Applying STIGs with PowerShell
Overview
In order for networking systems to be used within the U.S. Department of Defense (DoD) and other federal agencies, the Defense Information Systems Agency (DISA) developed baseline security configuration standards called Security Technical Implementation Guides, or STIGs. These guides include prescriptive hardening guidelines for Windows operating systems, applications, and network devices. They are designed to reduce the attach surface and ensure compliance with DoD cybersecurity policies, such as NIST SP 800-53. For Windows 10, an STIG might include ensuring that “Minimum password length” is set to 14 characters, Set “Audit Log Retention Method” to “Overwrite events as needed”, or Disabling SMBv1 protocol. In this lab, we will cover how to use Tenable to conduct a compliance check on a Windows machine and discover STIGs that need remediation. Next, we will manually remediate the STIG and then automatically remediate it using a PowerShell script.
Tools Used
- Cloud Platform: Azure
- Vulnerability Scanner: Tenable
- Compliance Audit: DISA Microsoft Windows 10 STIG v3r4
- VM: Windows 10 22H2
- Application: PowerShell
Preparing the Virtual Machine
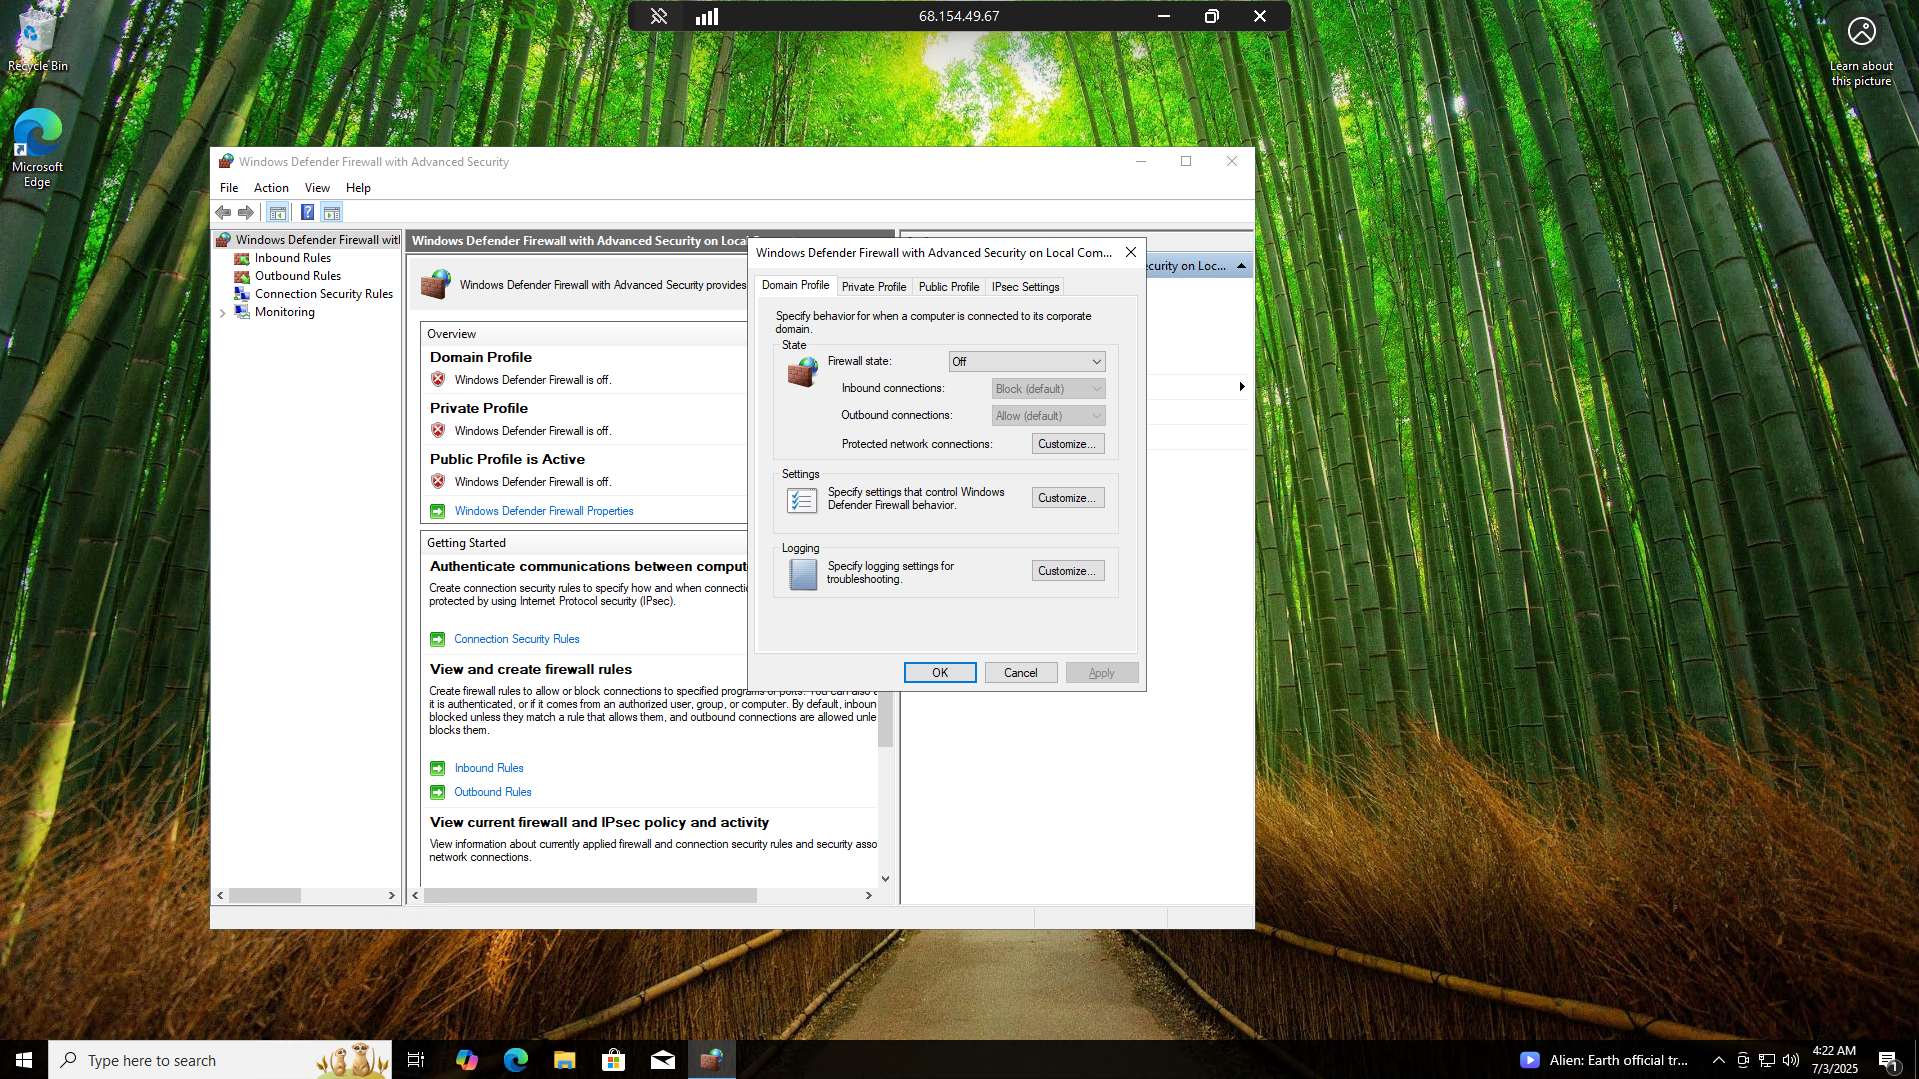
Turning off Windows Firewall:
Search bar > “run”
1
wf.msc
Turn off all firewalls
On machine rogue-stigs
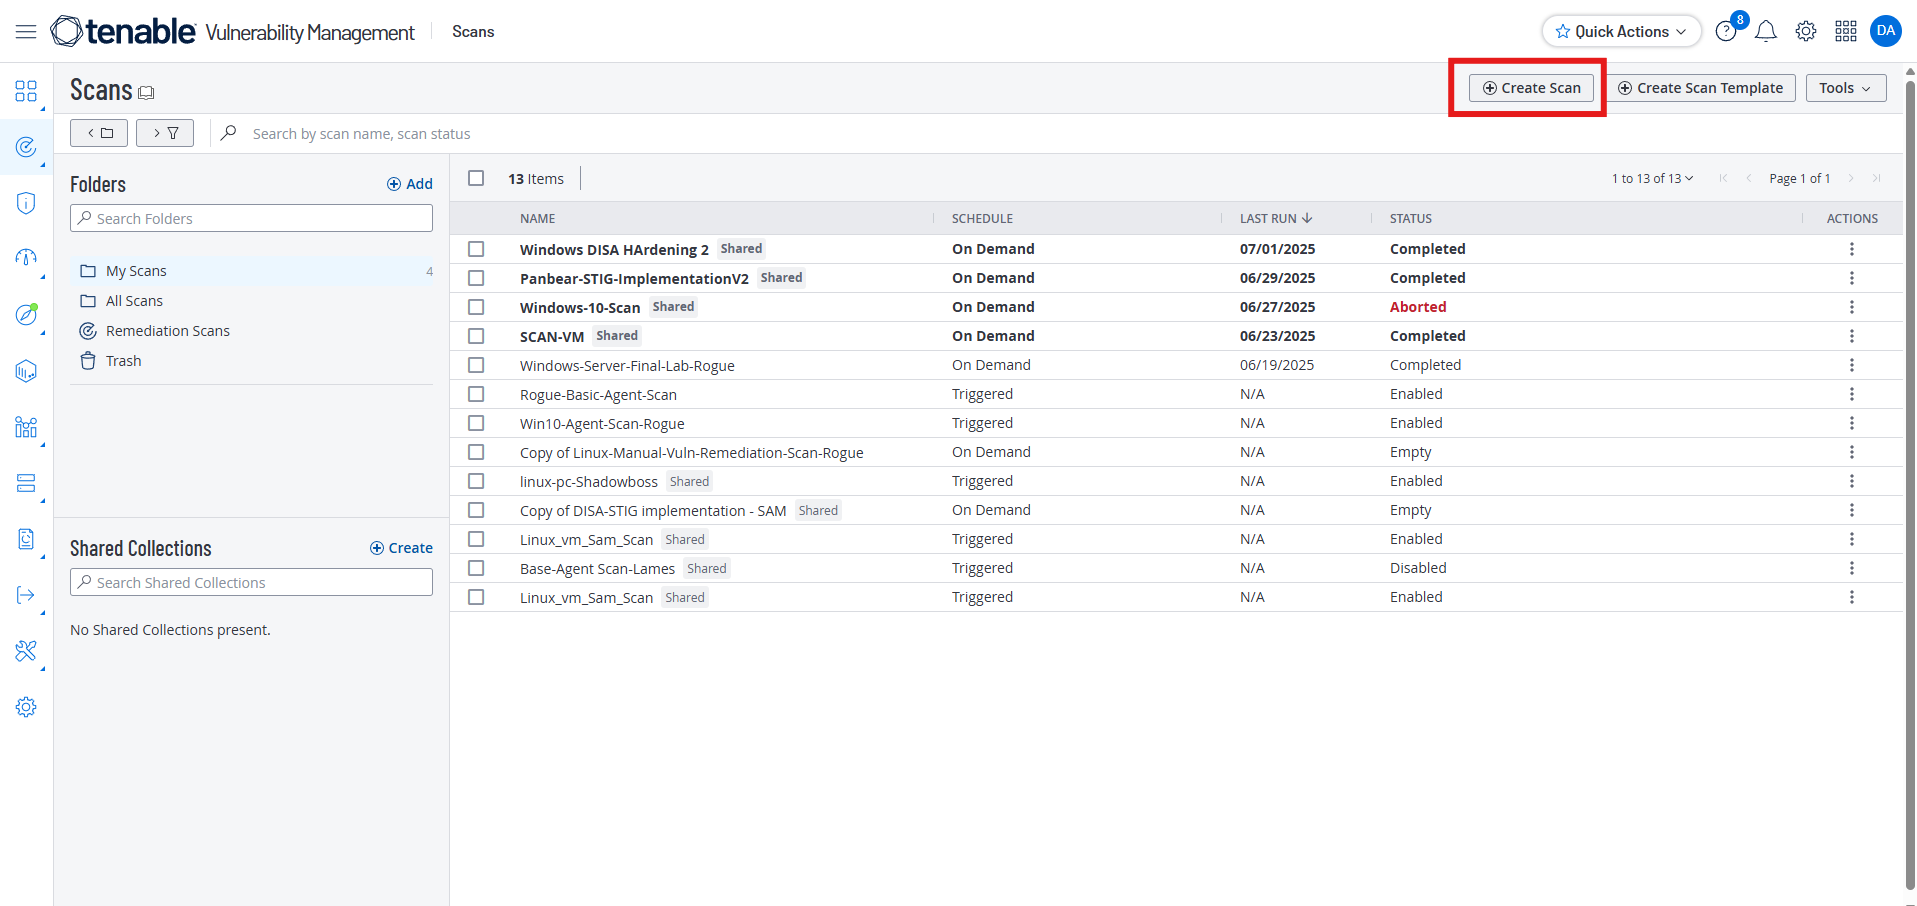
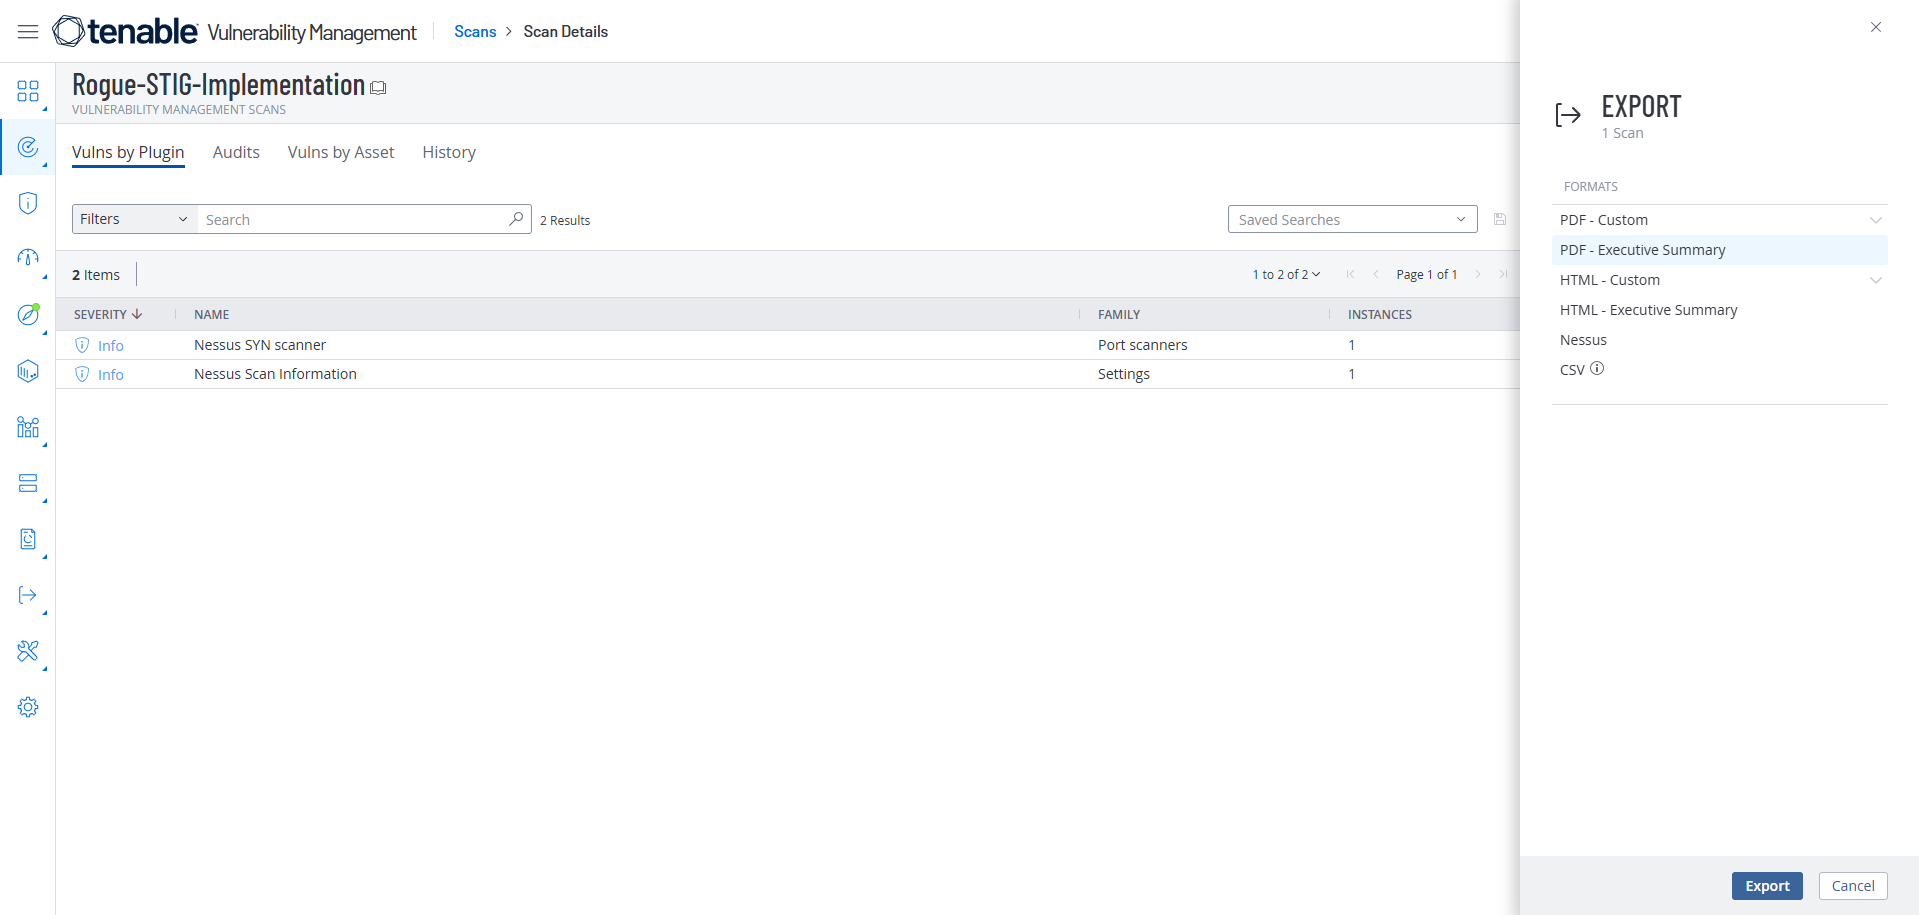
Setting Up Tenable to Conduct Compliance Audit and Policy Scan
In Tenable:
Scan > Create a Scan
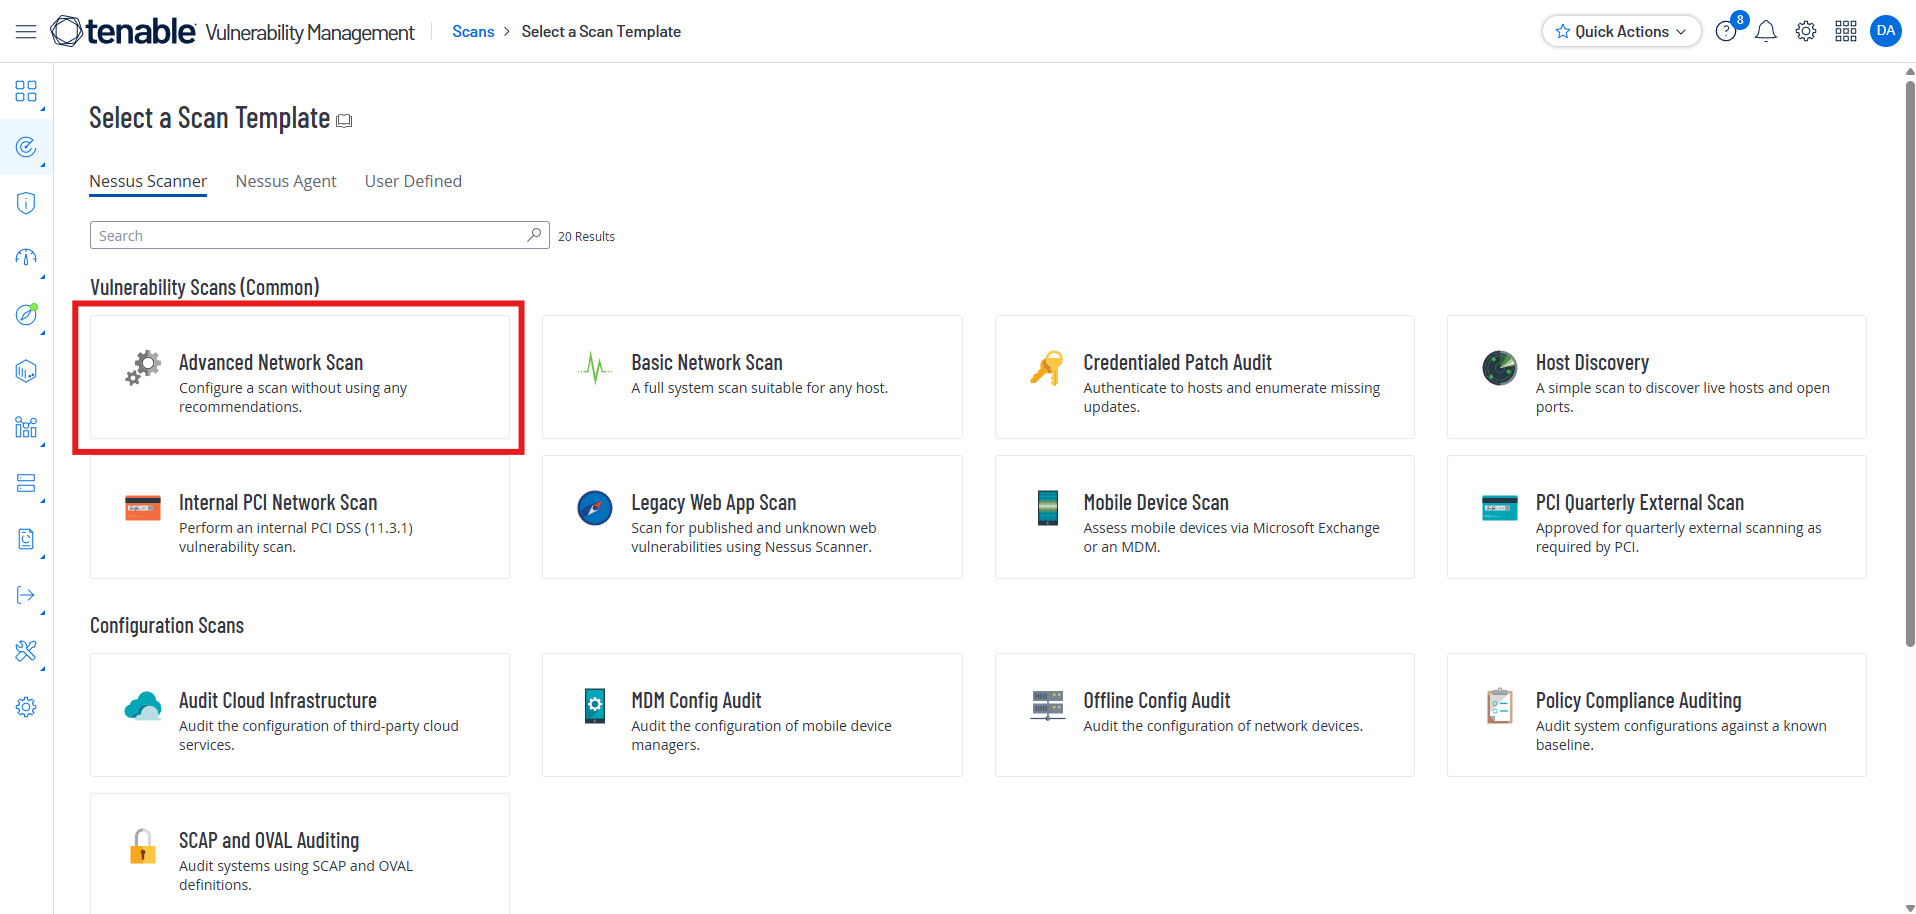
Select “Advanced Network Scan”
Name the Scan, Use Local Scanner, and Give Internal IP address of the target
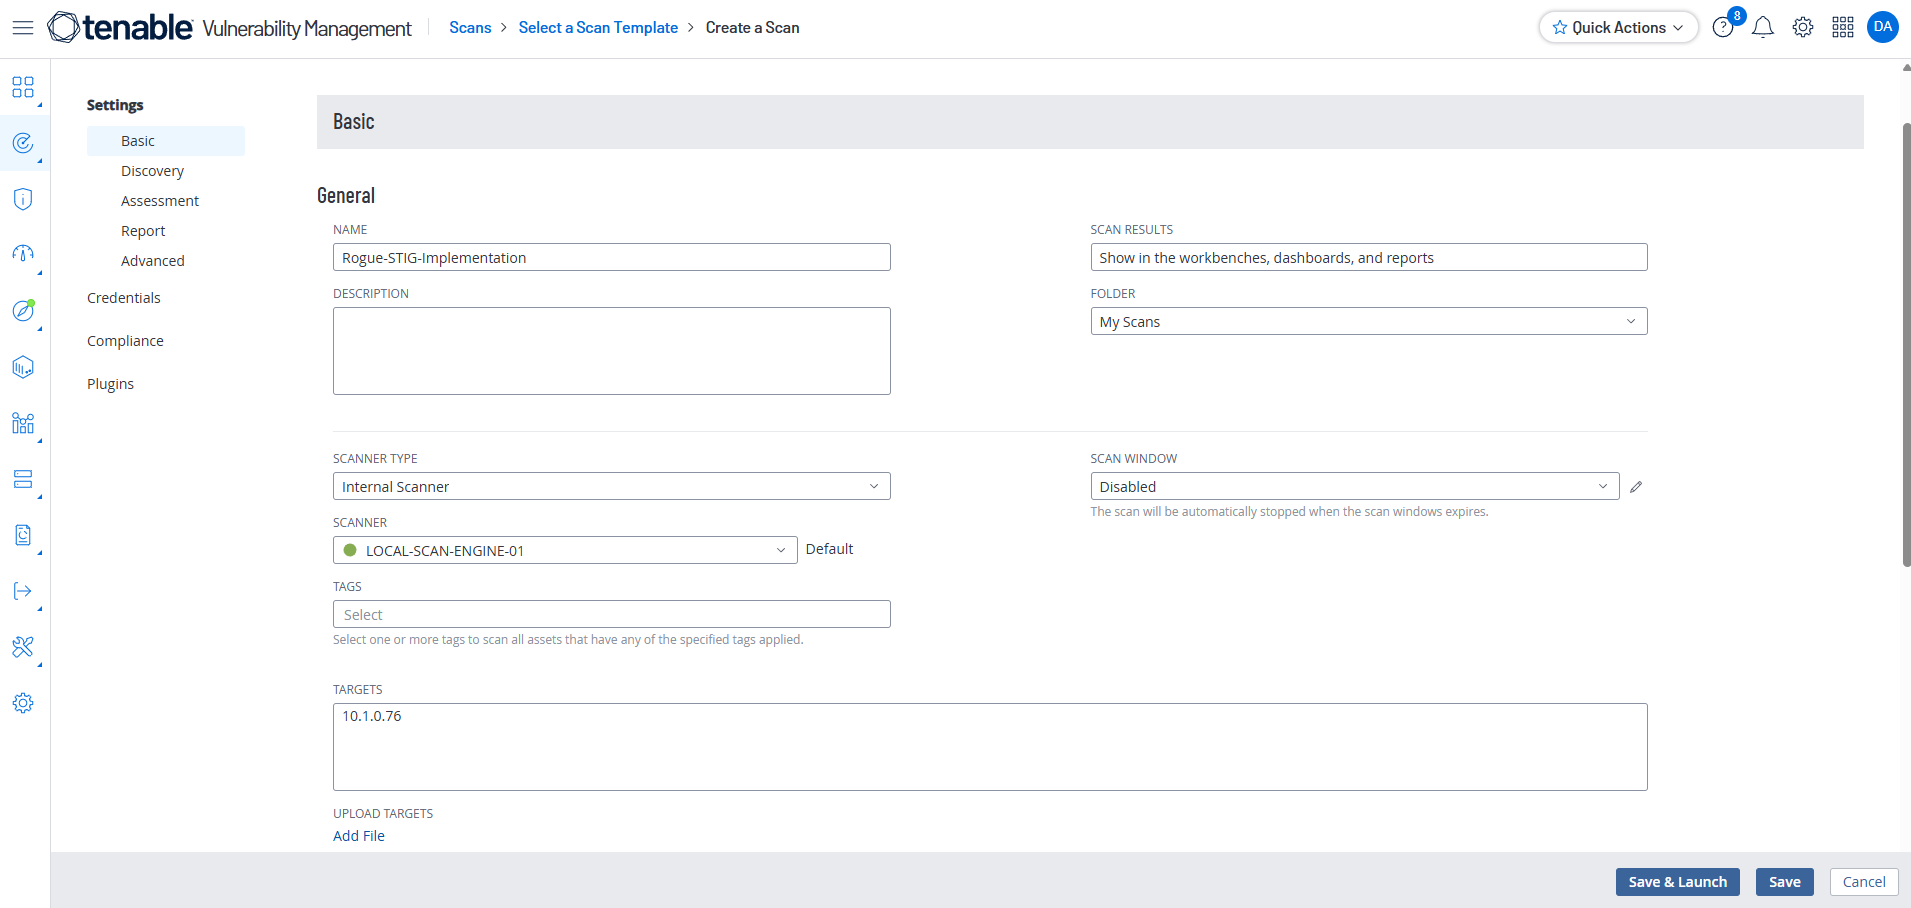
Add the credentials to rogue-stigs
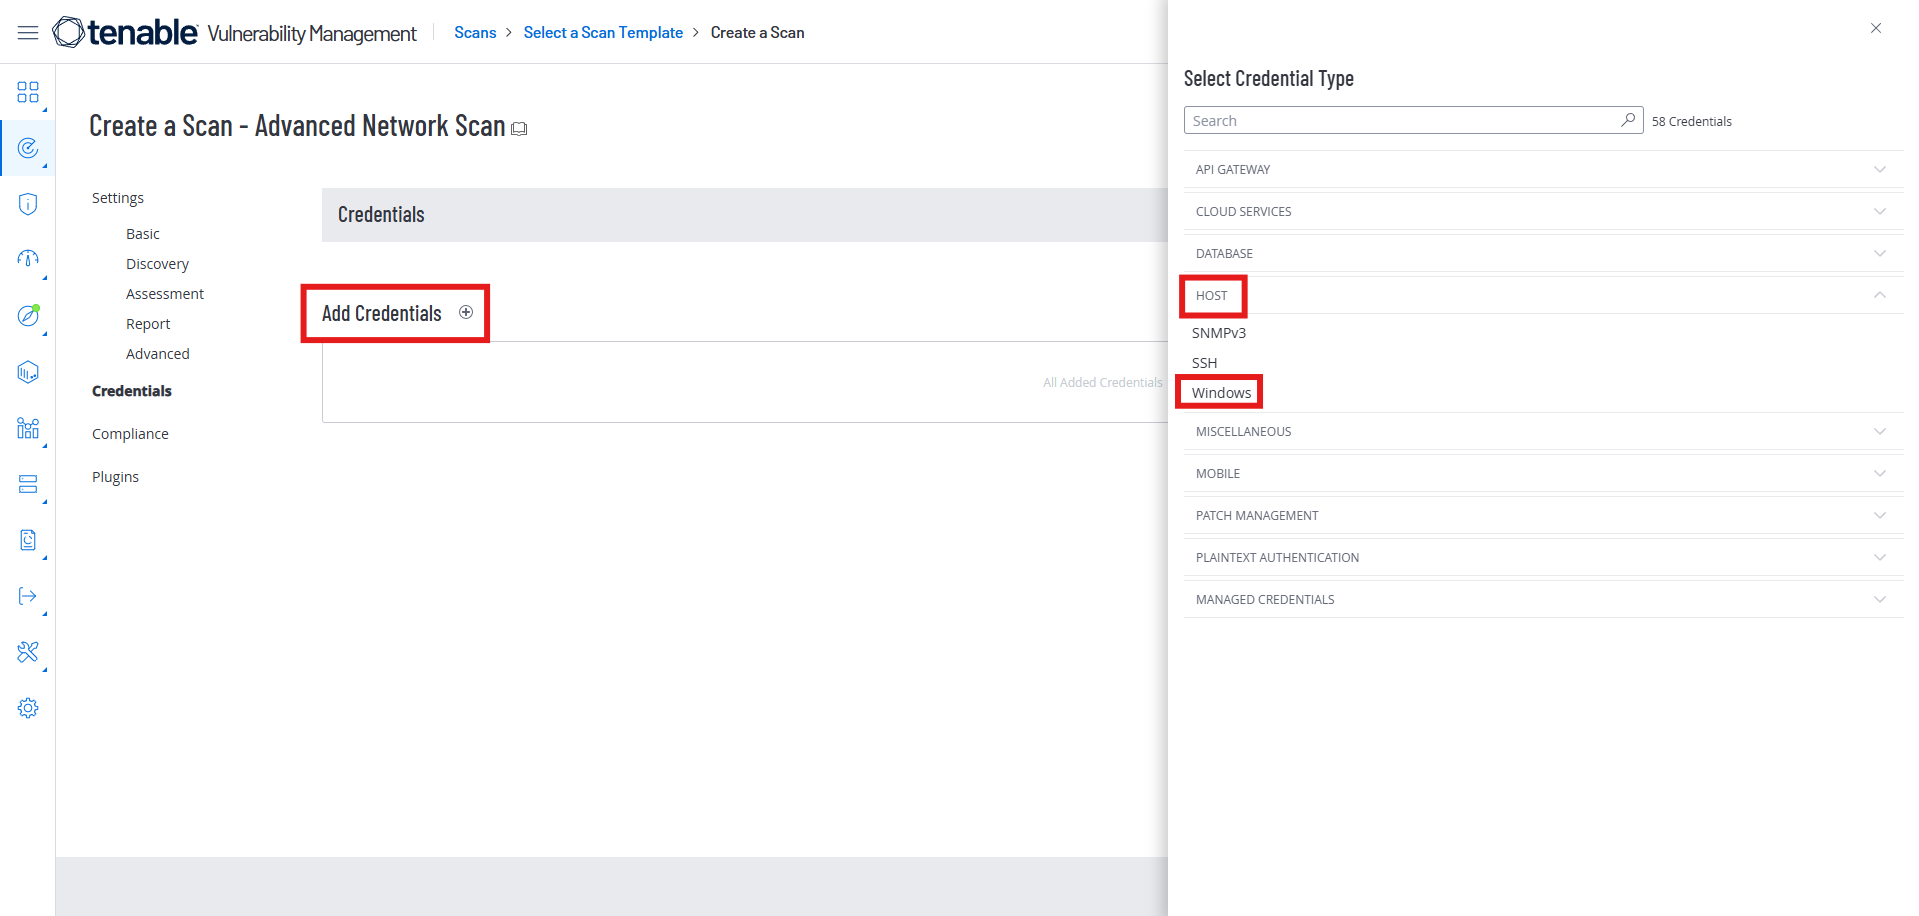
Make sure the last three switches are turned on:

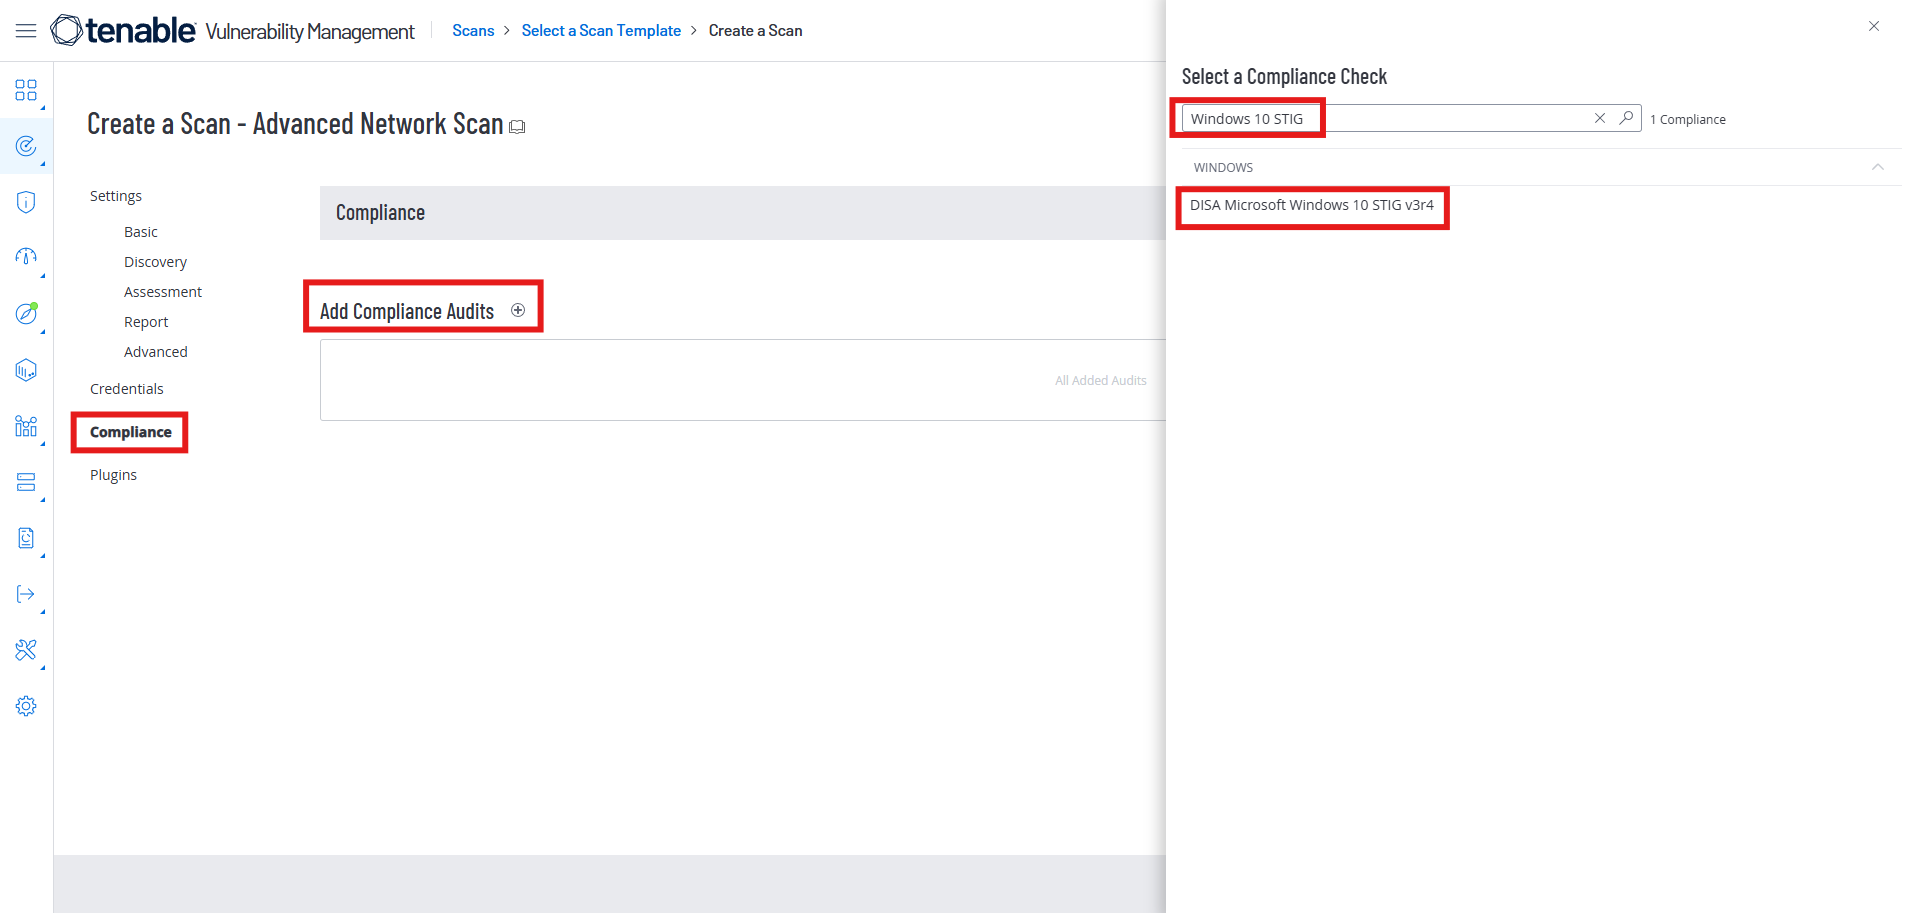
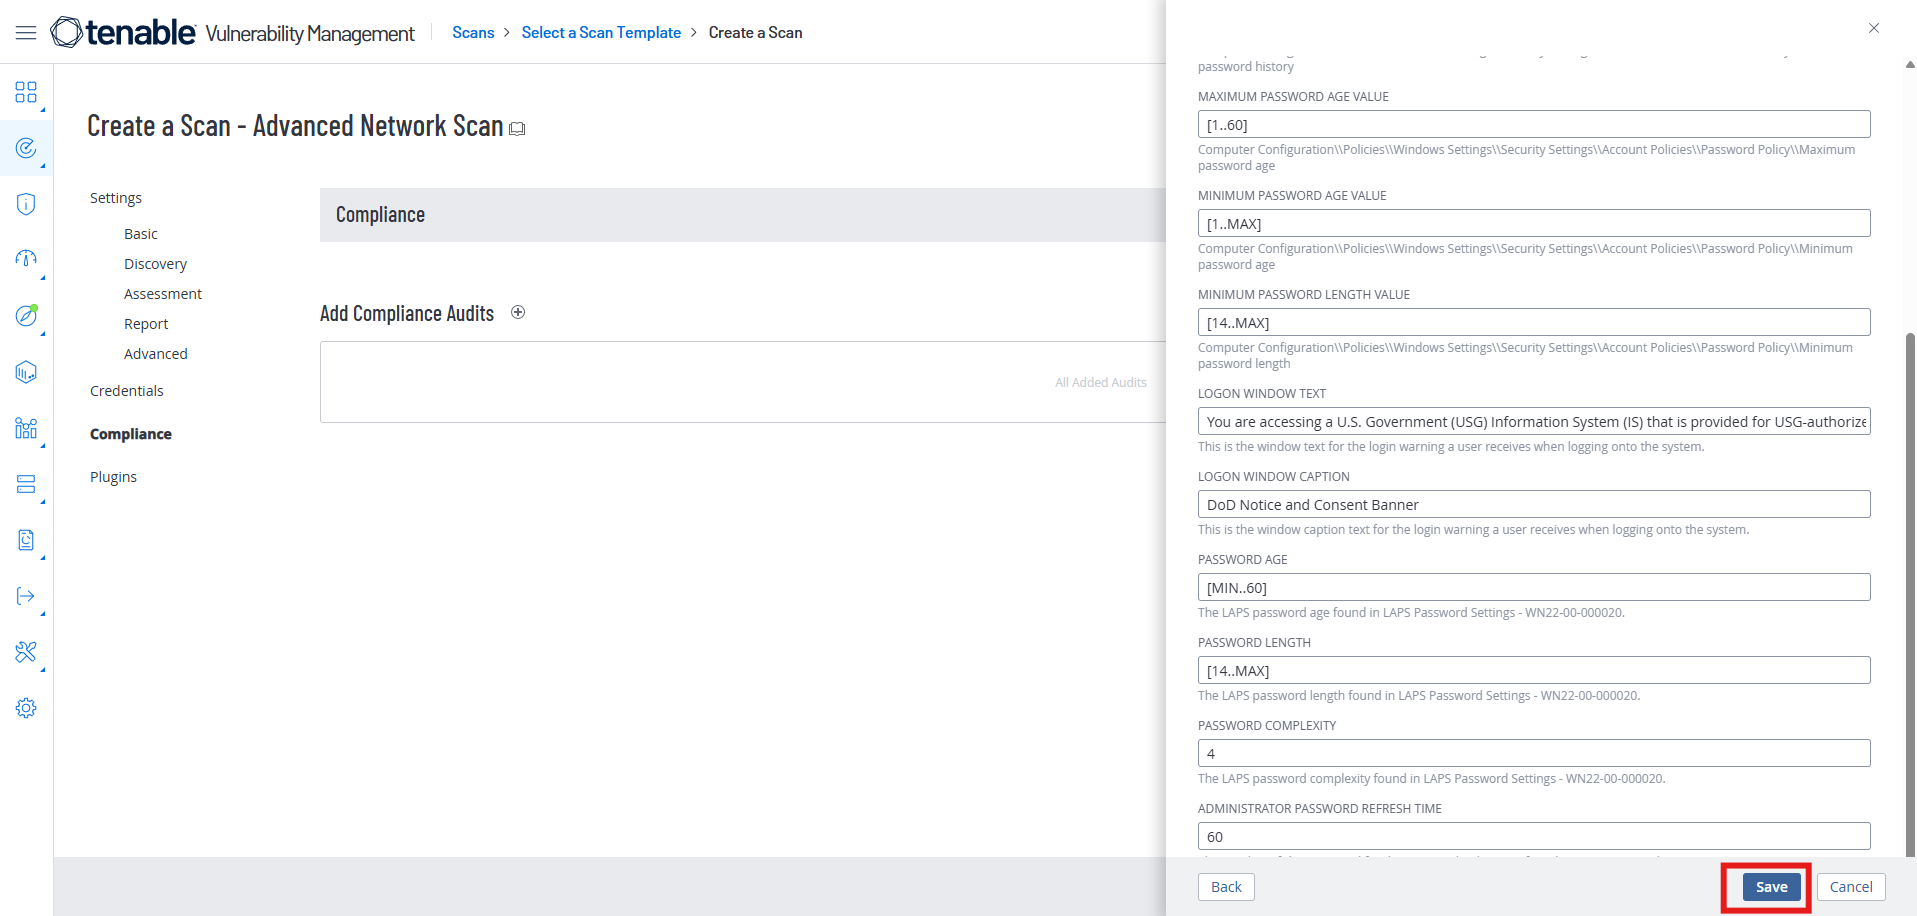
Click on the Compliance option, add a Compliance Audit, and search for “Windows 10 STIG”
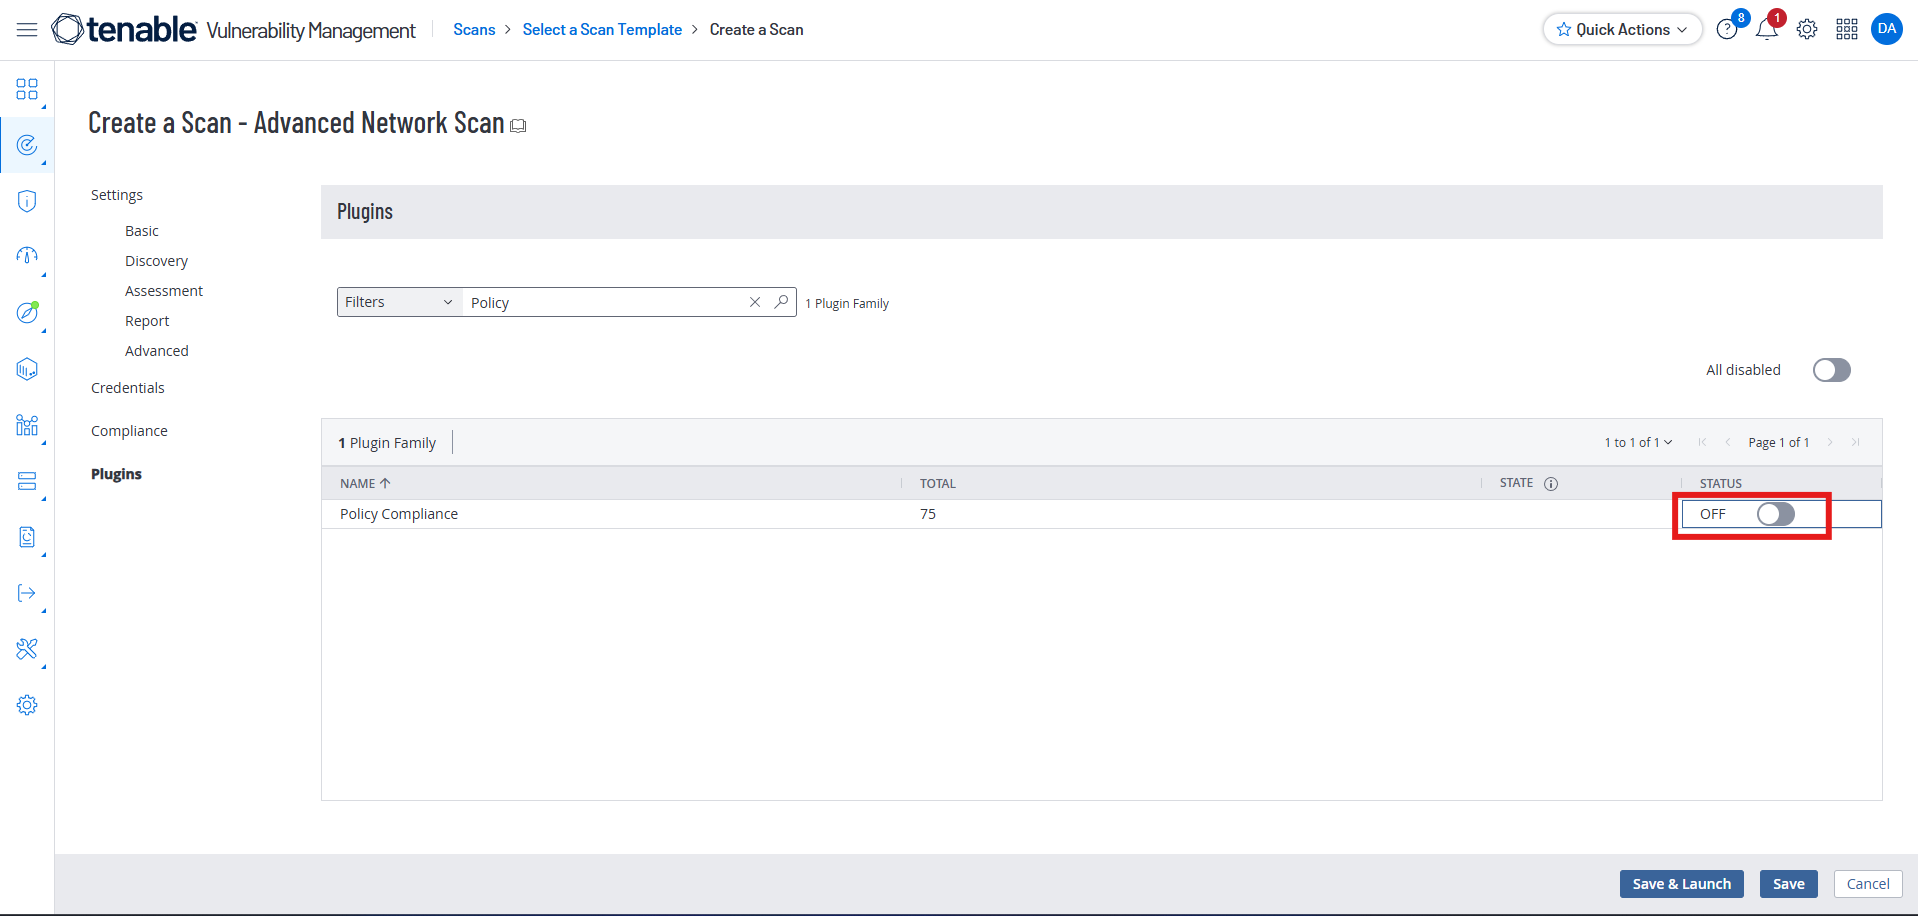
We want to make our search faster and focused on only on Compliance Checks. Go to Plugins in the sidebar and search for “Policy.”
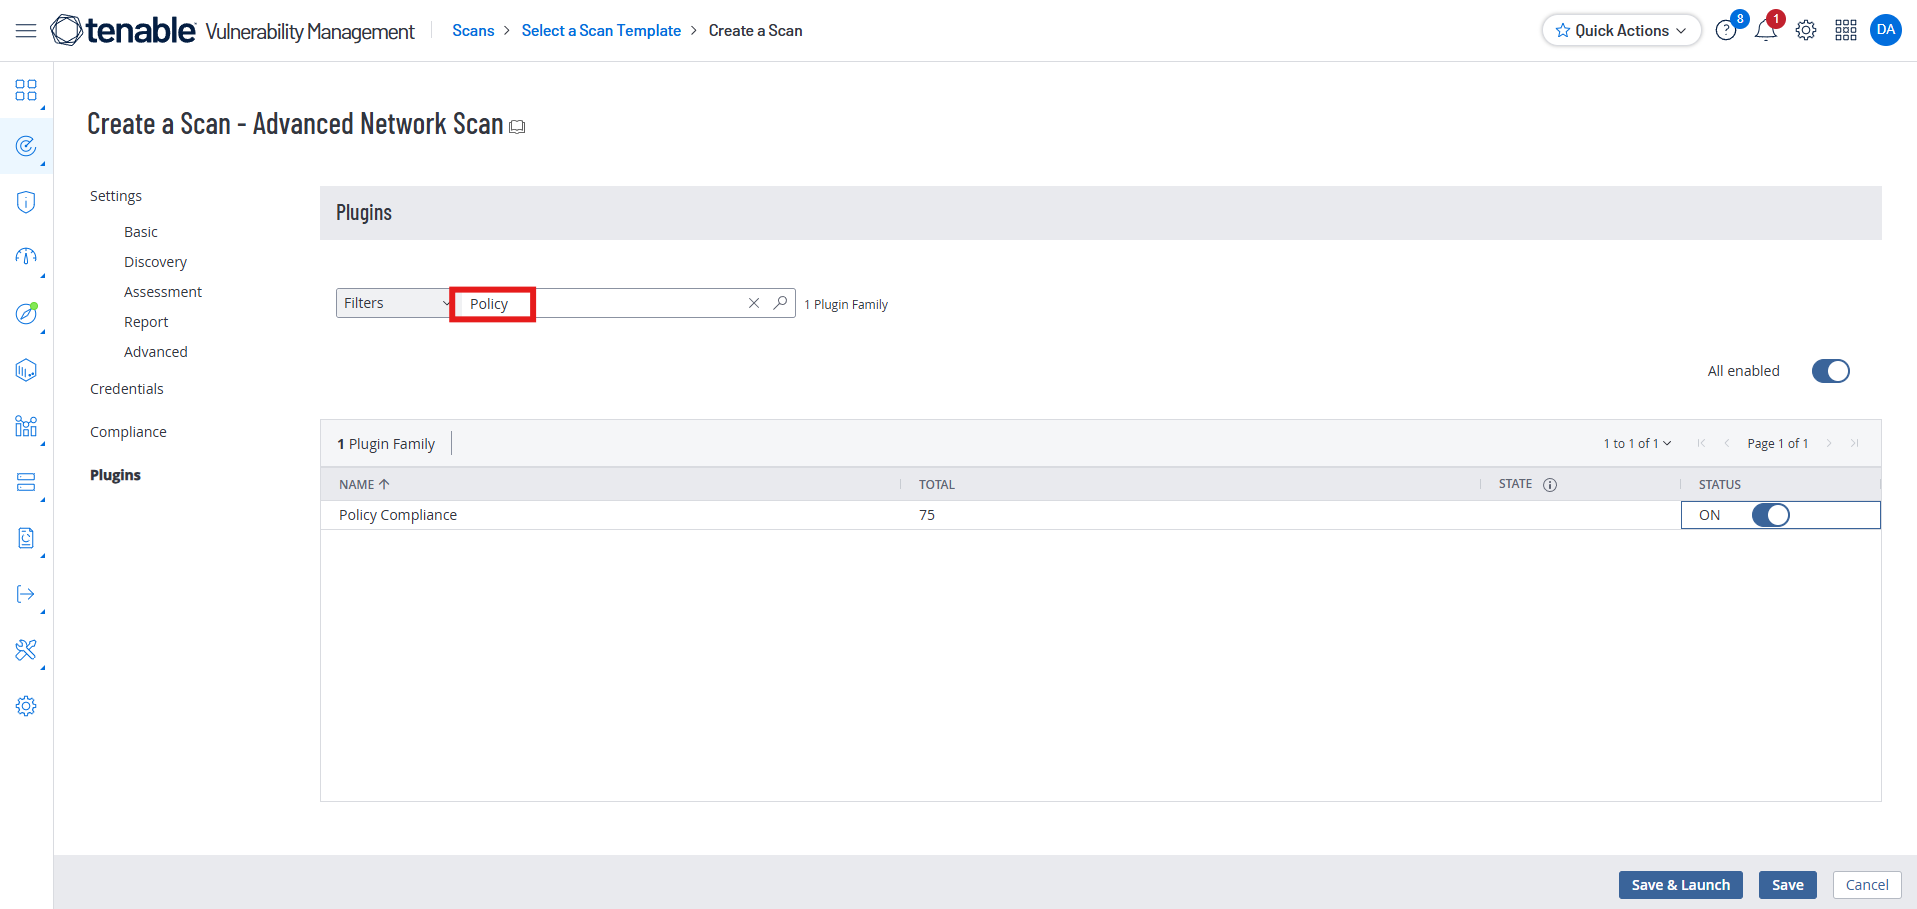
Turn Policy Off
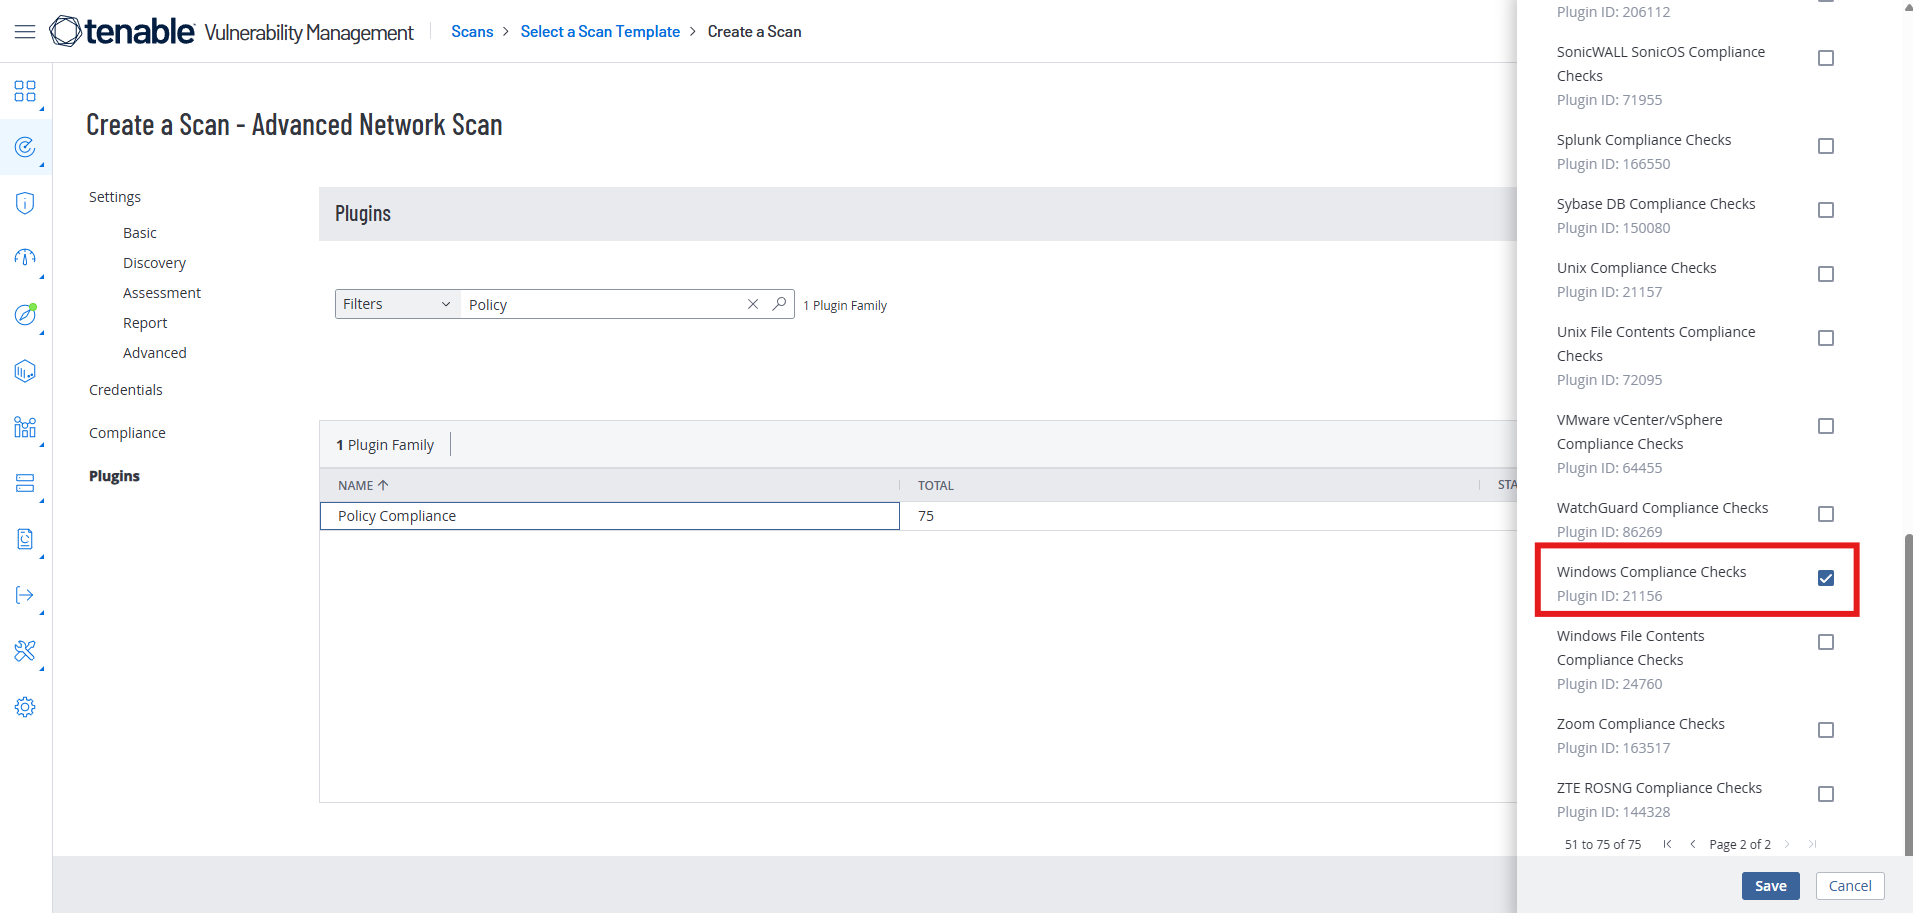
Double Click on “Policy Compliance” and go to the second page of the side panel that pops up and select “Windows Compliance Checks”
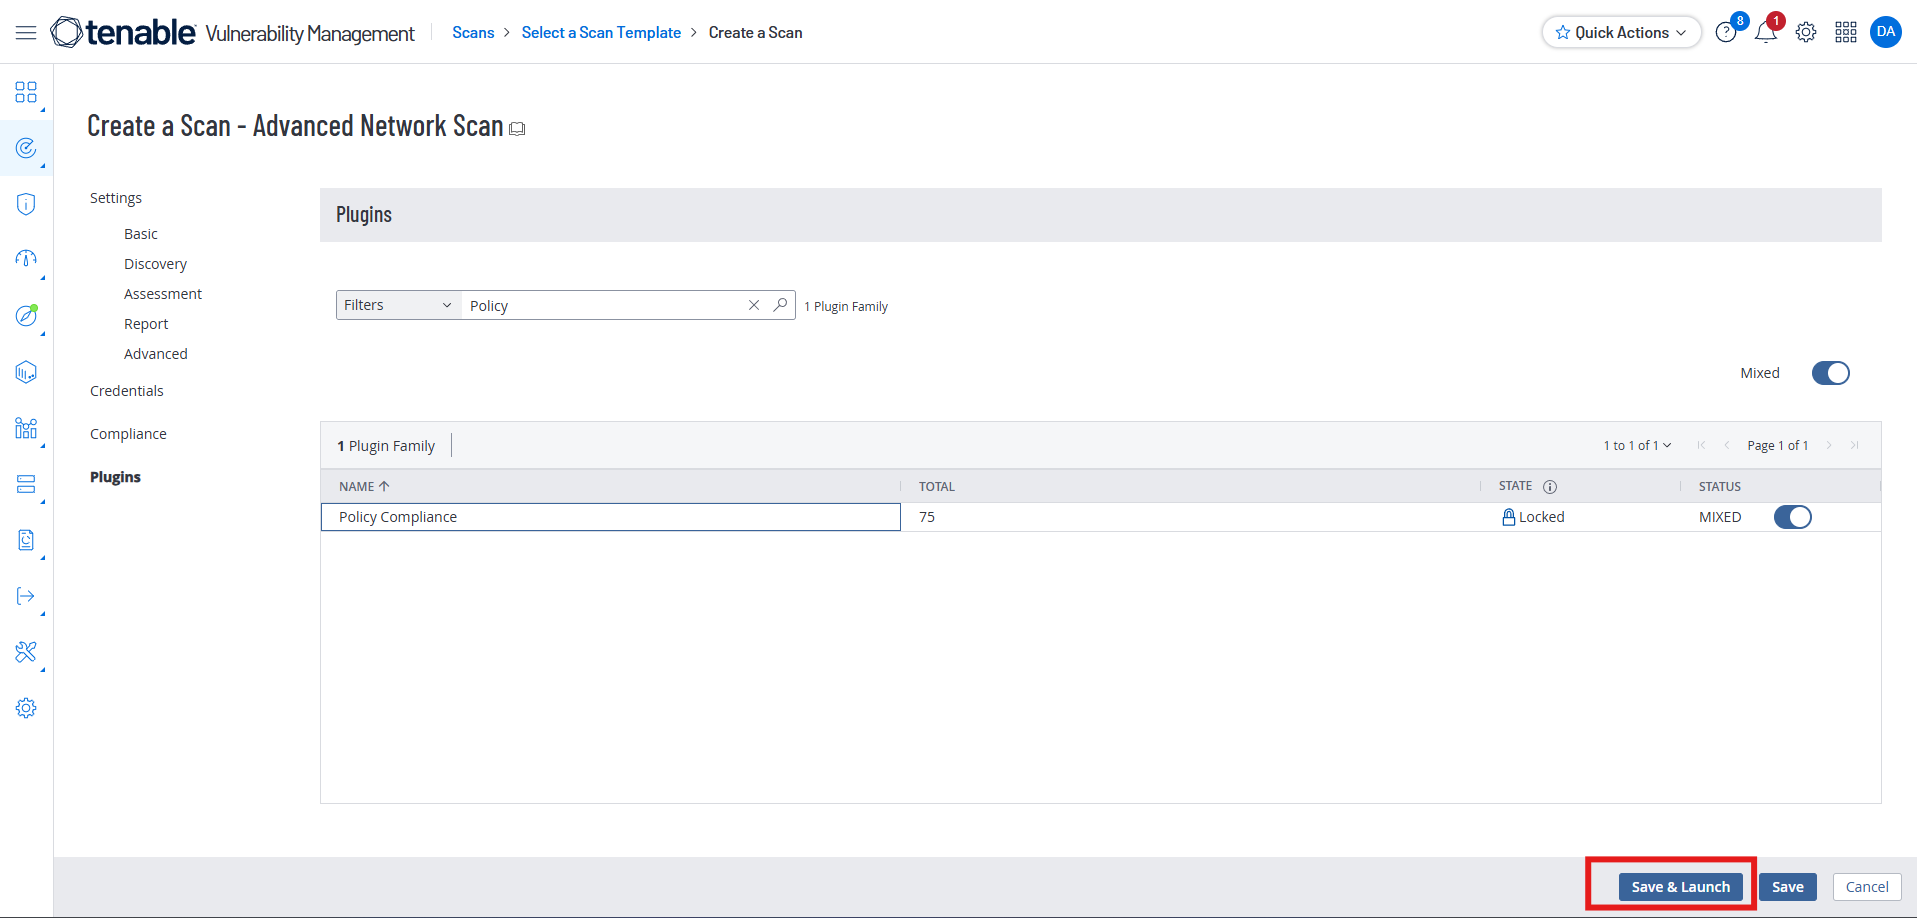
Select “Save and Launch”
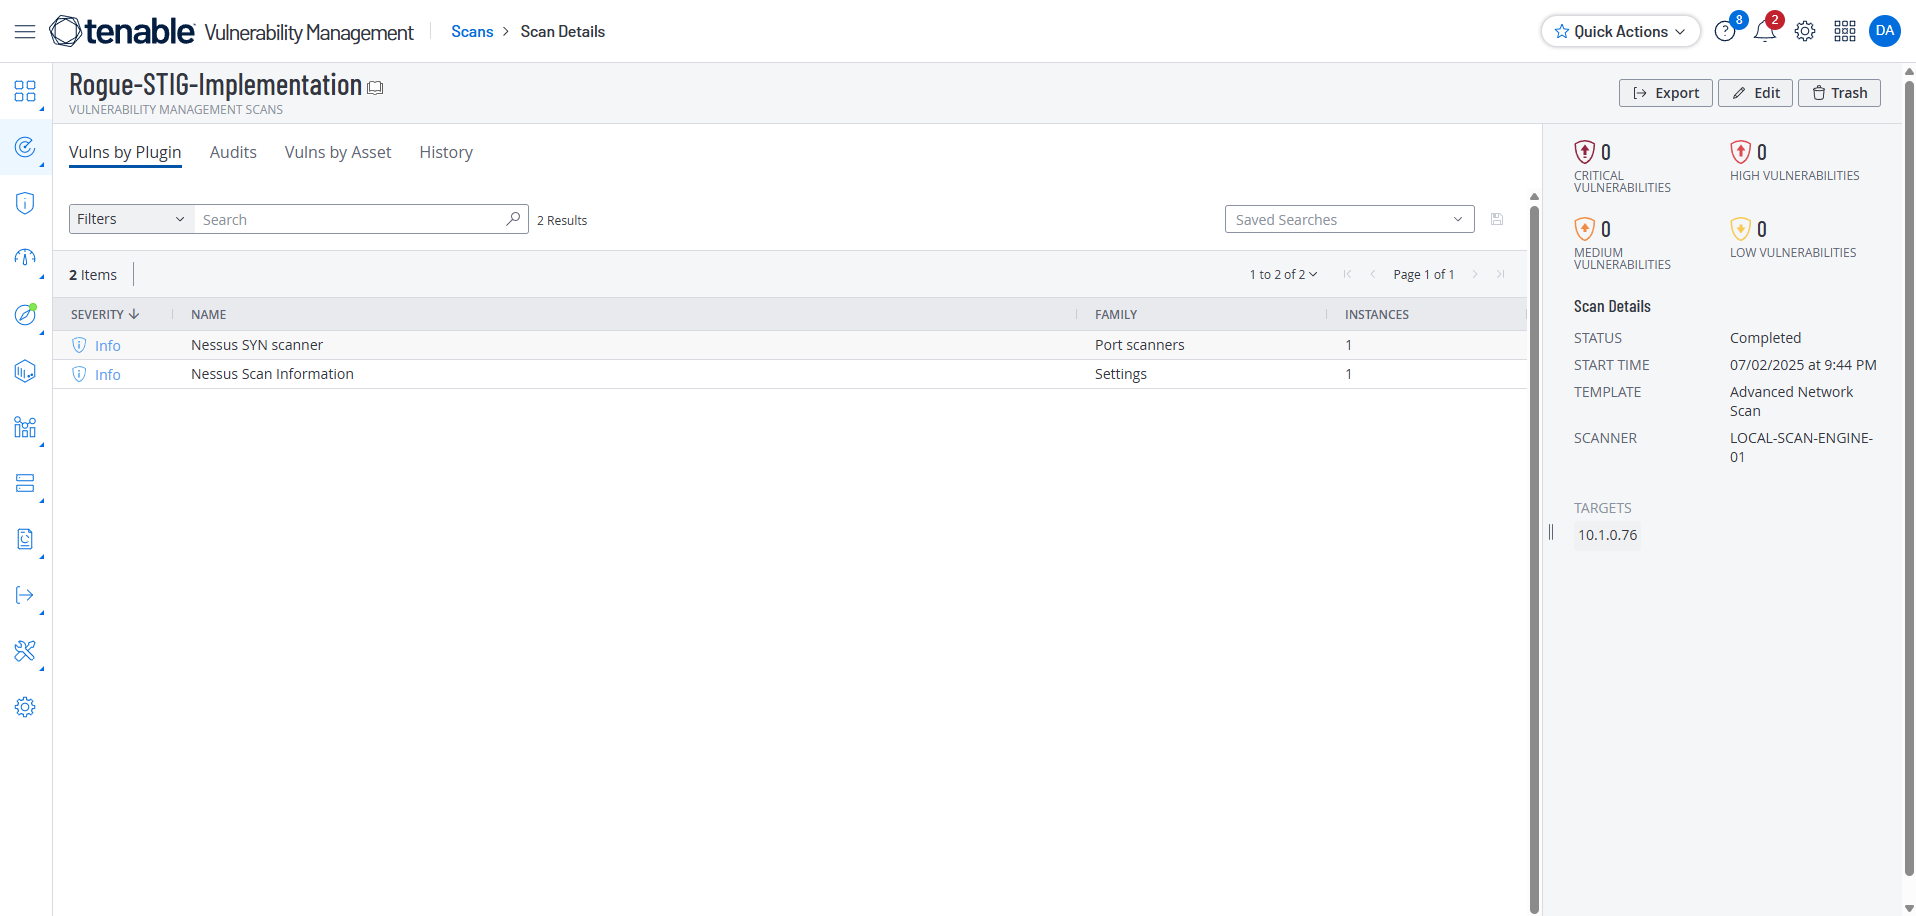
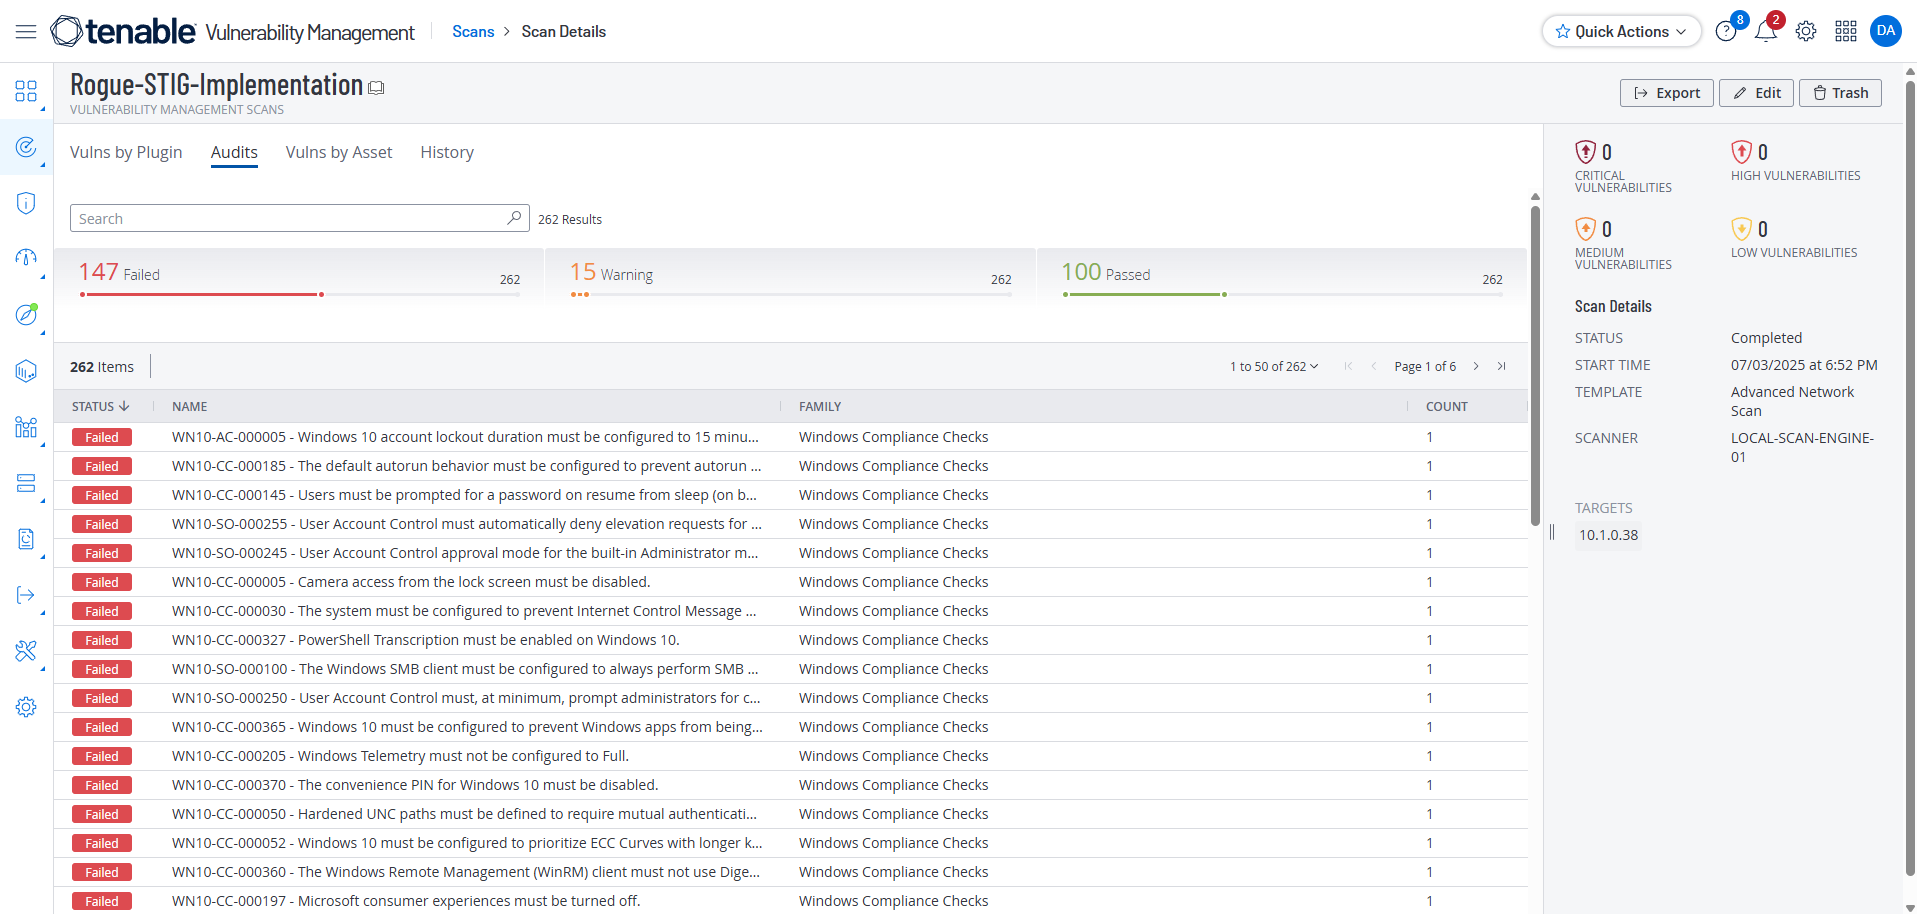
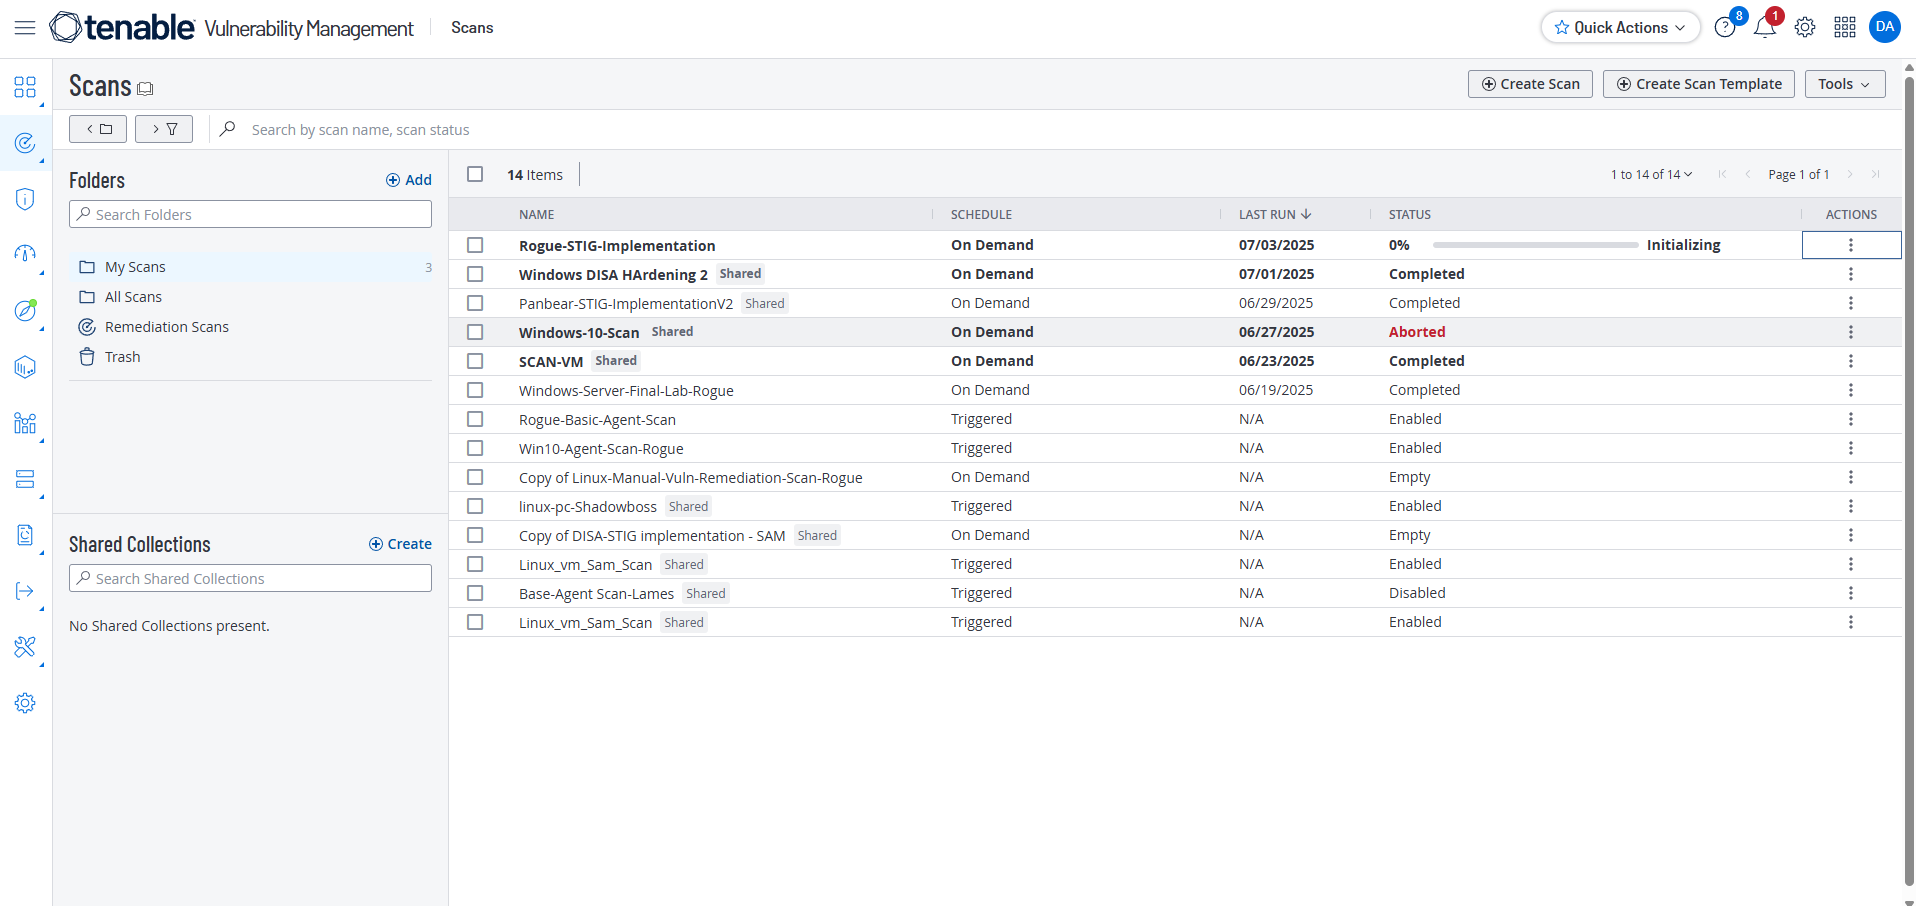
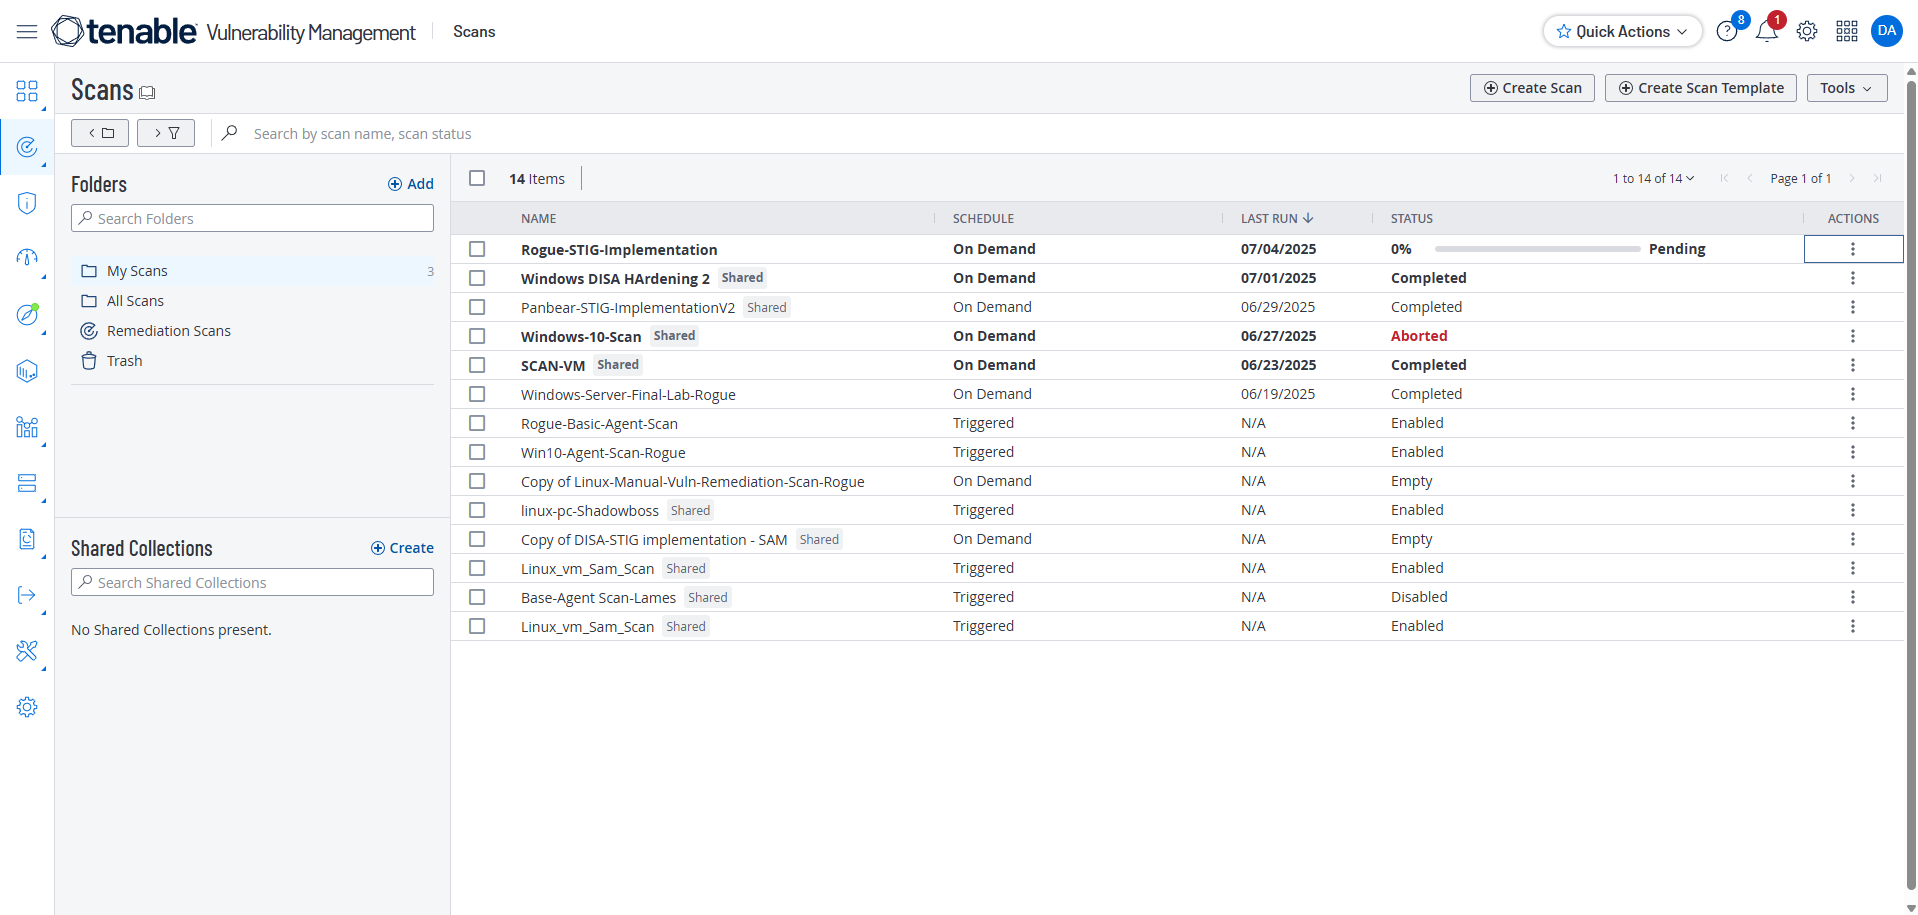
Initial Scan: Establishing a Baseline
Scan completed in 8 minutes
!image.png](/assets/img/bluelabs/applying-stigs-with-powershell/image12.png)
Selecting a STIG to Remediate
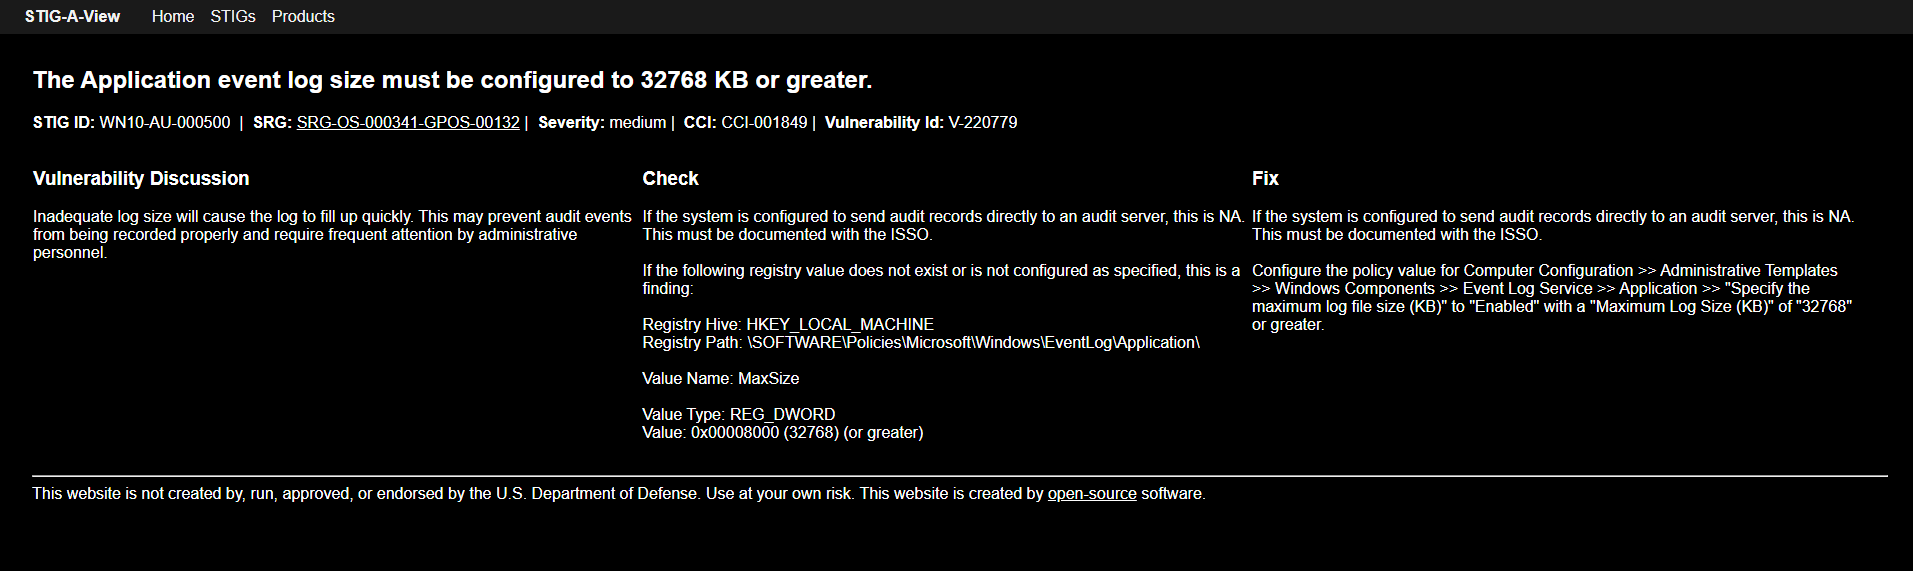
Look up the following STIG
1
wn10-au-000500
https://stigaview.com/products/win10/v3r1/
WN10-AU-000500 - V3R1 - STIG-A-View
1
2
3
4
5
6
7
8
9
10
11
12
Check
If the system is configured to send audit records directly to an audit server, this is NA. This must be documented with the ISSO.

If the following registry value does not exist or is not configured as specified, this is a finding:

Registry Hive: HKEY_LOCAL_MACHINE
Registry Path: \SOFTWARE\Policies\Microsoft\Windows\EventLog\Application\

Value Name: MaxSize

Value Type: REG_DWORD
Value: 0x00008000 (32768) (or greater)
1
2
3
4
Fix
If the system is configured to send audit records directly to an audit server, this is NA. This must be documented with the ISSO.

Configure the policy value for Computer Configuration >> Administrative Templates >> Windows Components >> Event Log Service >> Application >> "Specify the maximum log file size (KB)" to "Enabled" with a "Maximum Log Size (KB)" of "32768" or greater.
Manual Remediation
Method 1: Modifying Event Viewer
Open Event View
1
eventvwr.msc
In Event Viewer, go to Windows Logs > Application and right-click on Application. Select Properties.
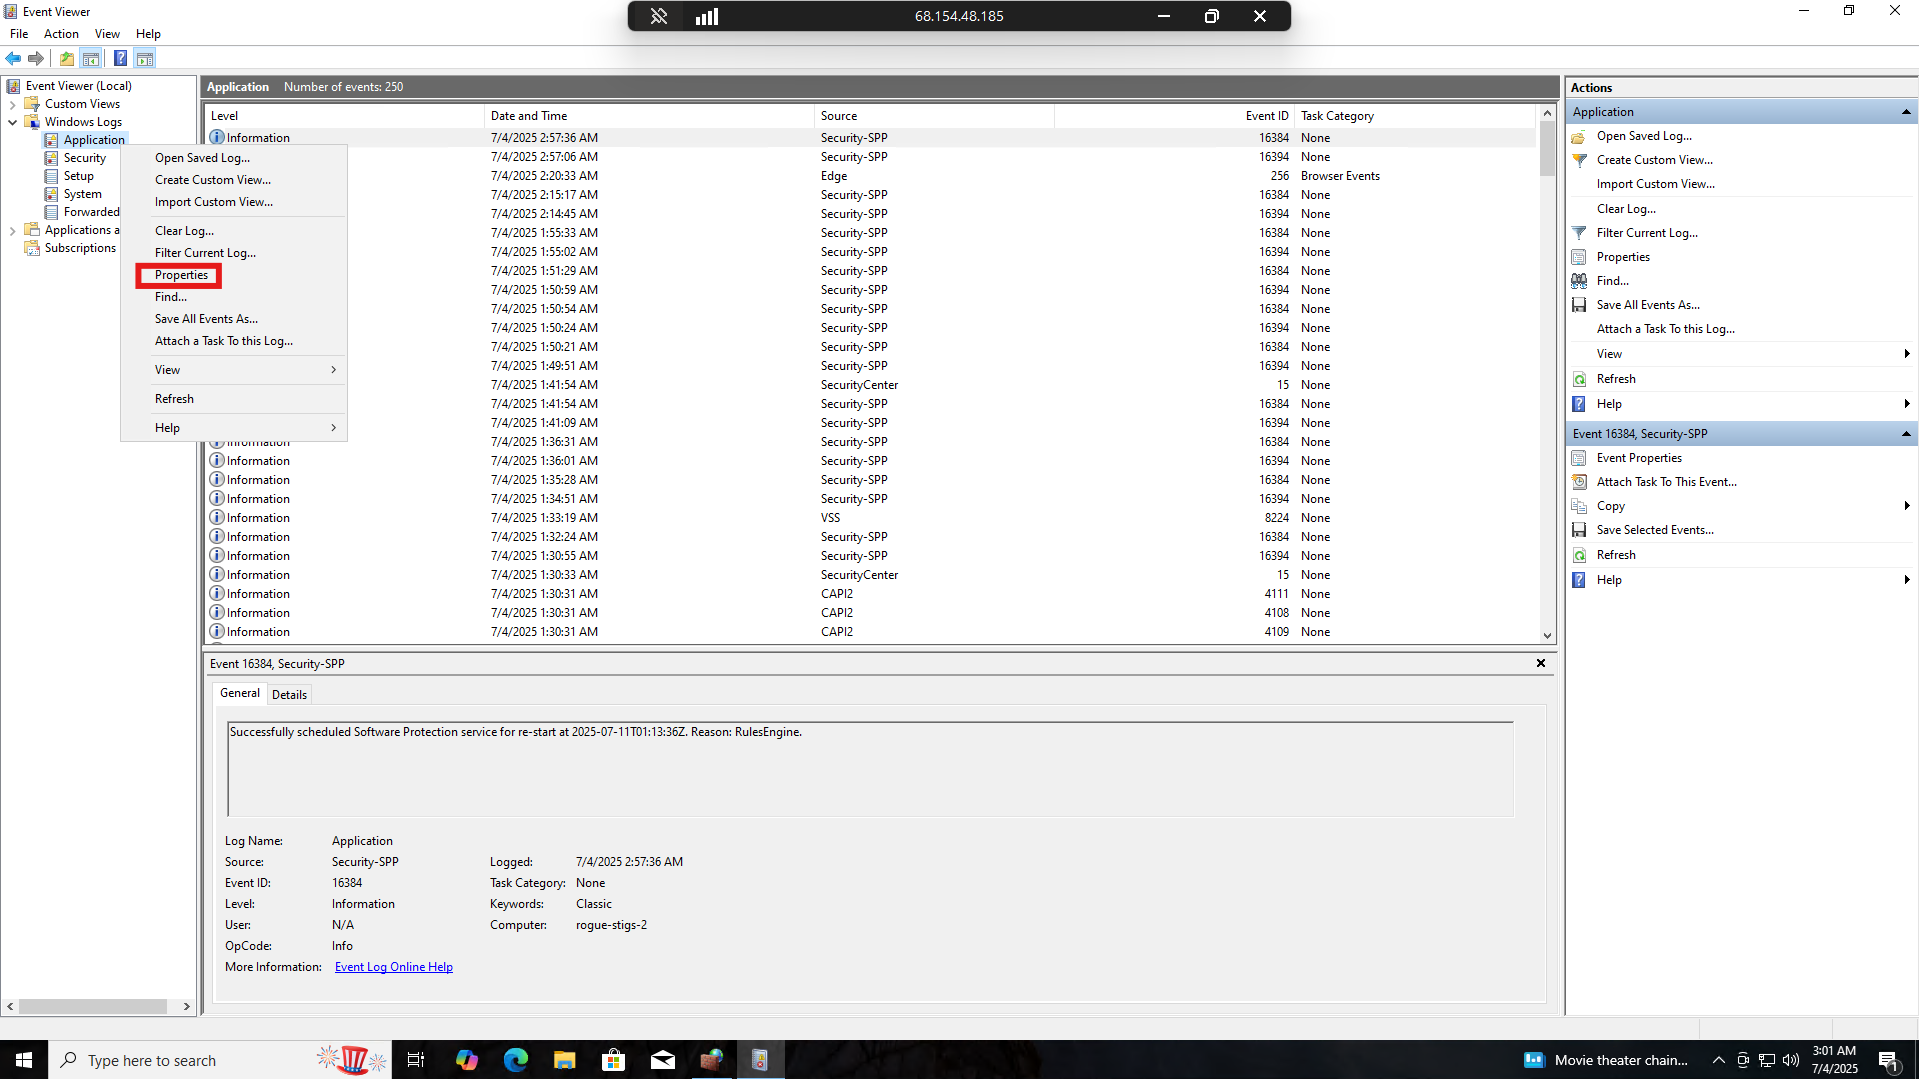
Set the Maximum log size to 32768 or greater
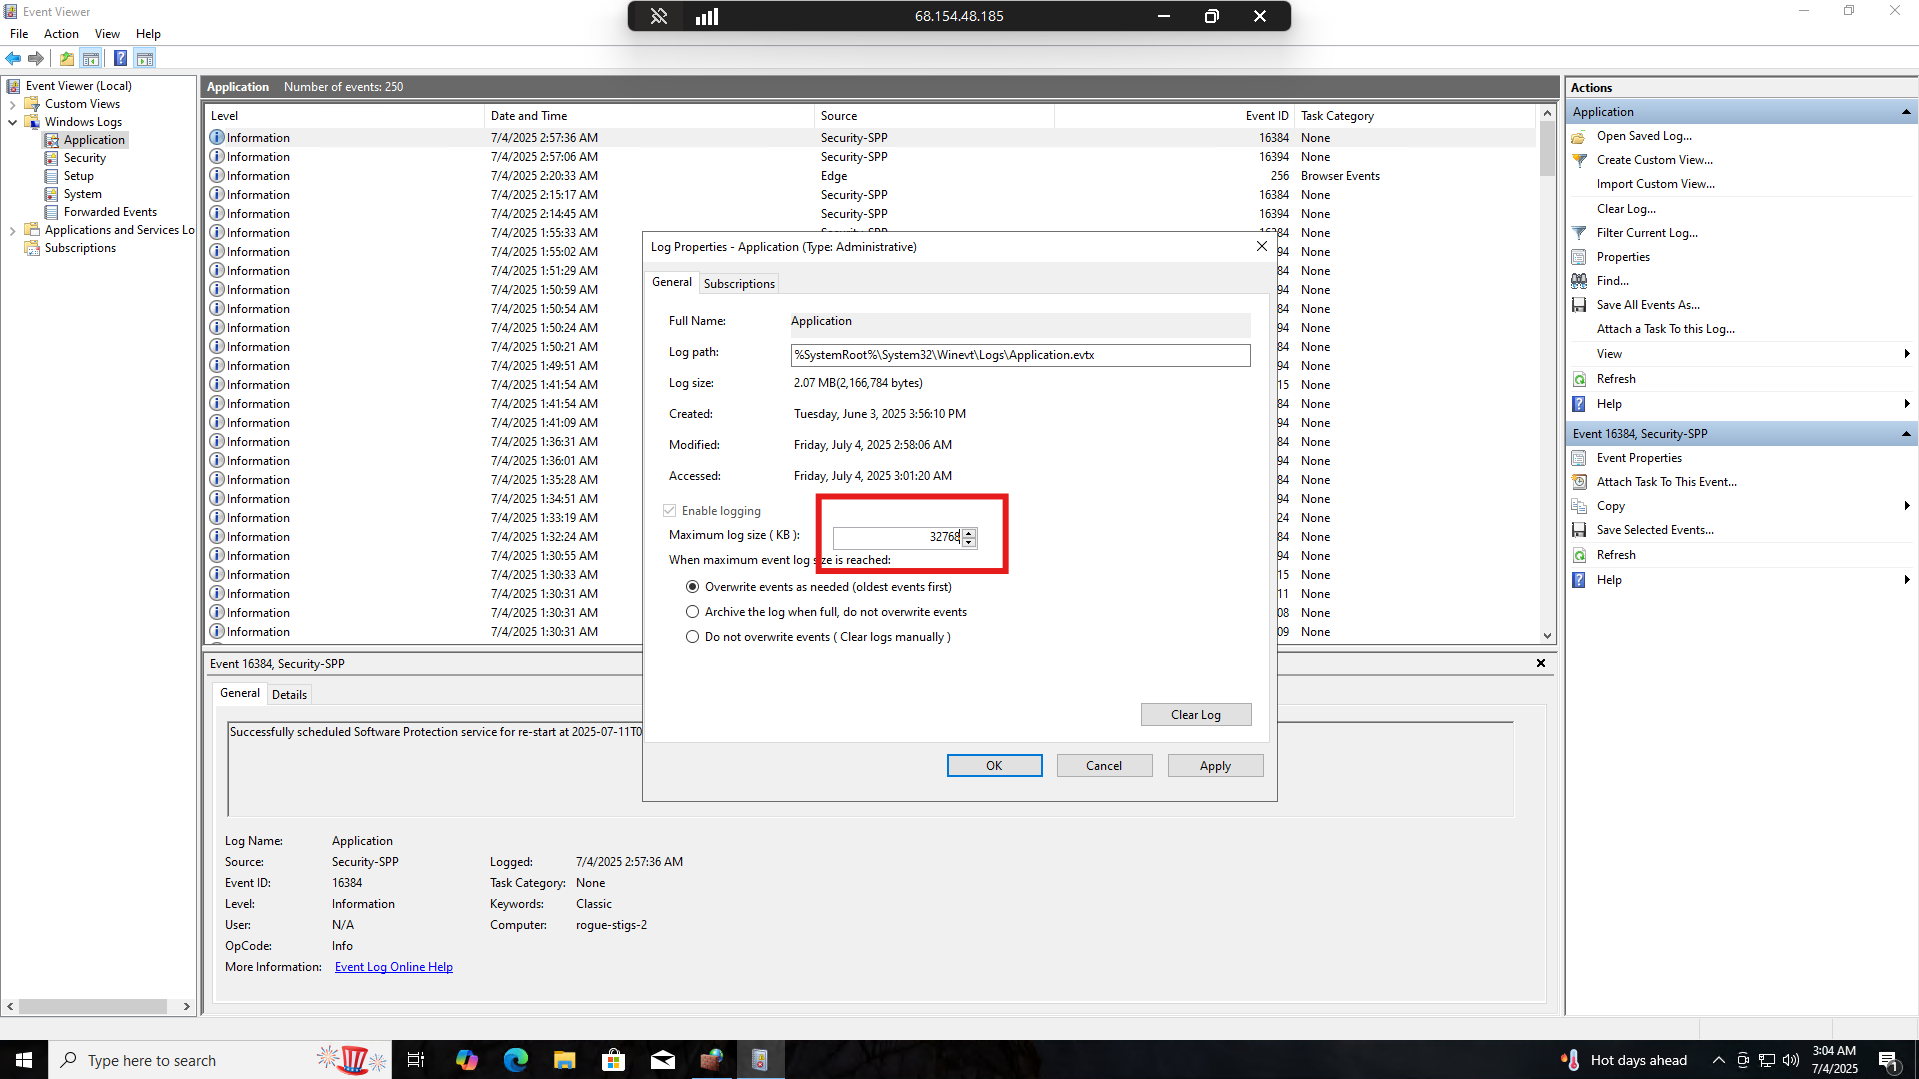
We can click “Apply” then “Okay” and fix the STIG that way.
Method 2: Modifying Registry Editor
Another way to fix this STIG is by accessing the Registry Editor.
No EventLog key is found in the Registry. We will need to create it.
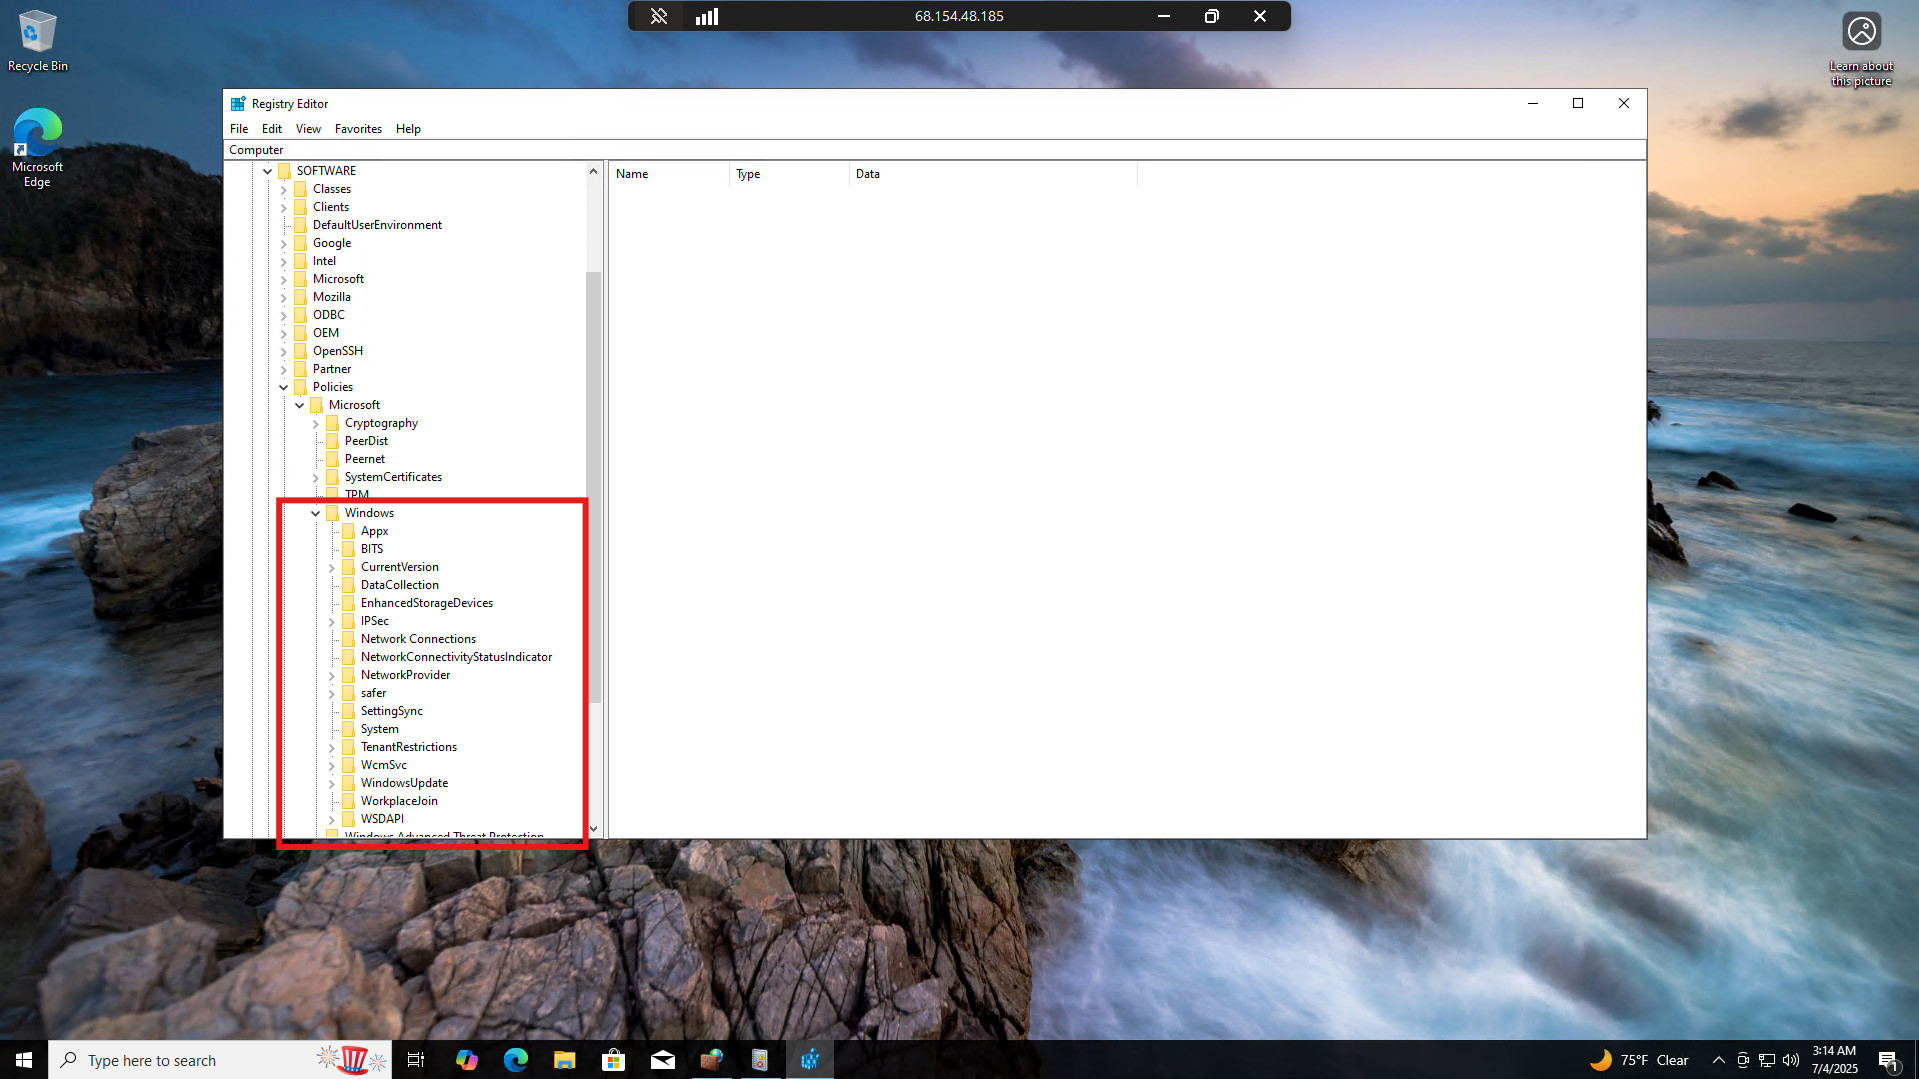
Right-click “Windows” and Select New > Key
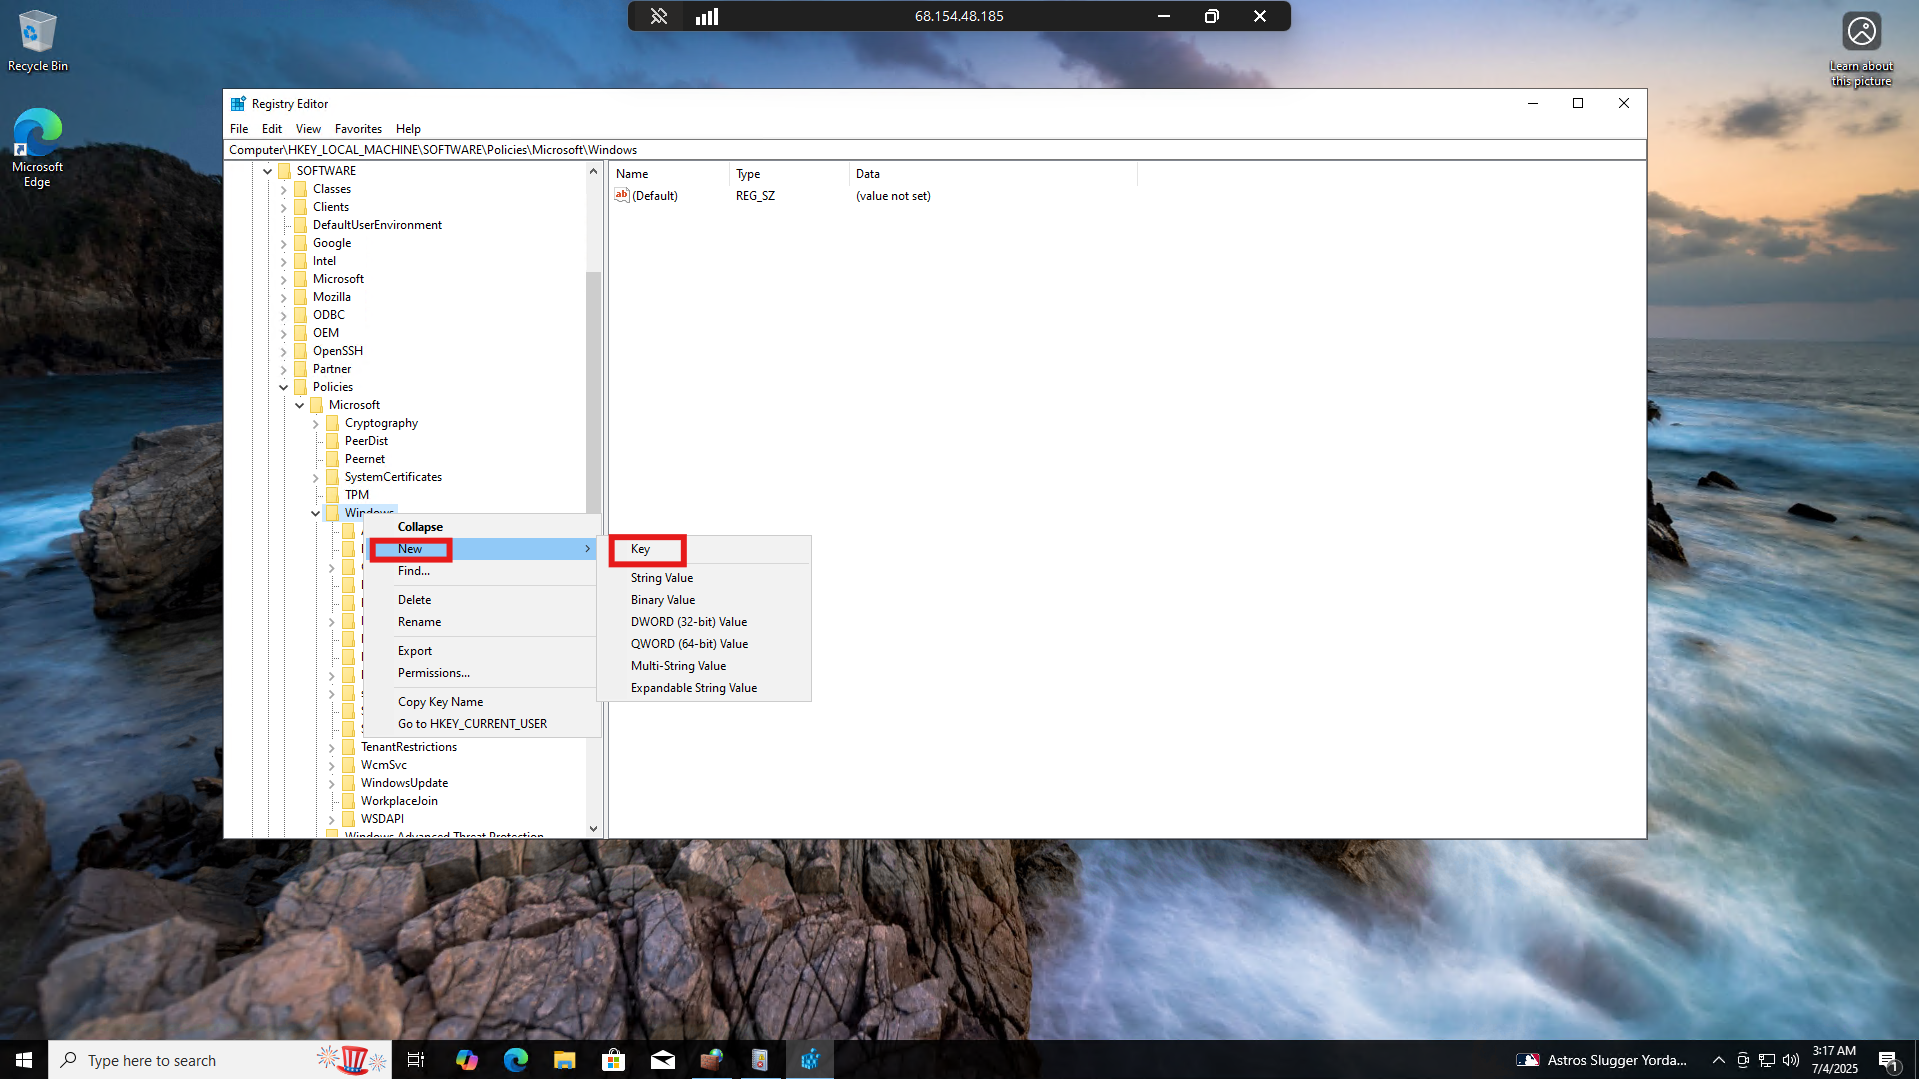
Name the new key “EventLog”
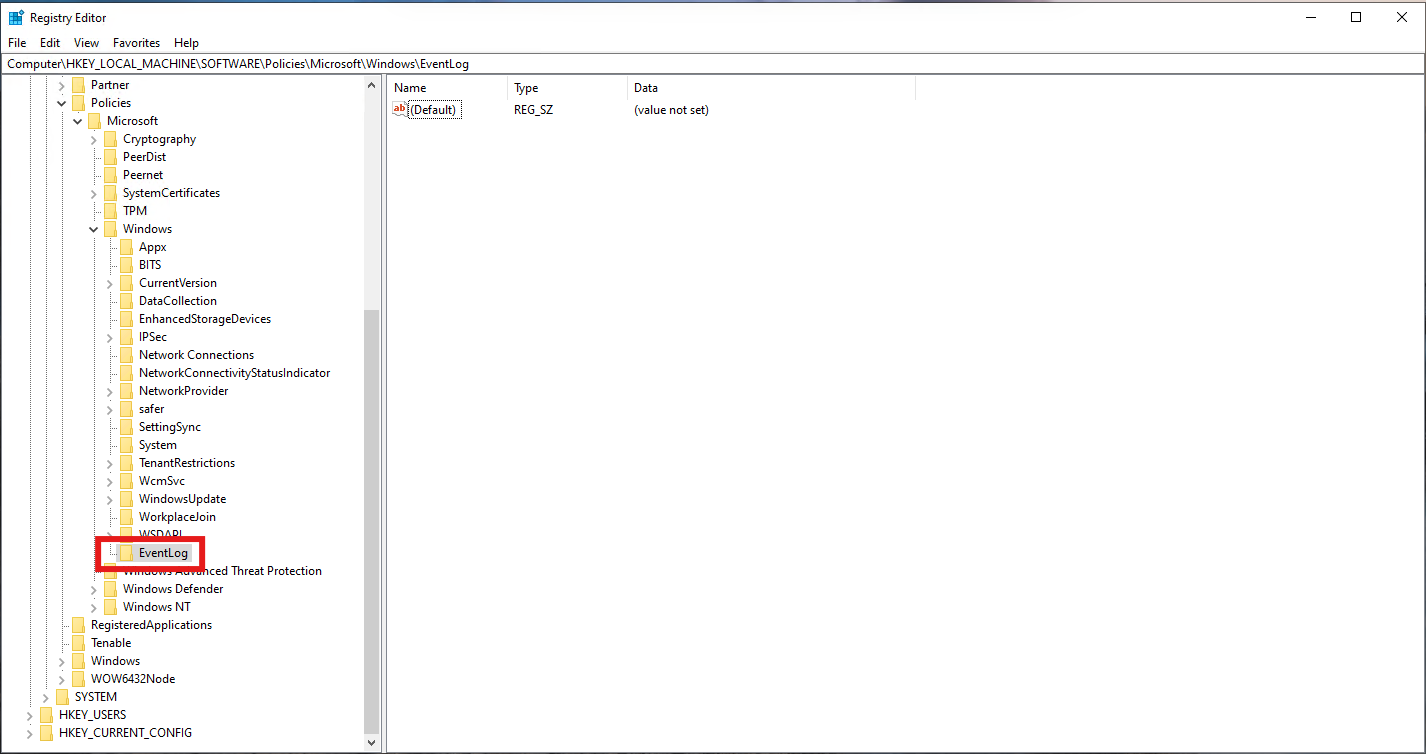
Under EventLog, make a new key called “Application”

Right click on Application and select New > DWORD (32-bit) Value
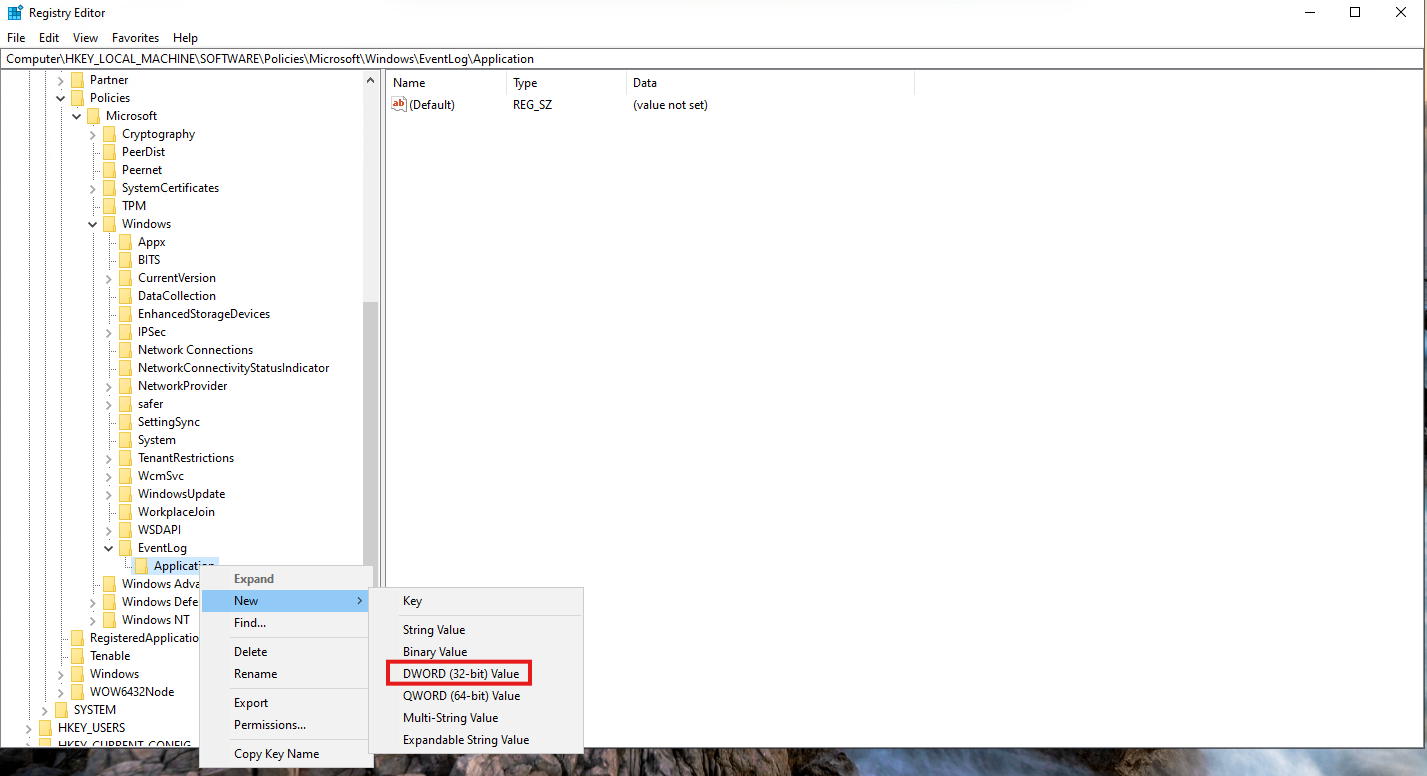
Name the new DWORD as “MaxSize”
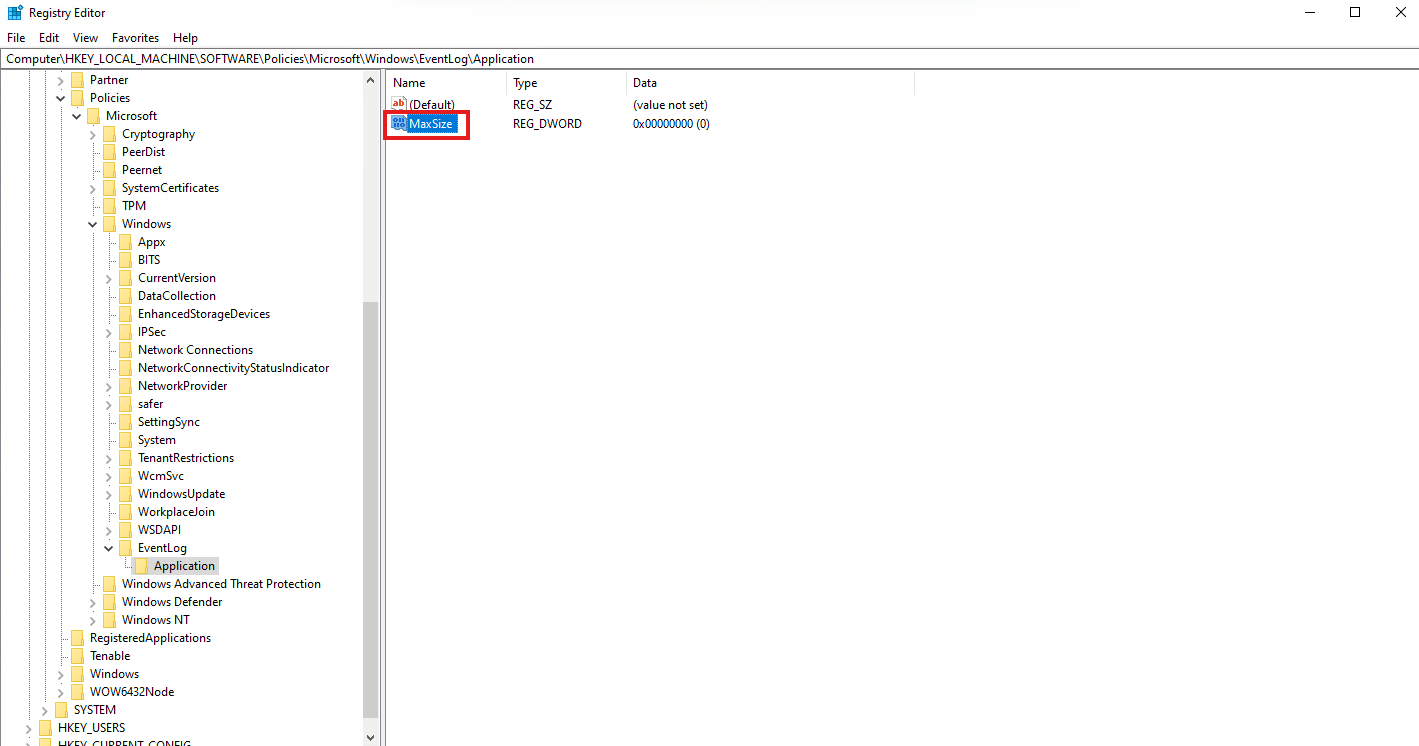
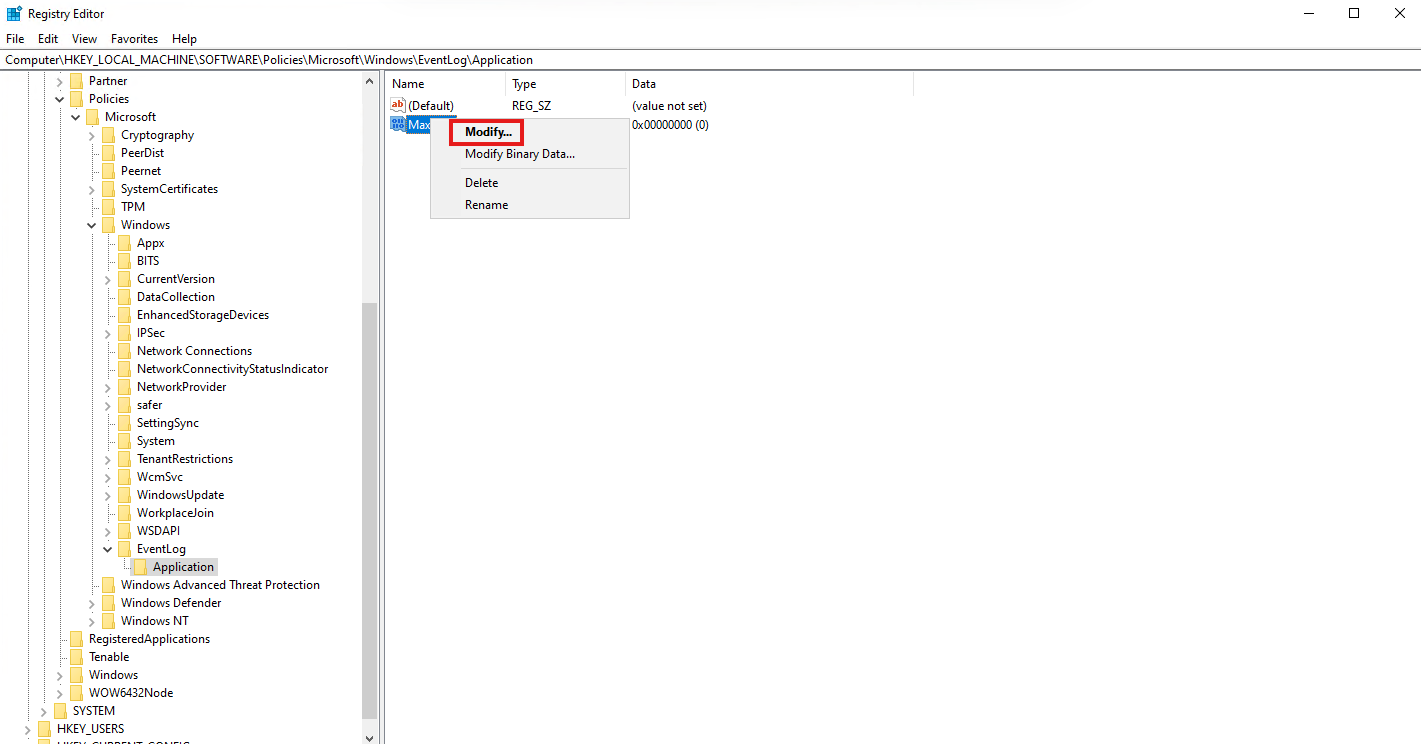
Right click “MaxSize”and select “Modify”
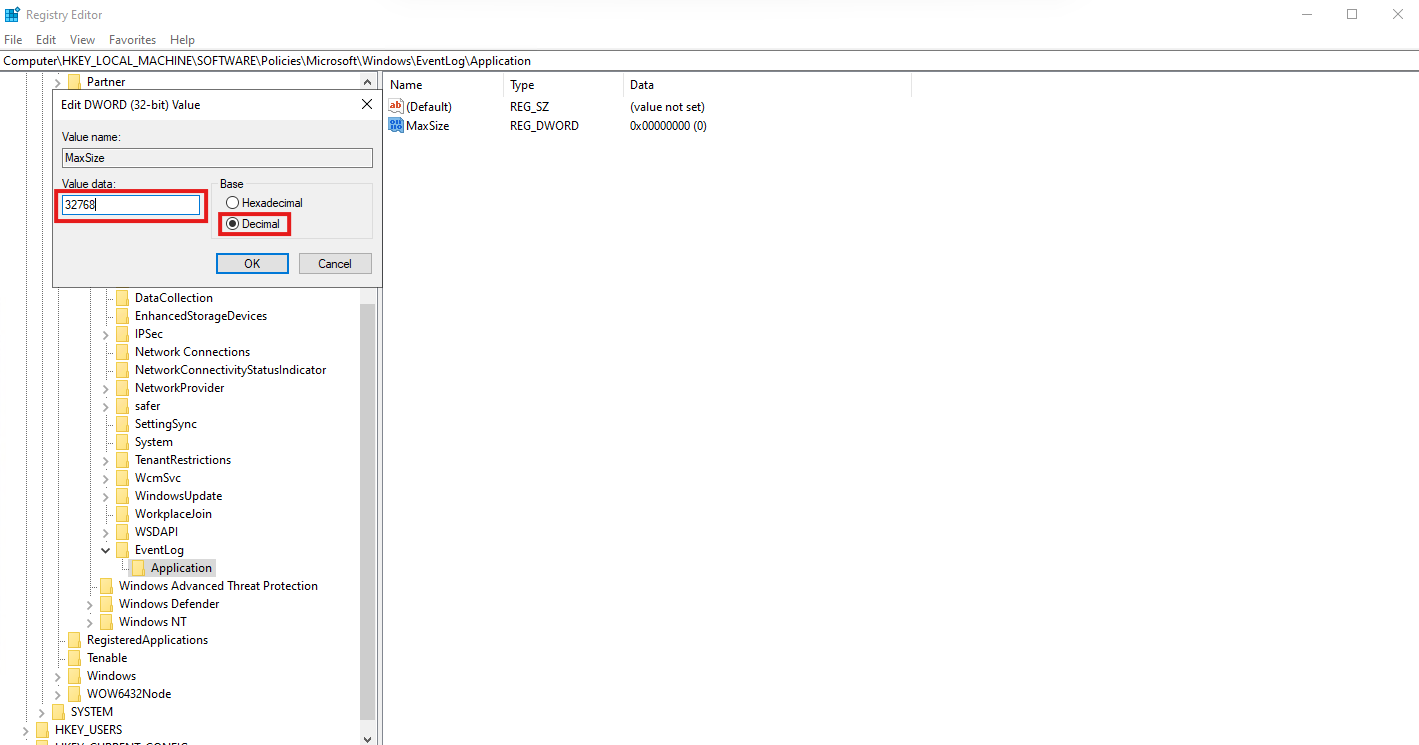
Set Value data to 32768 and Set Base to Decimal and click OK
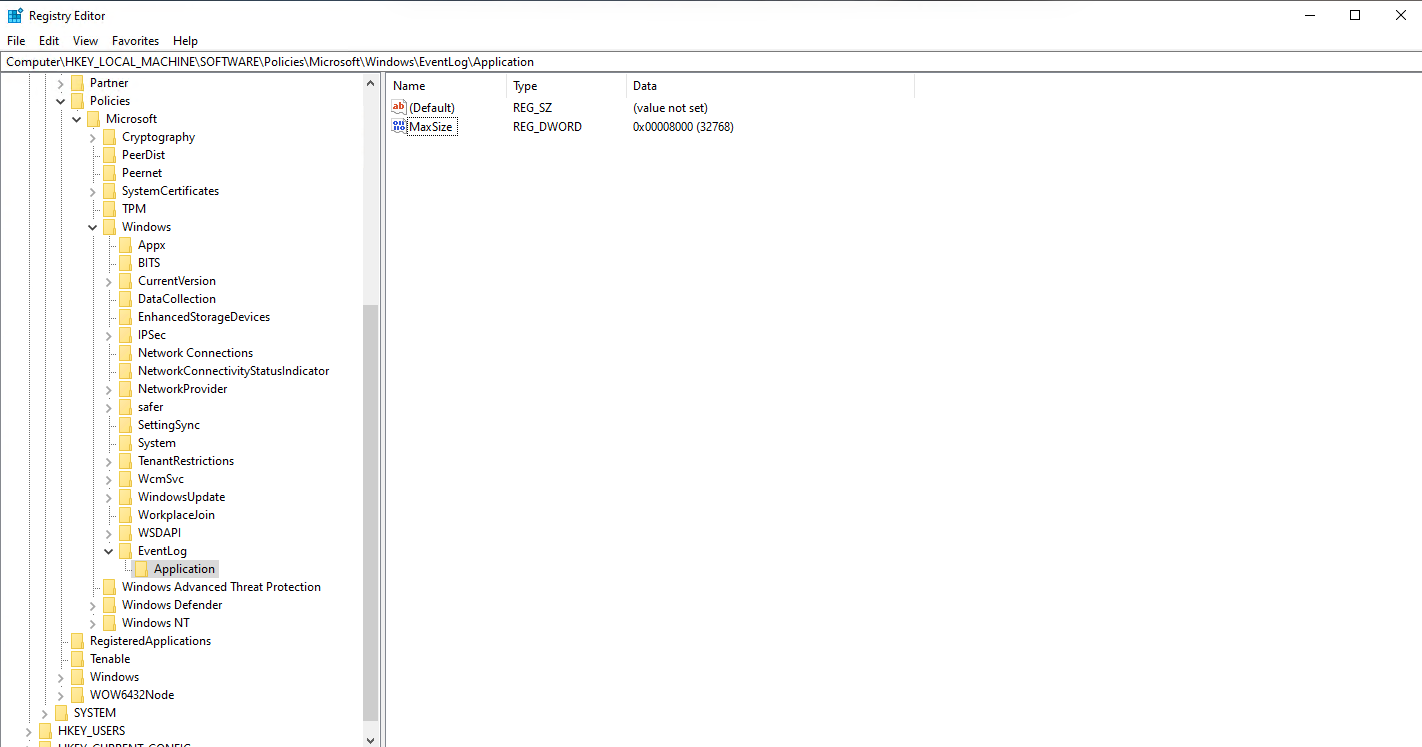
Afterwards, it should look like this:
Restart the machine and then rescan it in Tenable.

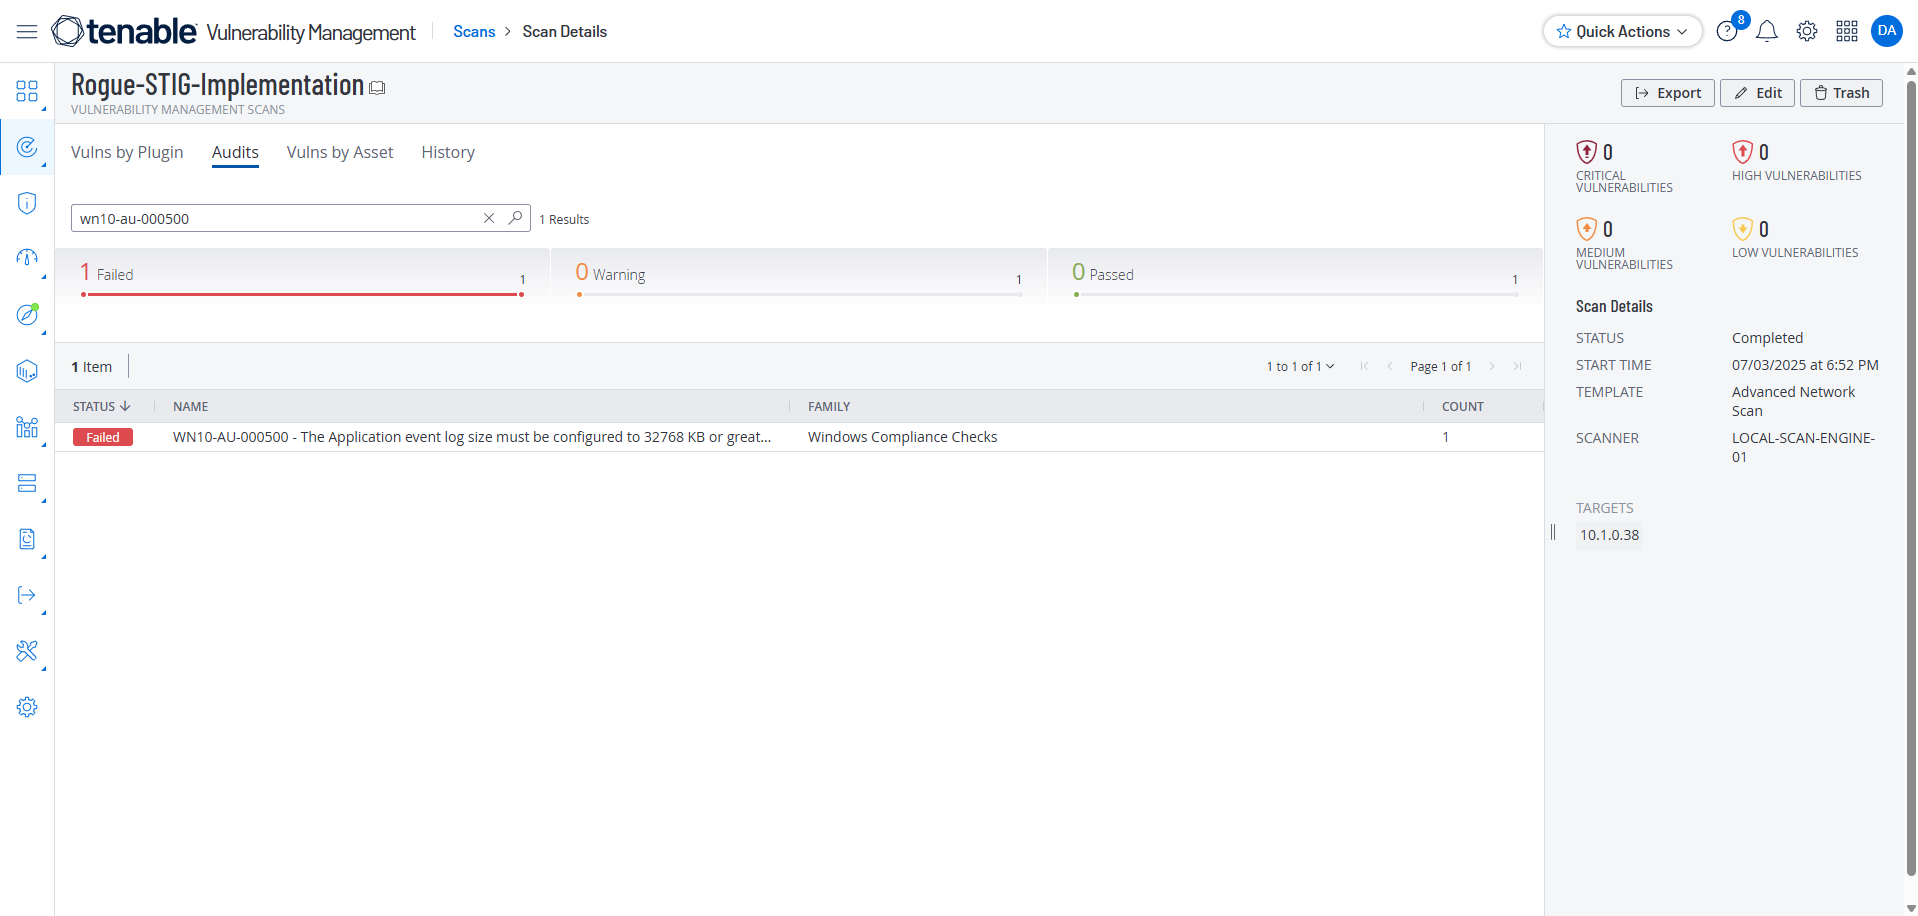
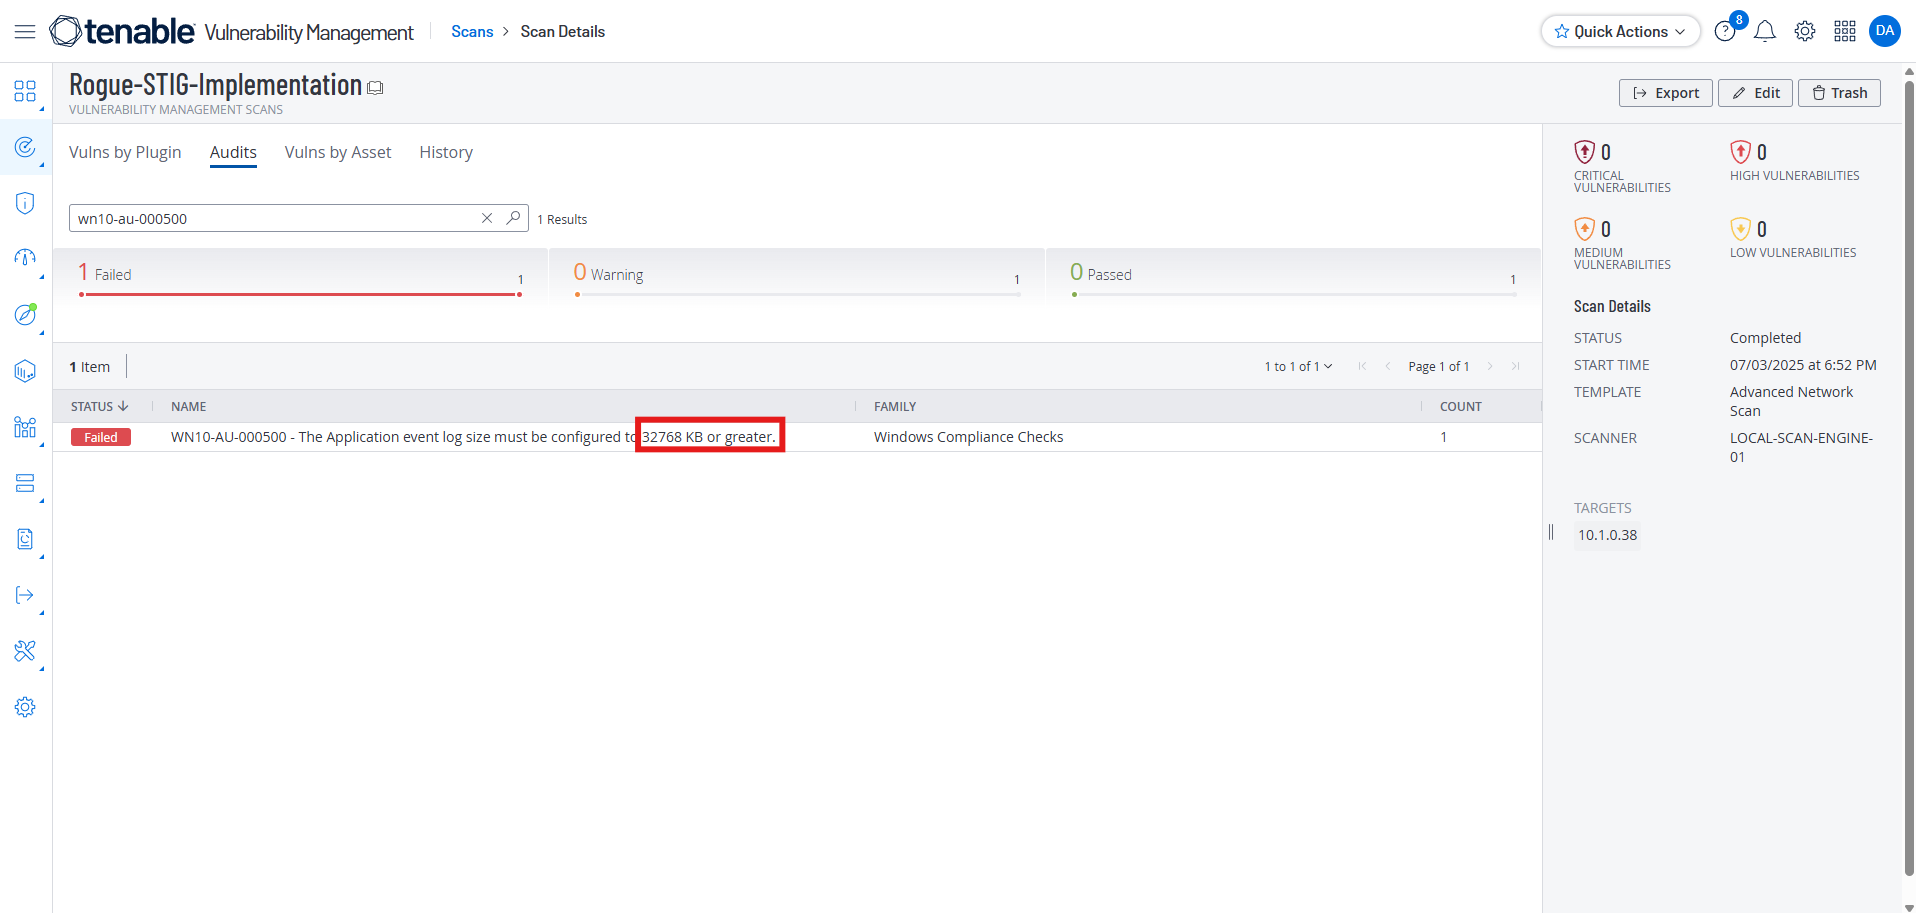
Scanning with Tenable again after Manual Remediation
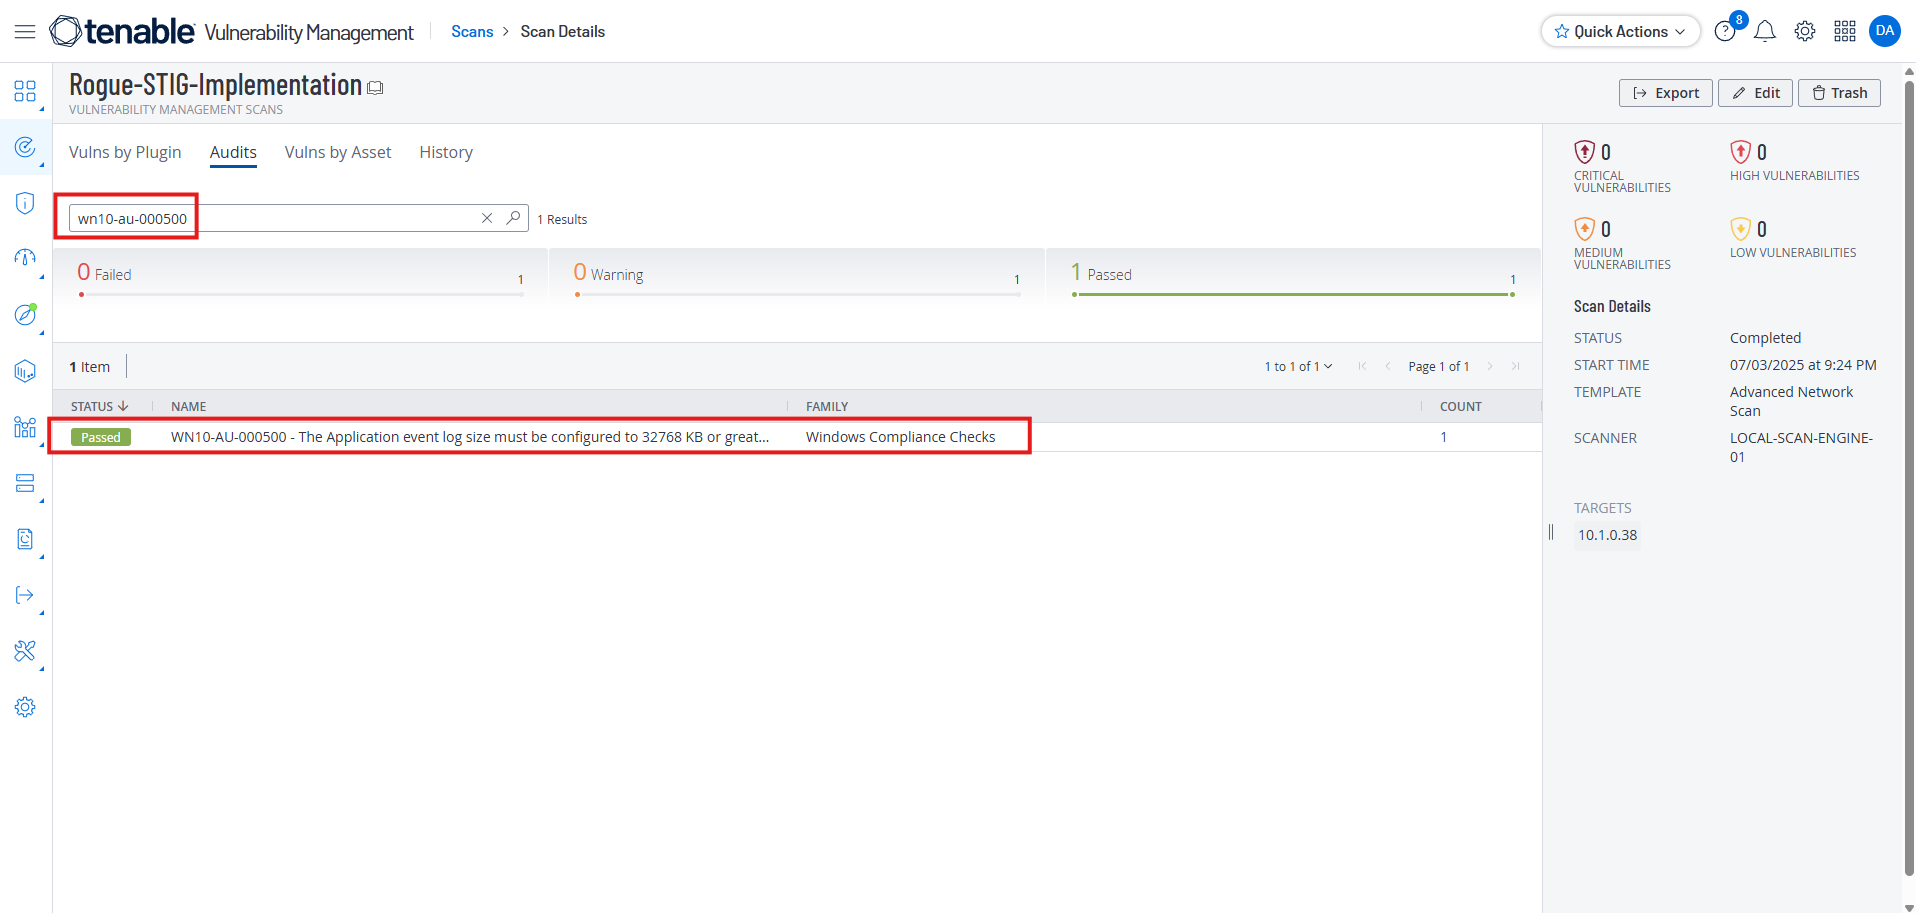
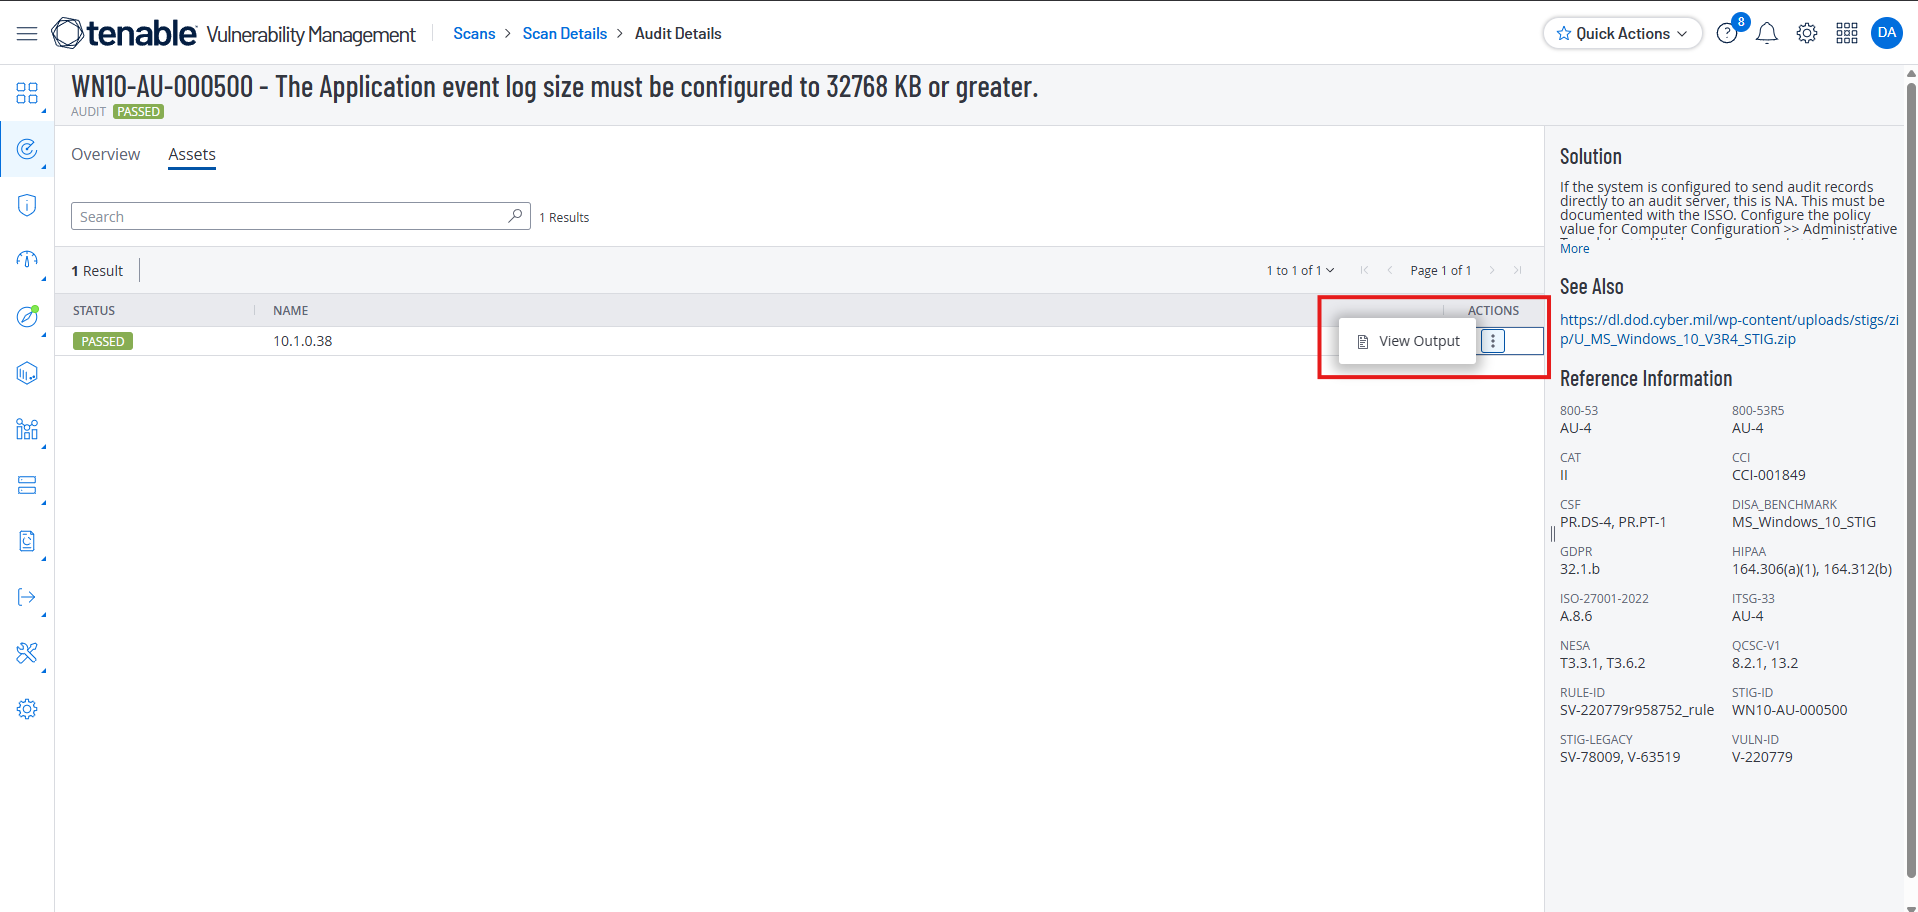
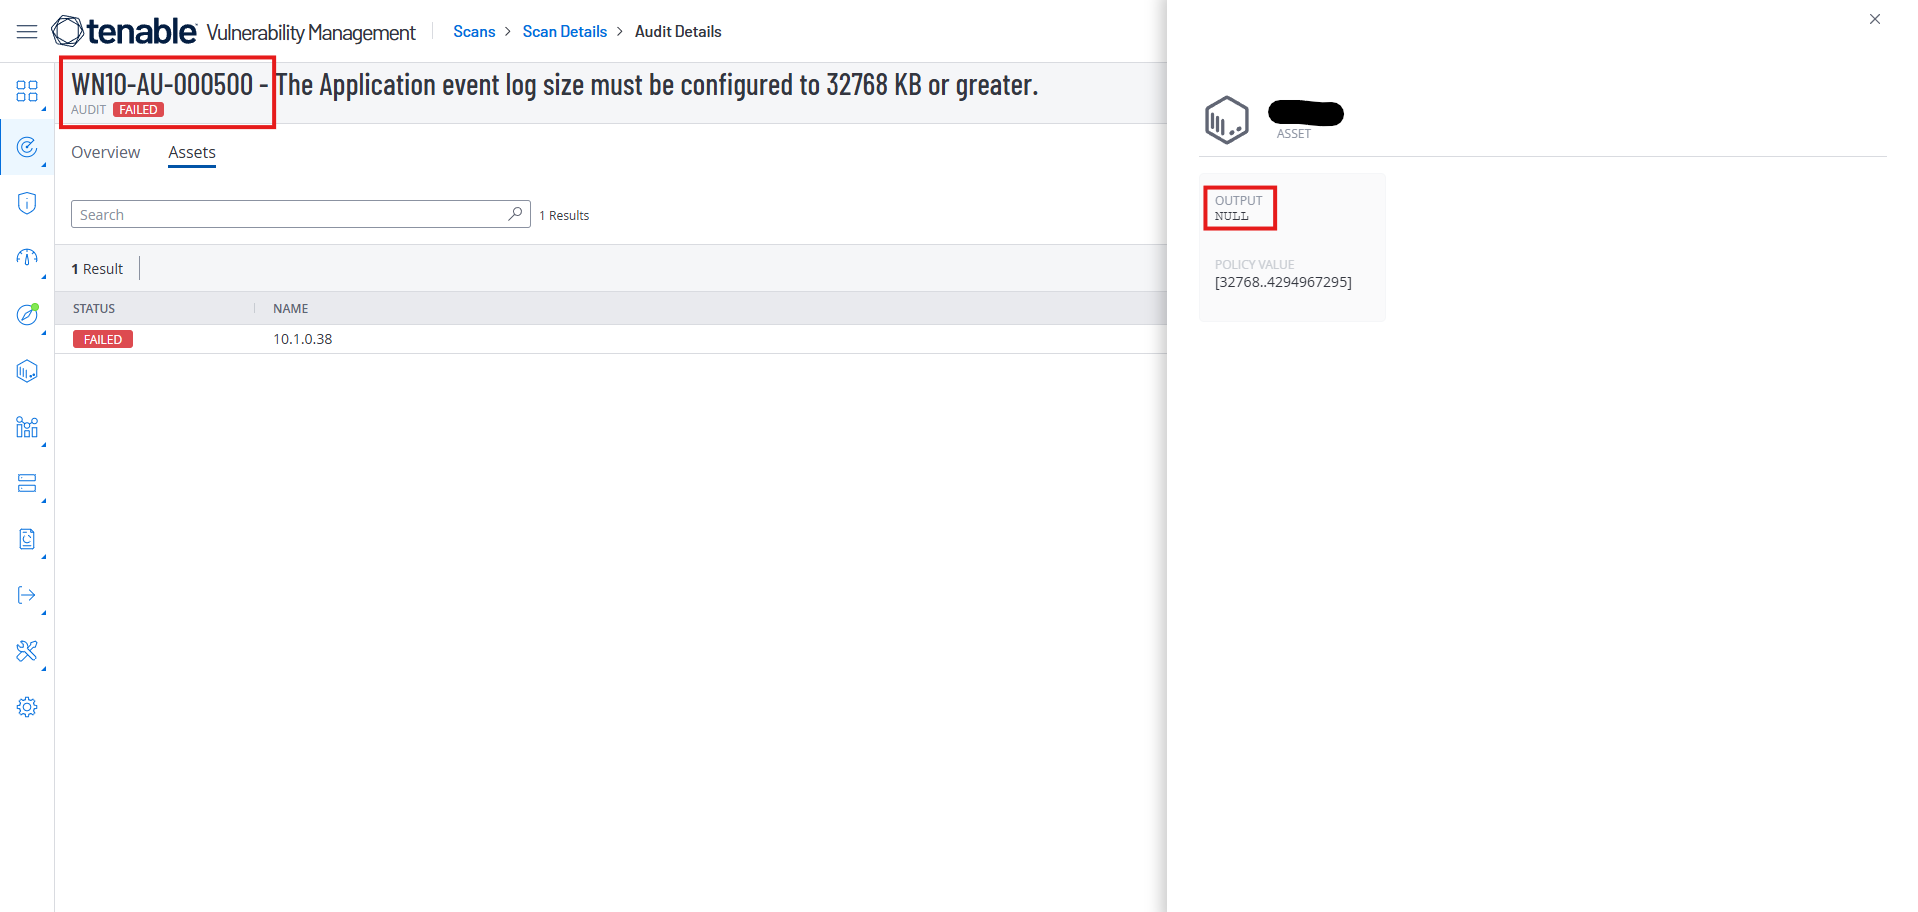
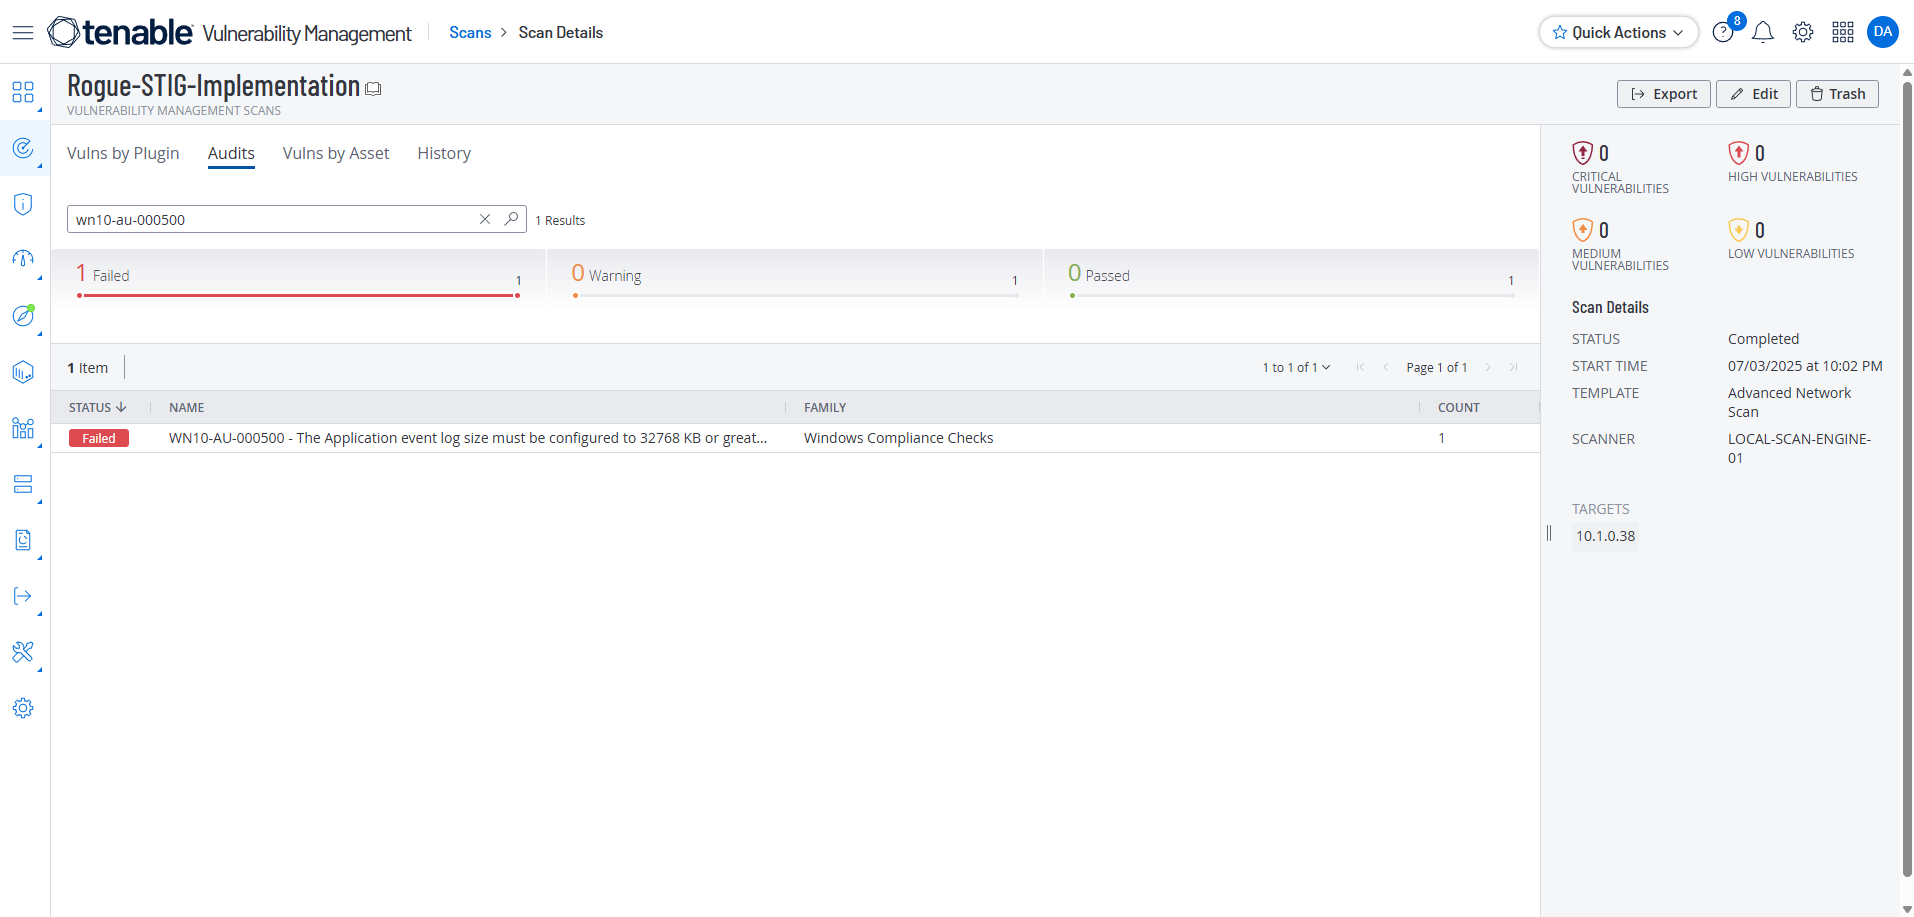
Now I run the Tenable scan again, search for the STIG wn10-au-000500 and get a Passed Status
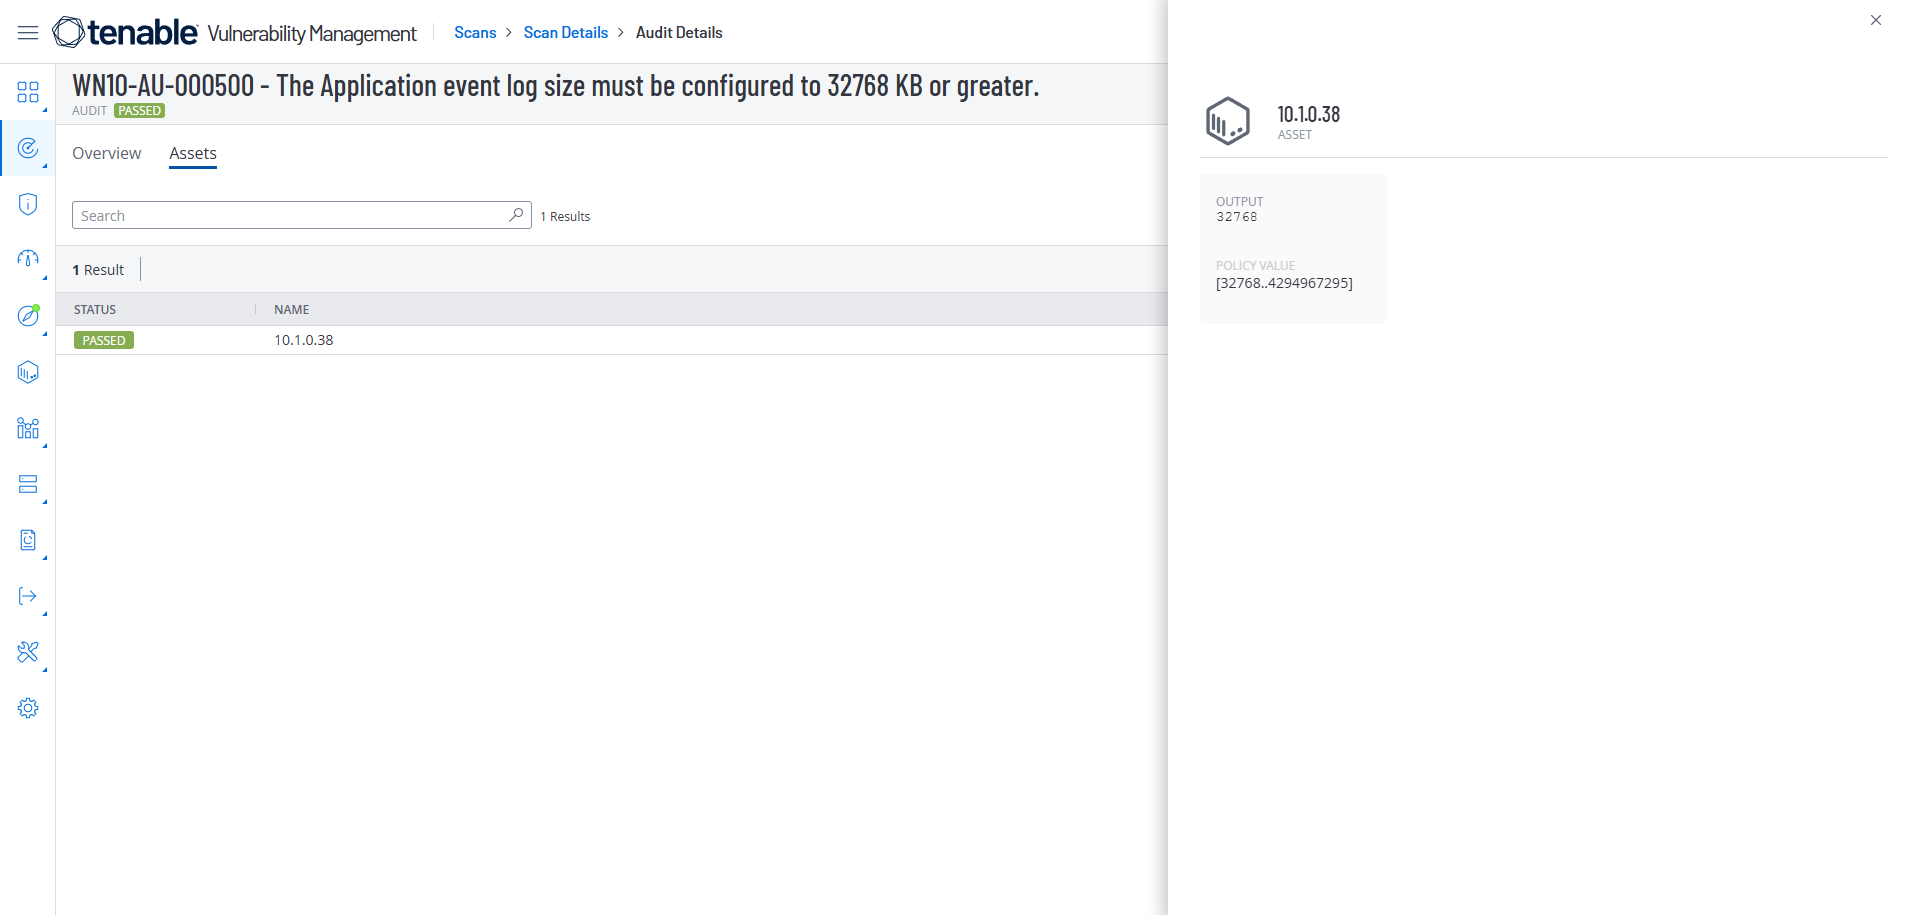
We can get more information by selecting Actions and View Output
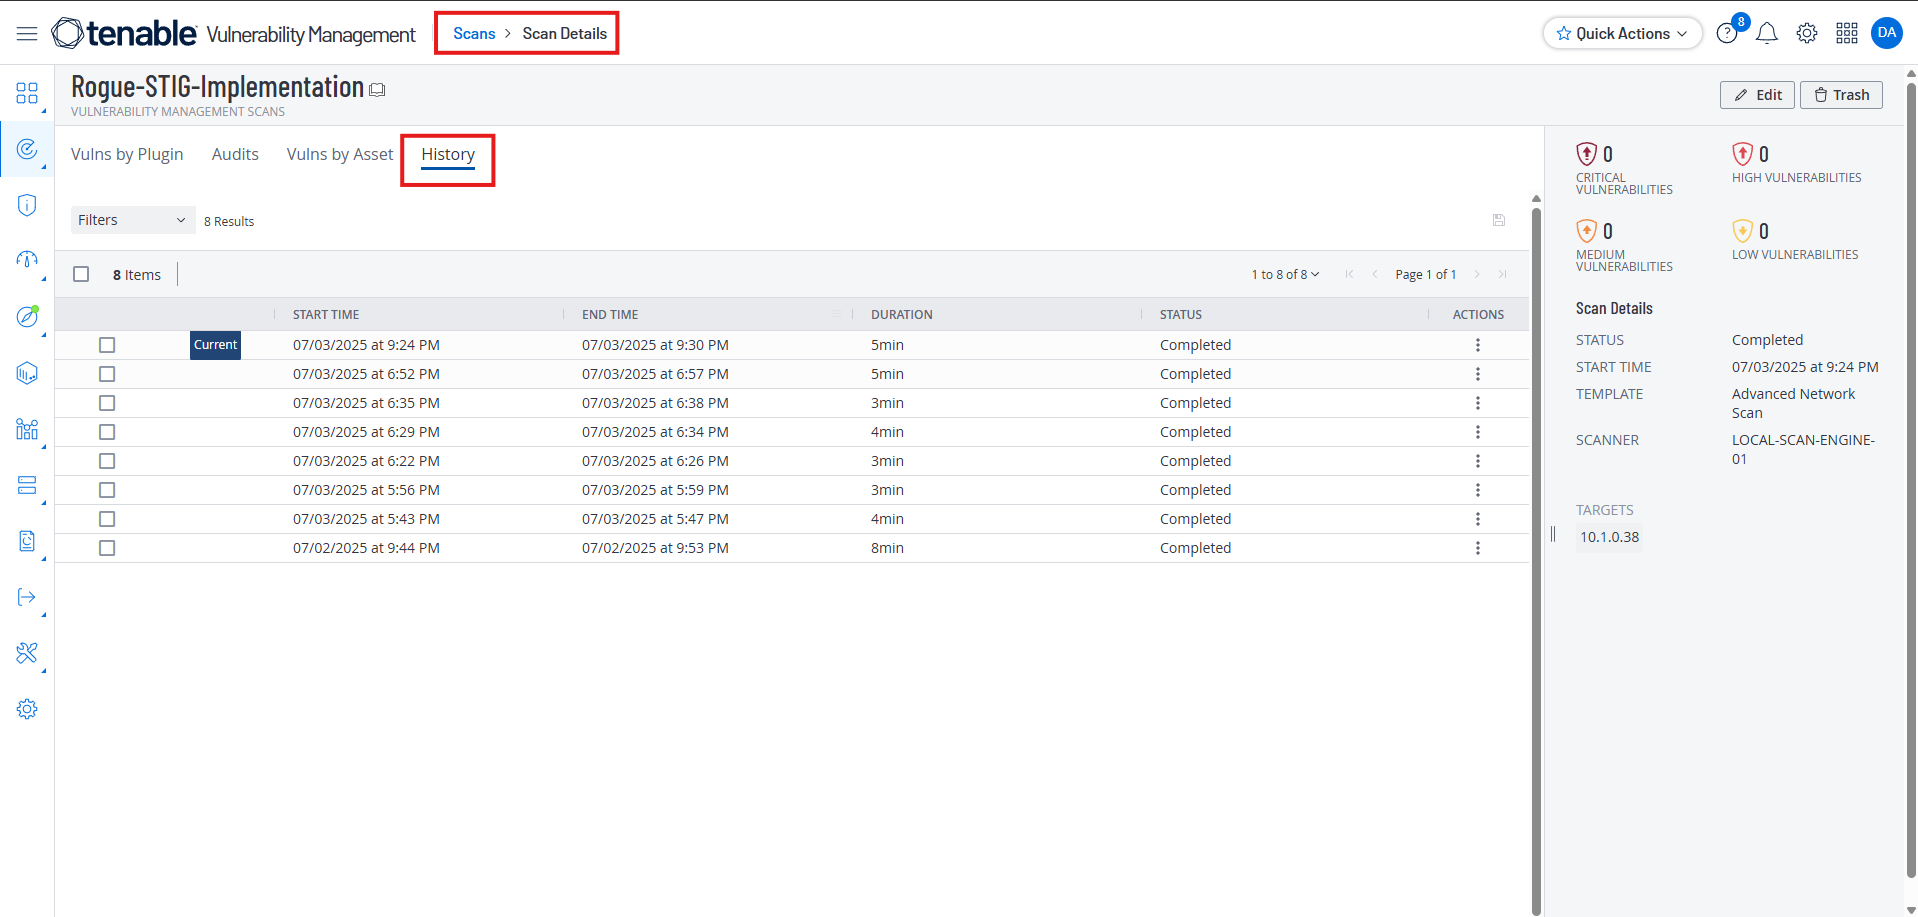
If you go back to your Scan History, you will see your prior scan had a different result:
Undoing the Manual Remediation
Now we want to delete the fix, rescan with Tenable to show the fix has been removed, and then perform the fix again with PowerShell.
RDP to the VM again and open the Registry Editor.
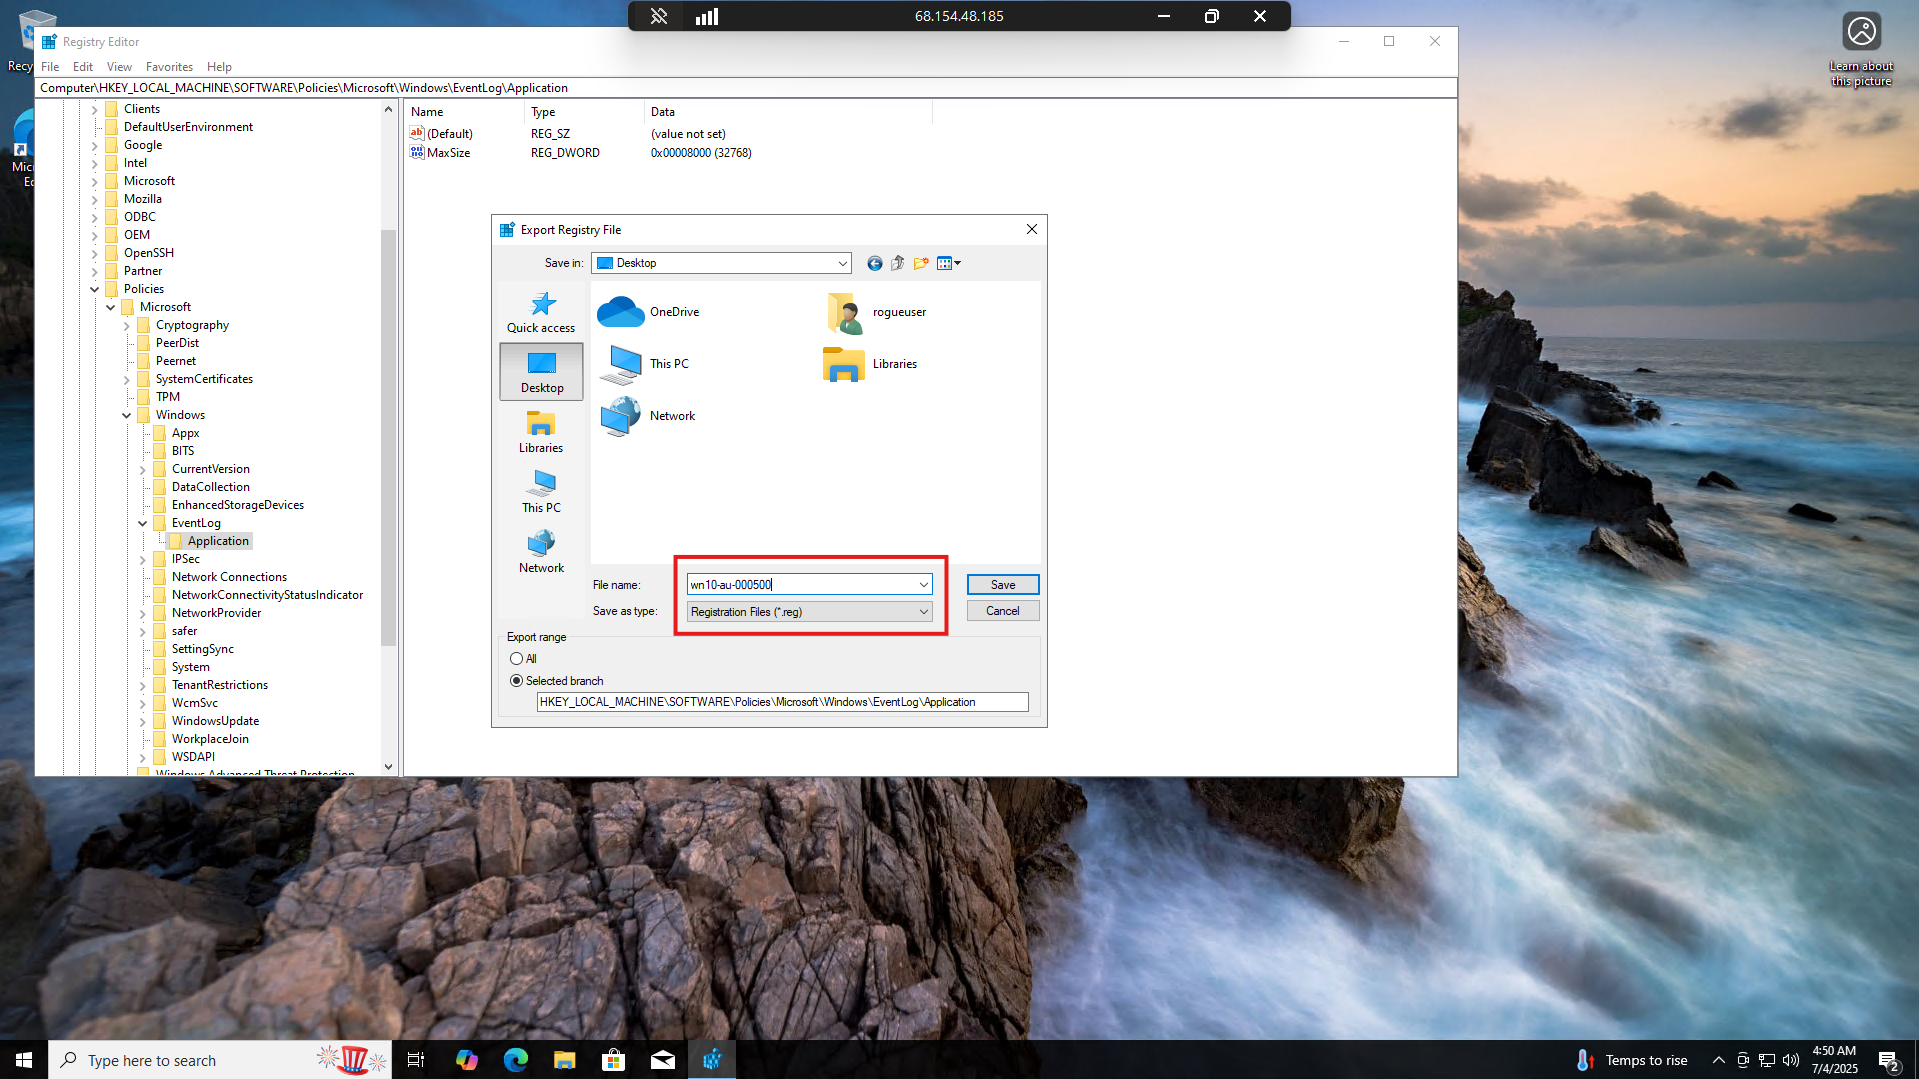
Right click on Application and select Export:
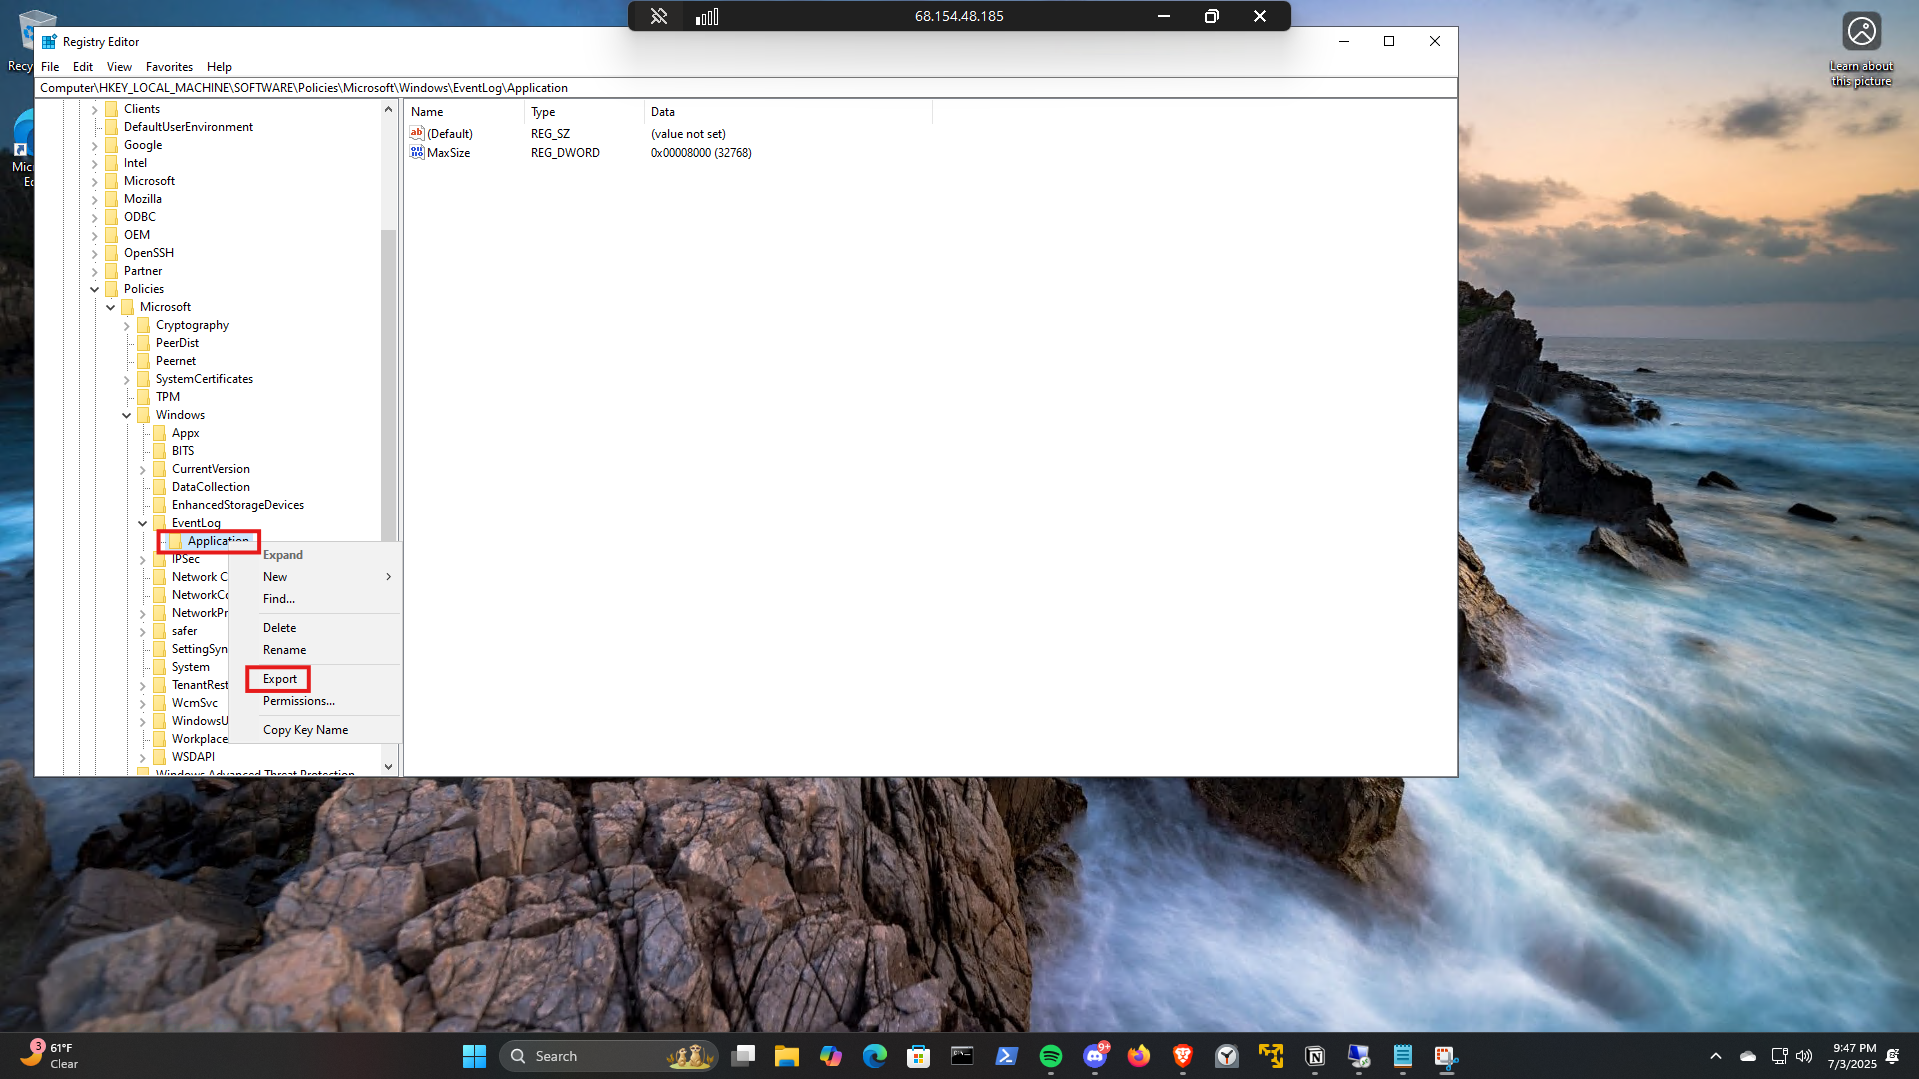
Name the exported file
1
wn10-au-000500
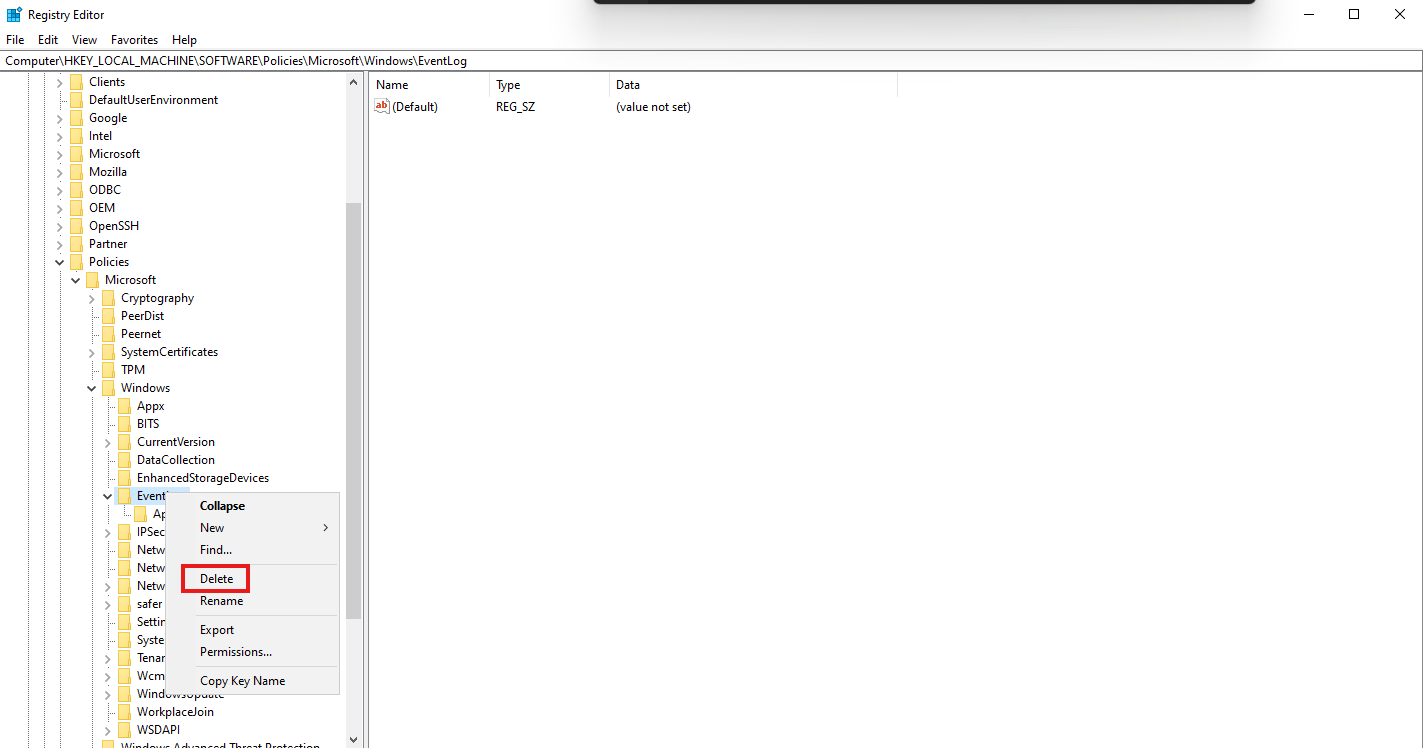
Delete the EventLog key to undo our fix
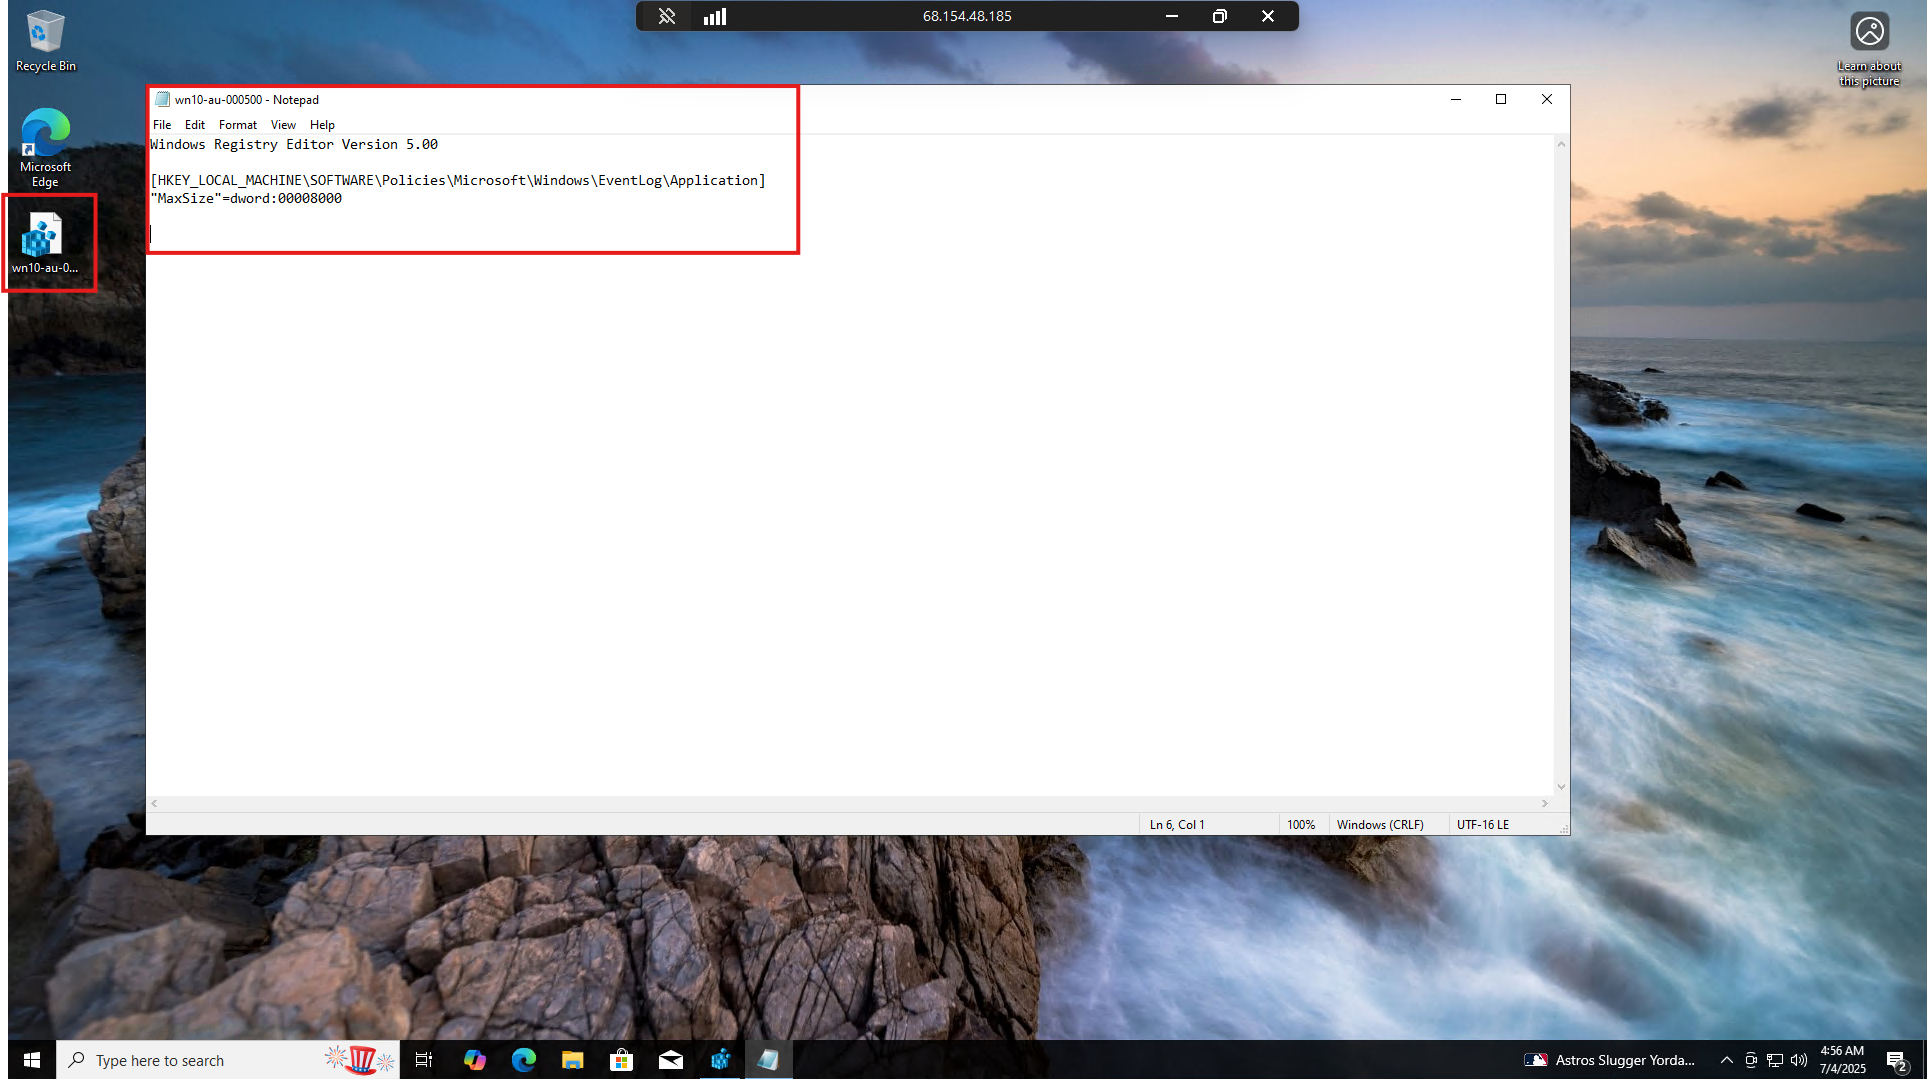
Right-click the exported key file, and click edit. When the file opens in Notepad, copy the contents and paste it into a place outside of the VM (like your local machine or Notion/Obsidian page) you can use later.
FILE: win10-au-000500
1
2
3
4
**Windows Registry Editor Version 5.00

[HKEY_LOCAL_MACHINE\SOFTWARE\Policies\Microsoft\Windows\EventLog\Application]
"MaxSize"=dword:00008000**
Restart the VM
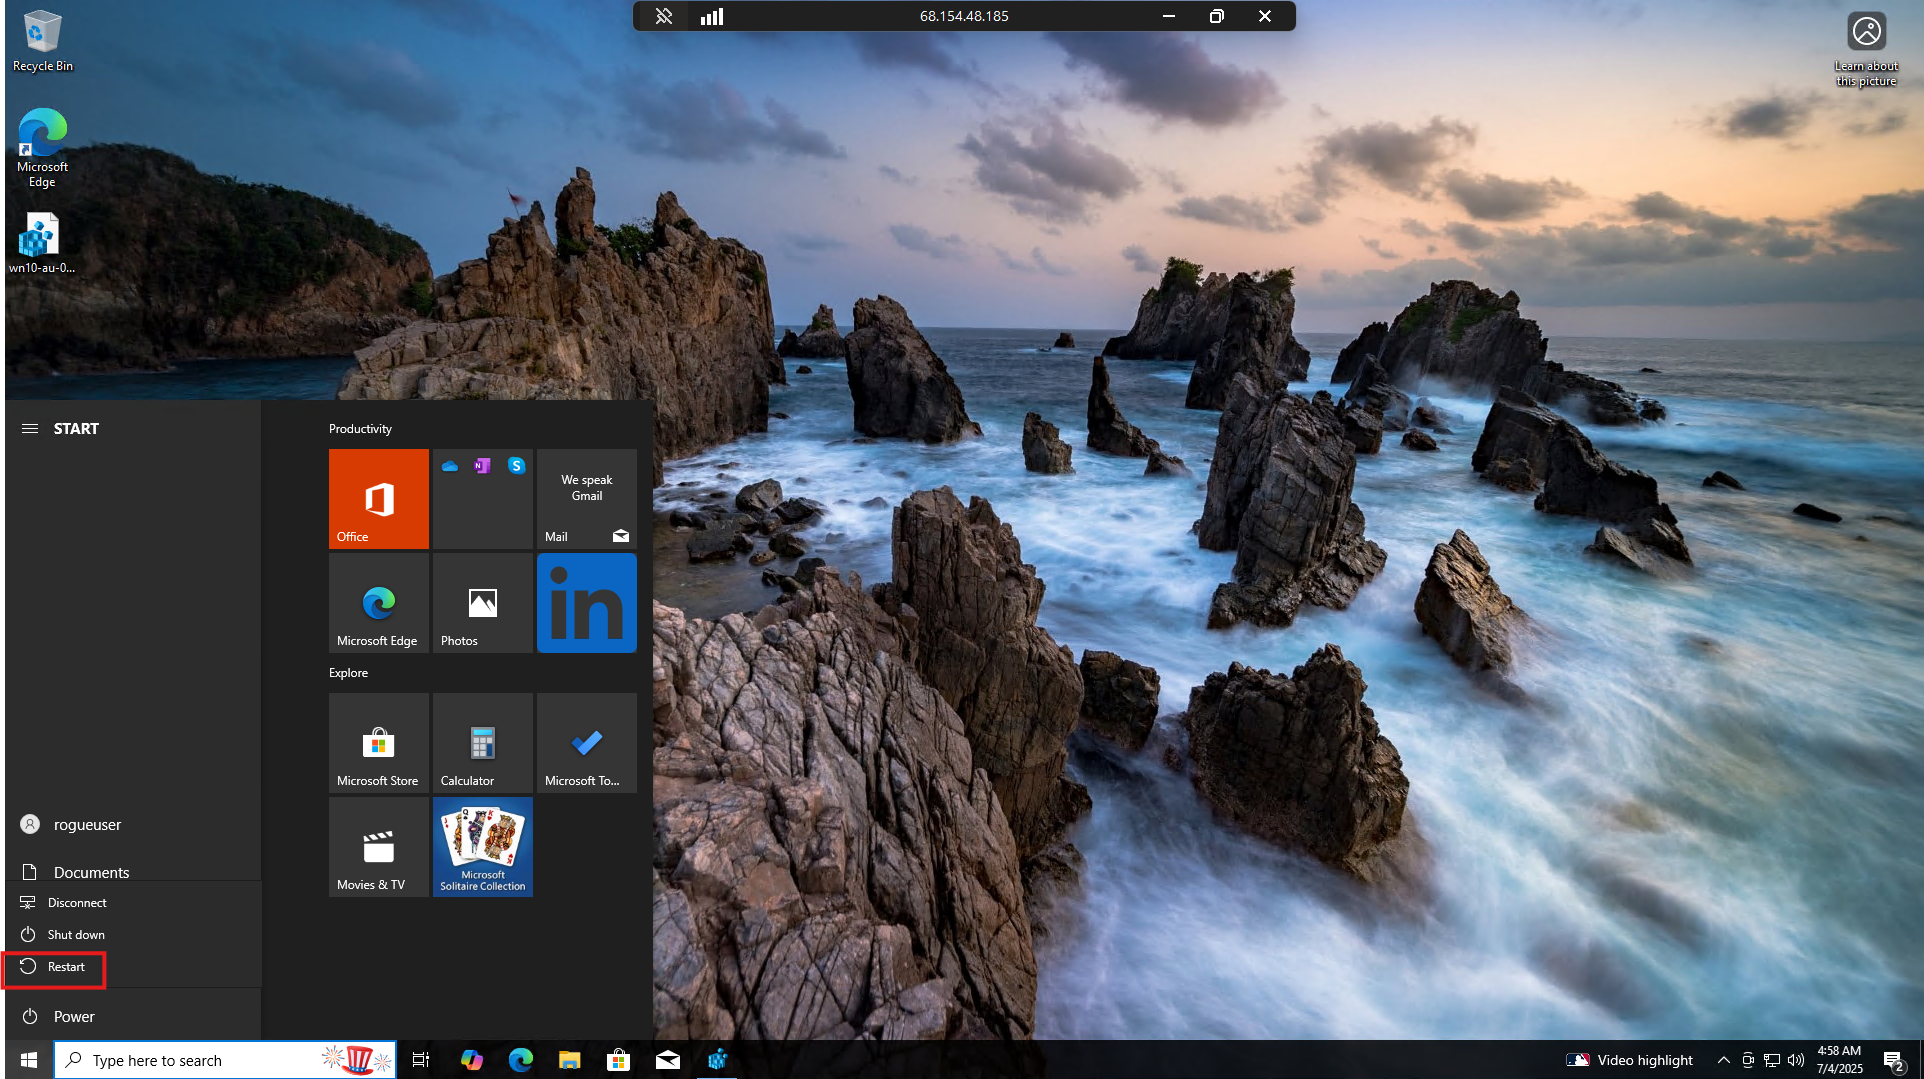
I log back into the VM via RDP to make sure it is running again
Rescanning with Tenable after Undoing the Manual Remediation
I run the Tenable scan again
This time, we see the Status for wn10-au-000500 shows as Failed again, since we removed our fix.
Fixing the STIG with PowerShell
Access the VM via RDP again and open up PowerShell as Administrator
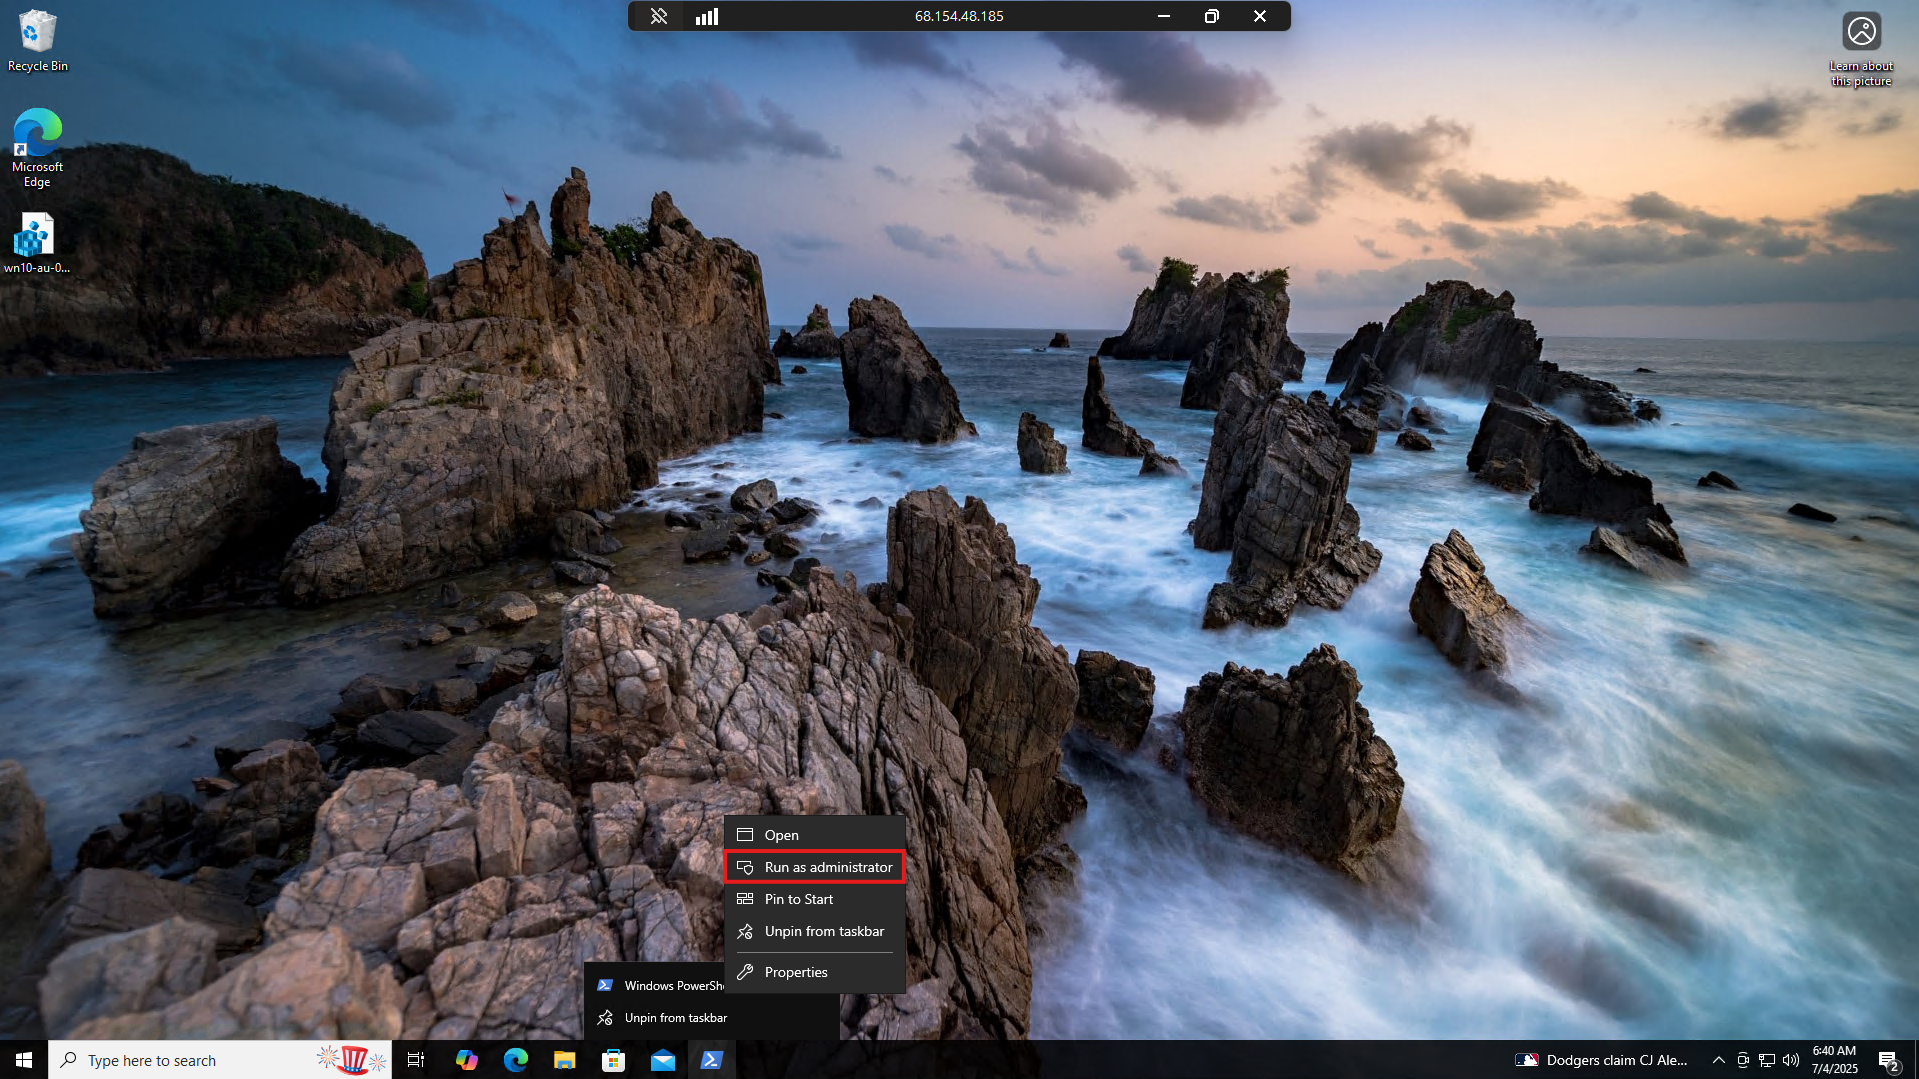
Create a New file called stig-fix.ps1
1
New-Item -Path ".\stig-fix.ps1" -ItemType "File" -Force
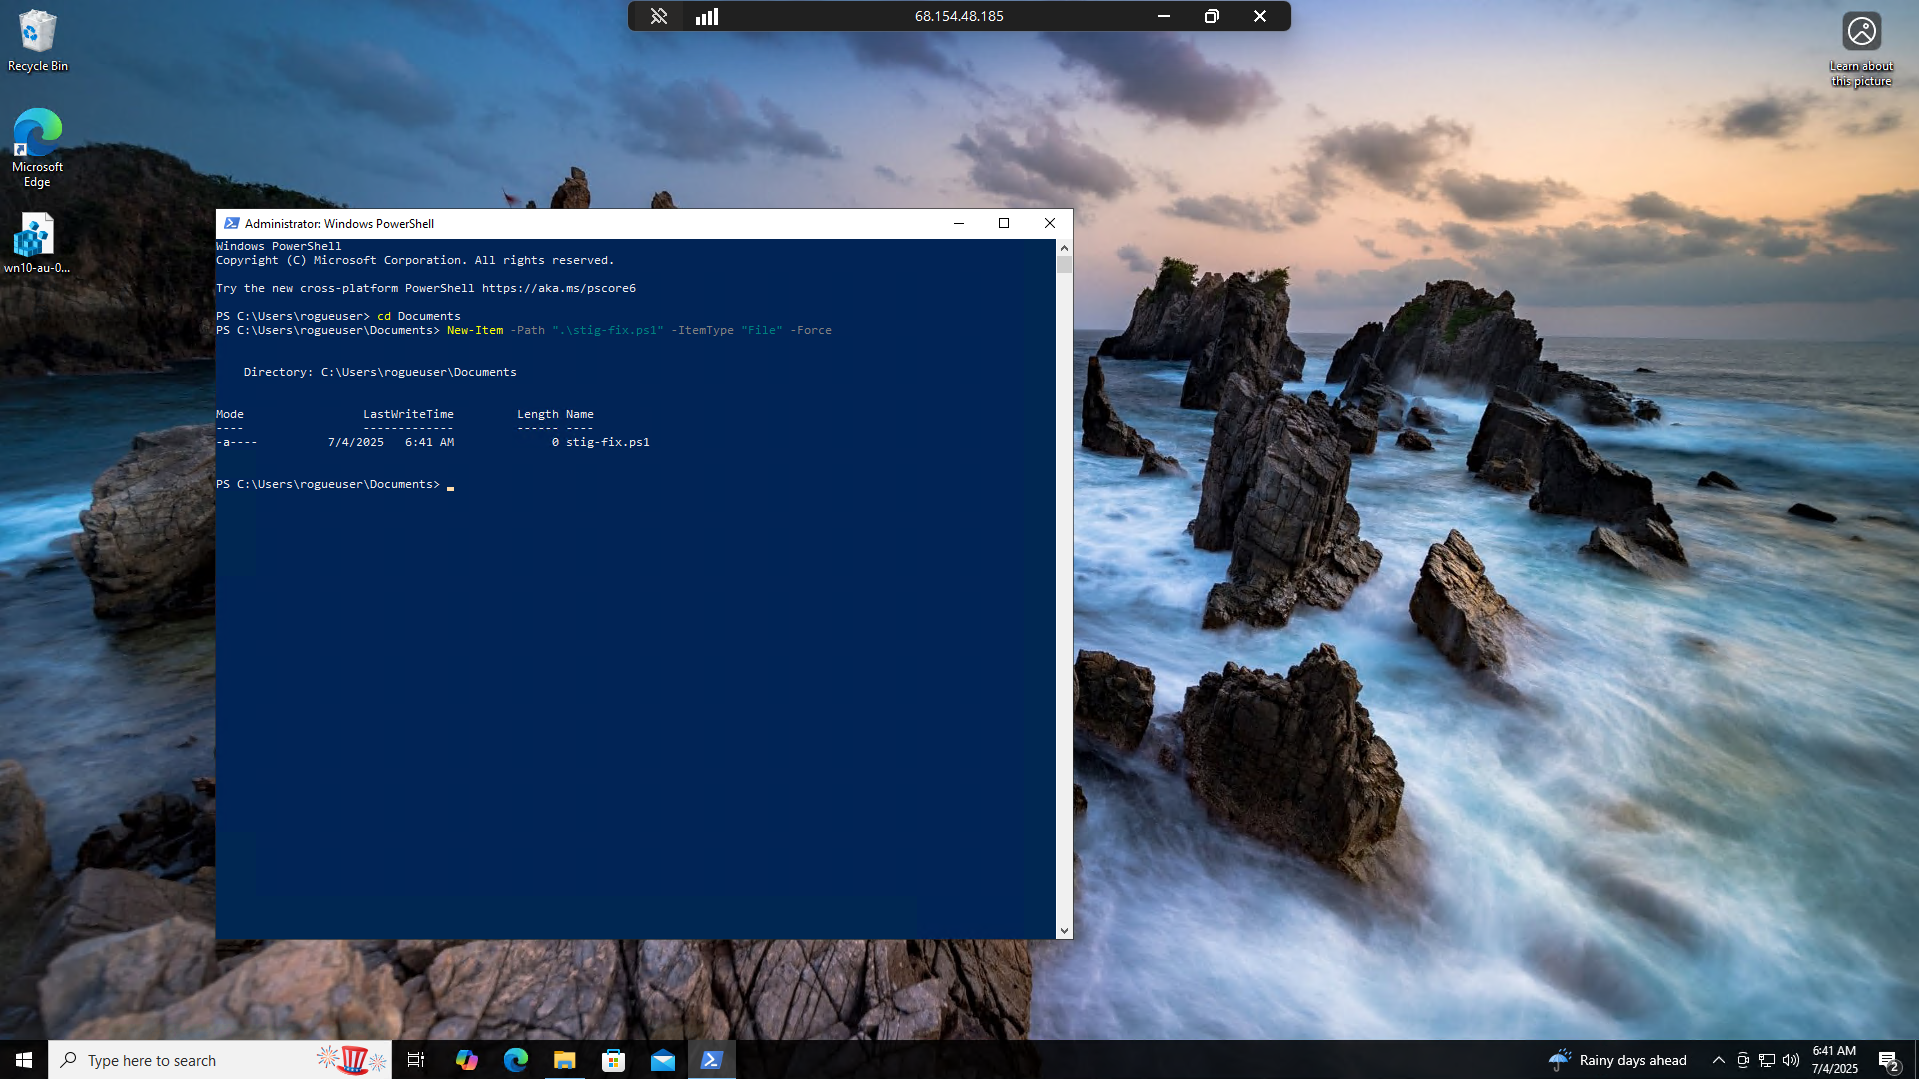
Open up the file you just created in notepad and copy and paste the contents below:
FILE: stig-fix.ps1
1
2
3
4
5
6
7
8
9
10
11
12
13
14
15
# Define the registry path and value
$regPath = "HKLM:\SOFTWARE\Policies\Microsoft\Windows\EventLog\Application"
$valueName = "MaxSize"
$valueData = 0x8000 # Equivalent to dword:00008000 (32768 in decimal)
# Ensure the registry key exists
if (-not (Test-Path $regPath)) {
New-Item -Path $regPath -Force | Out-Null
}
# Set the MaxSize DWORD value
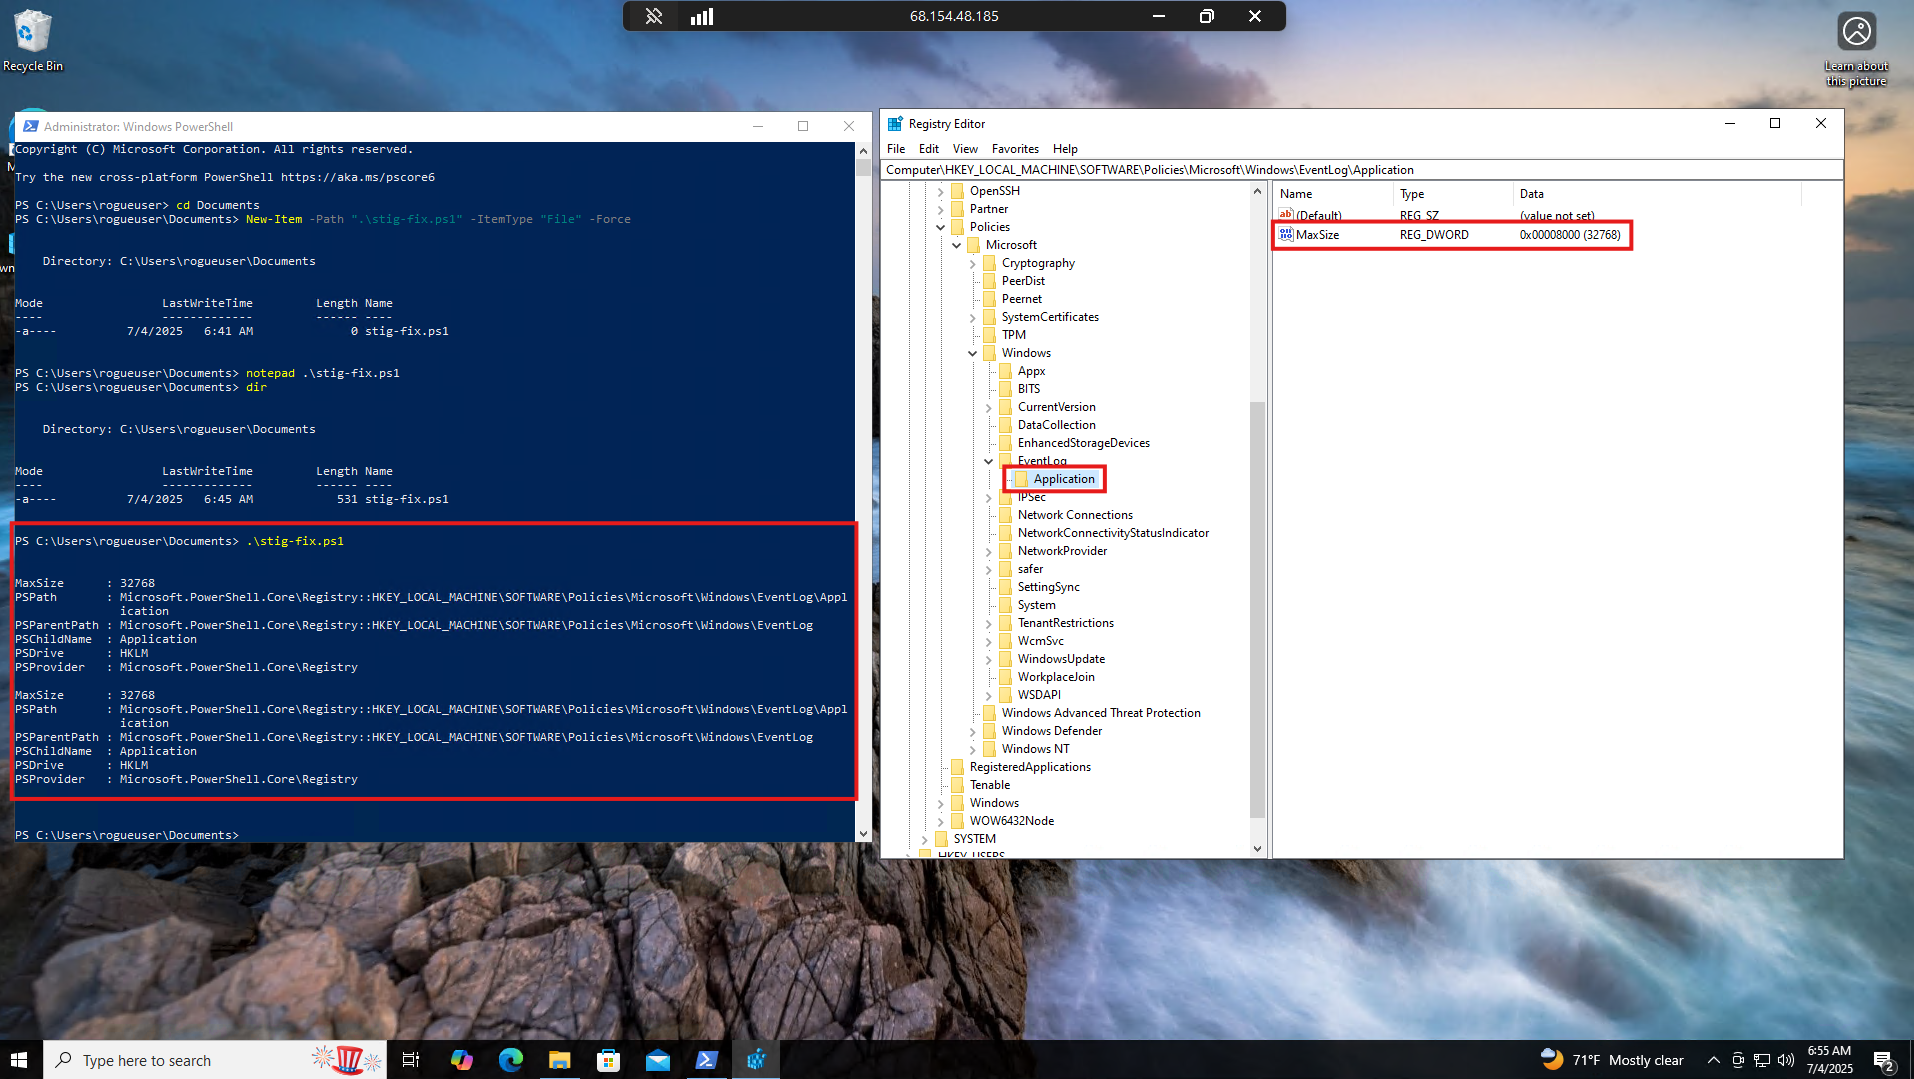
New-ItemProperty -Path $regPath -Name $valueName -Value $valueData -PropertyType DWord -Force
# Confirm the change
Get-ItemProperty -Path $regPath -Name $valueName
We can see the EventLog key is not present in the current Registry, since we removed that key earlier.

Run the stig-fix.ps1 PowerShell script. Select the Registry Editor and hit key F5 on your keyboard to refresh, or select View > Refresh. You will now see the \EventLog\Application\MaxSize registry key with a value of 32768 decimals.
Restart the VM again
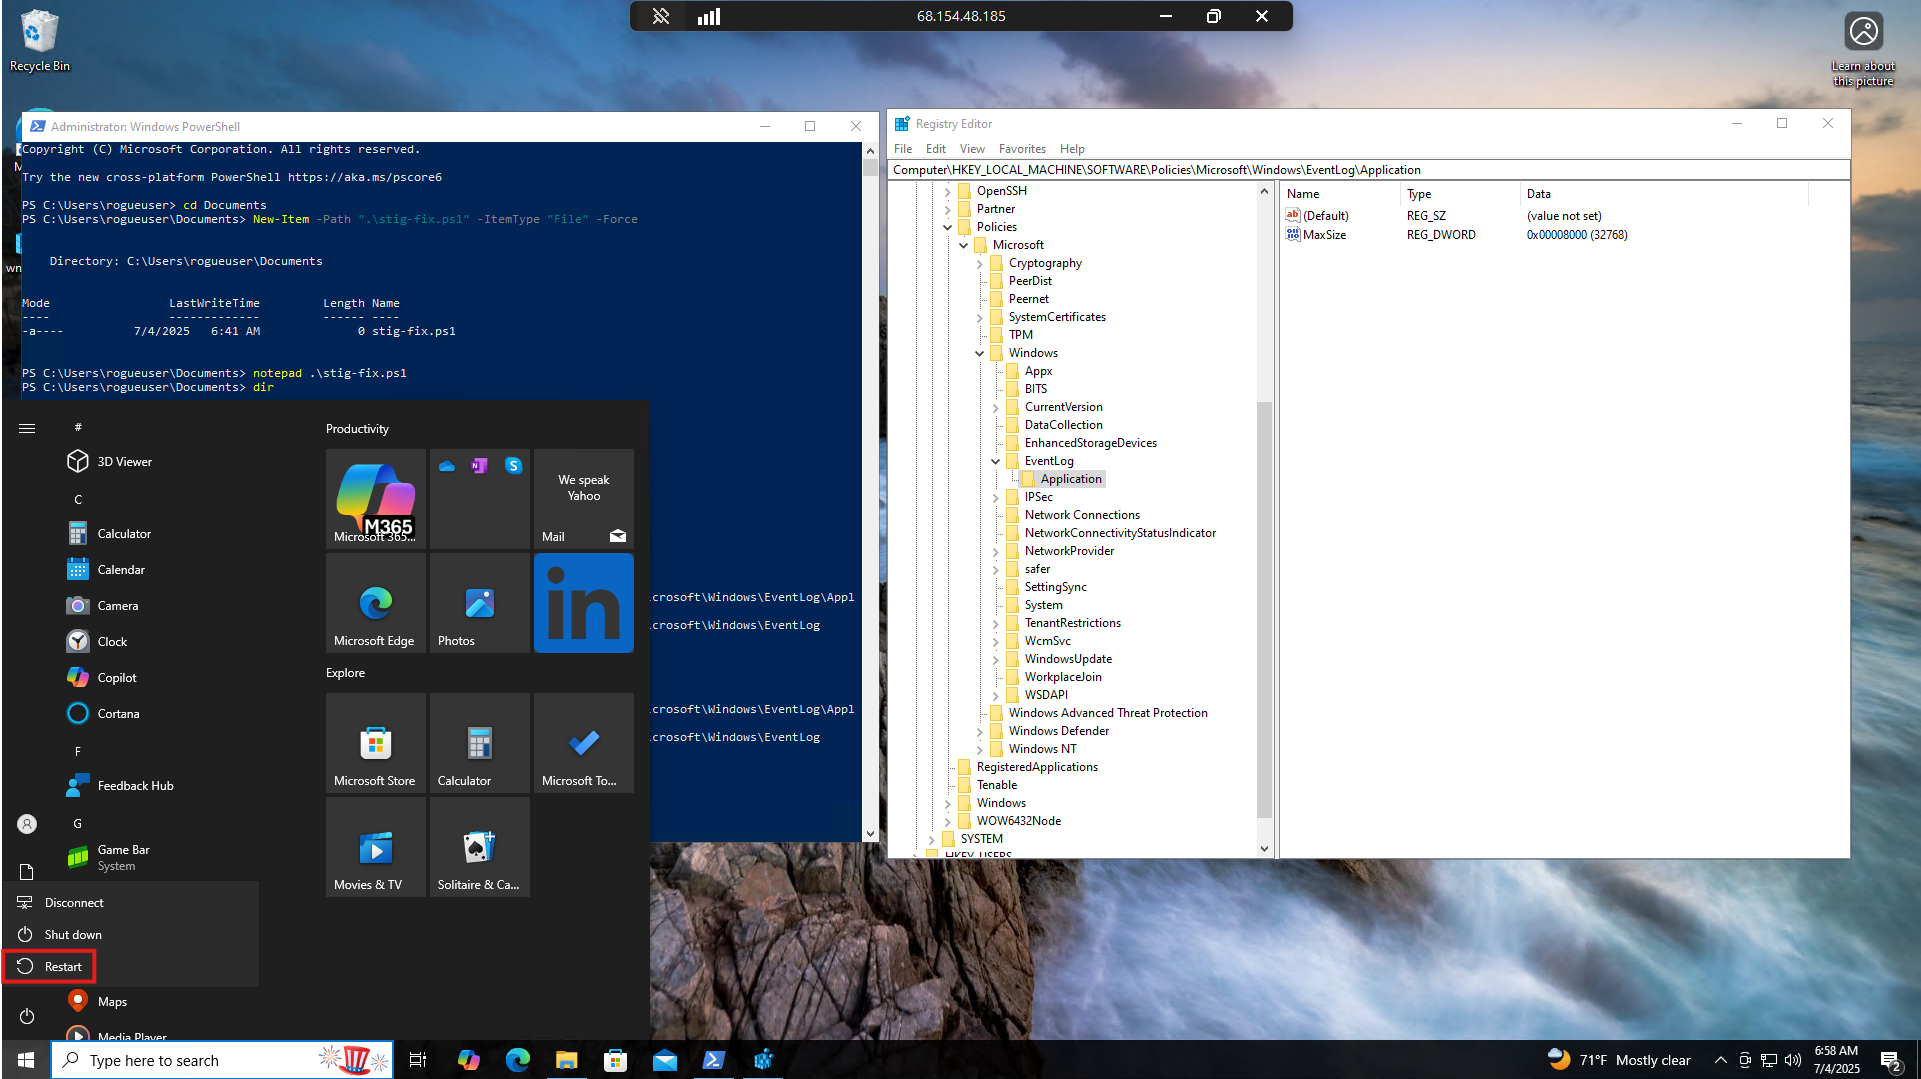
Wait a couple of minutes and log back into the VM to make sure it has fully restarted, then go back to Tenable and rescan the machine.
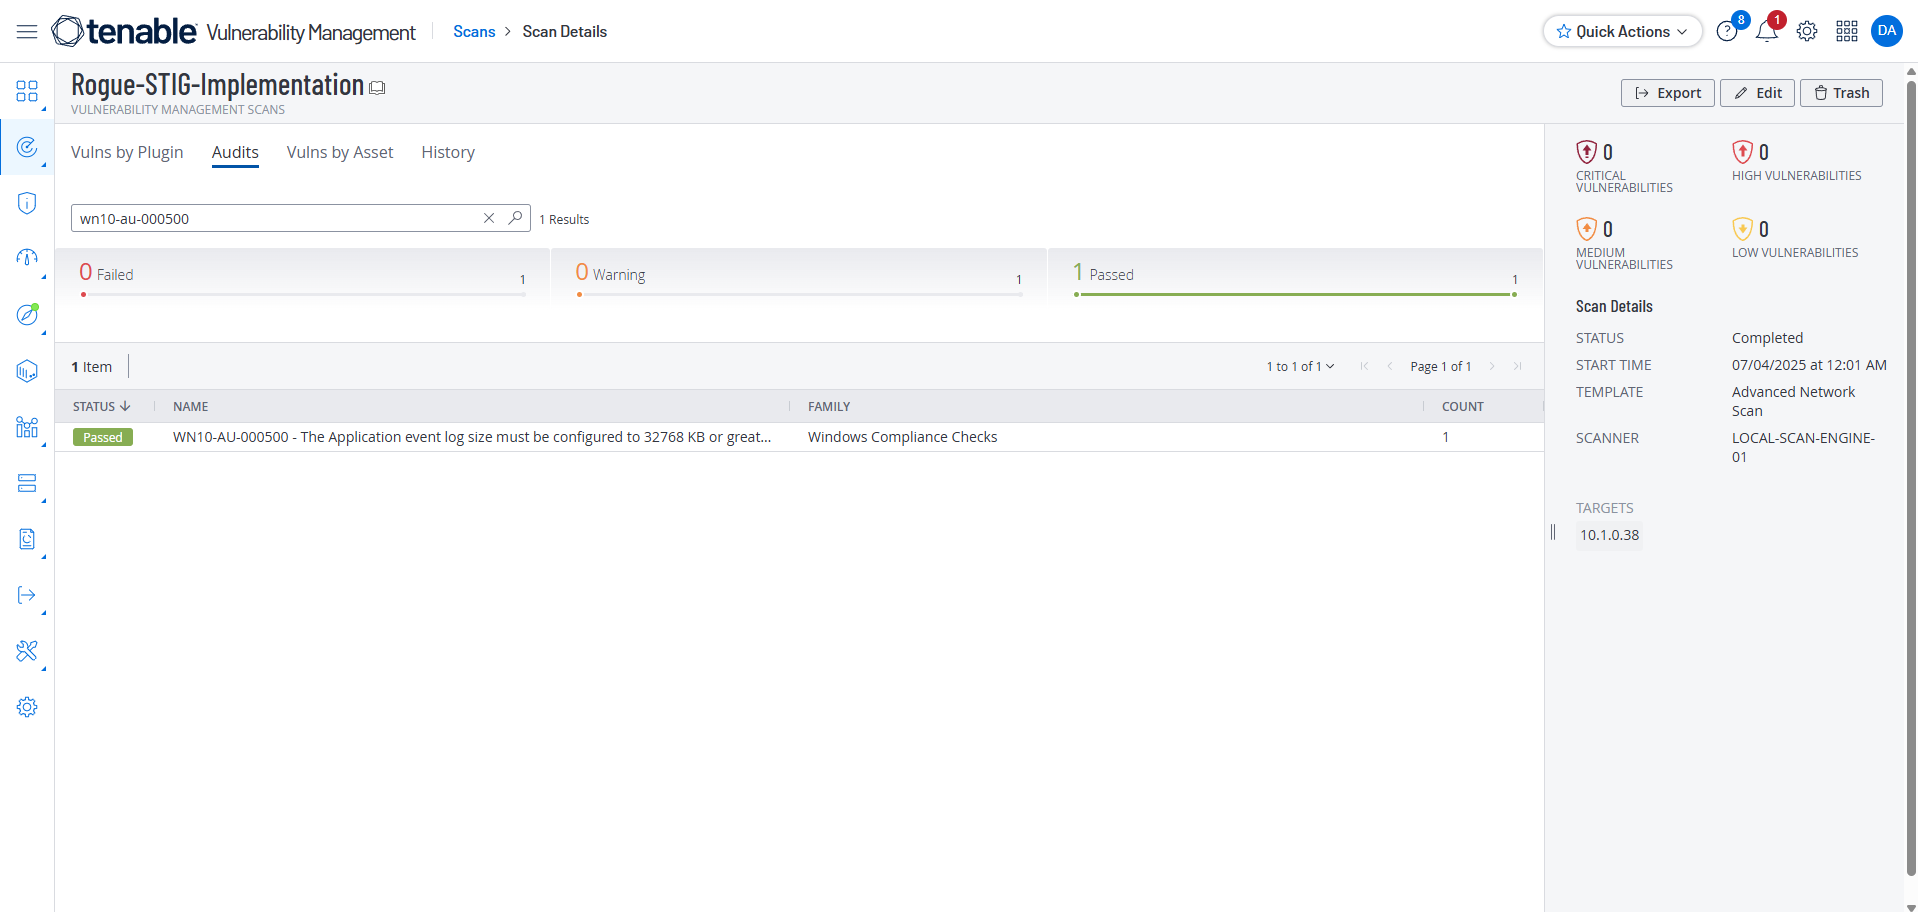
Scanning Again After Running the PowerShell Script
After our scan is complete, we see the wn10-au-000500 STIG has been fixed again, except this time it was fixed with our PowerShell script.

Conclusion
STIGs support the hardening of systems and maintain federal compliance standards. Vulnerability scanners like Tenable can be used to automate the discovery of STIGs and confirm their remediation. STIGs can be remediated manually, but the best method for remediating STIGs at scale is by utilizing an automated method, such as PowerShell scripting.